How to Setup SSO?
How to Setup Azure AD SSO
Step 1. Create SAML Application in Azure
- Login to Azure portal
- Select Enterprise Applications and Create a New Application
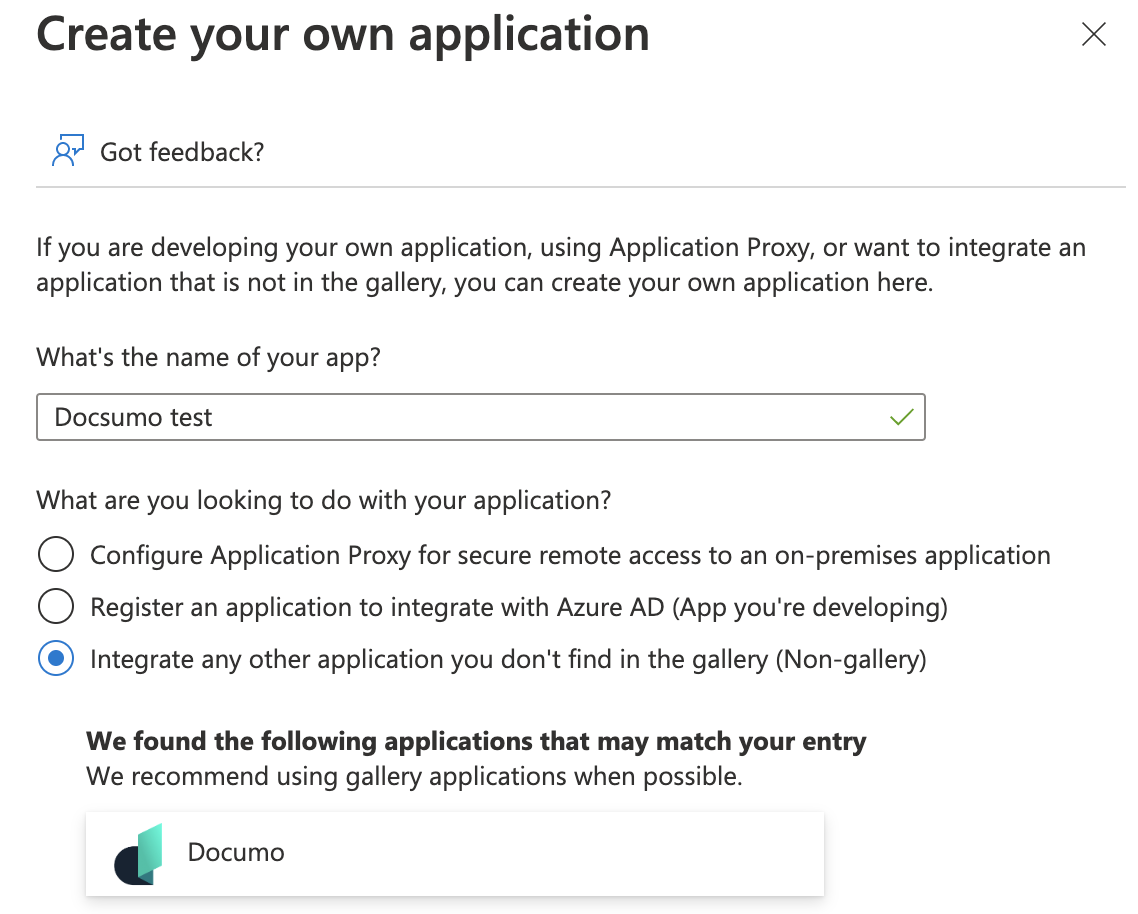
- Enter application name (eg: Docsumo) and select “Integrate any other application you don’t find in the gallery (Non-gallery)” to create the app.
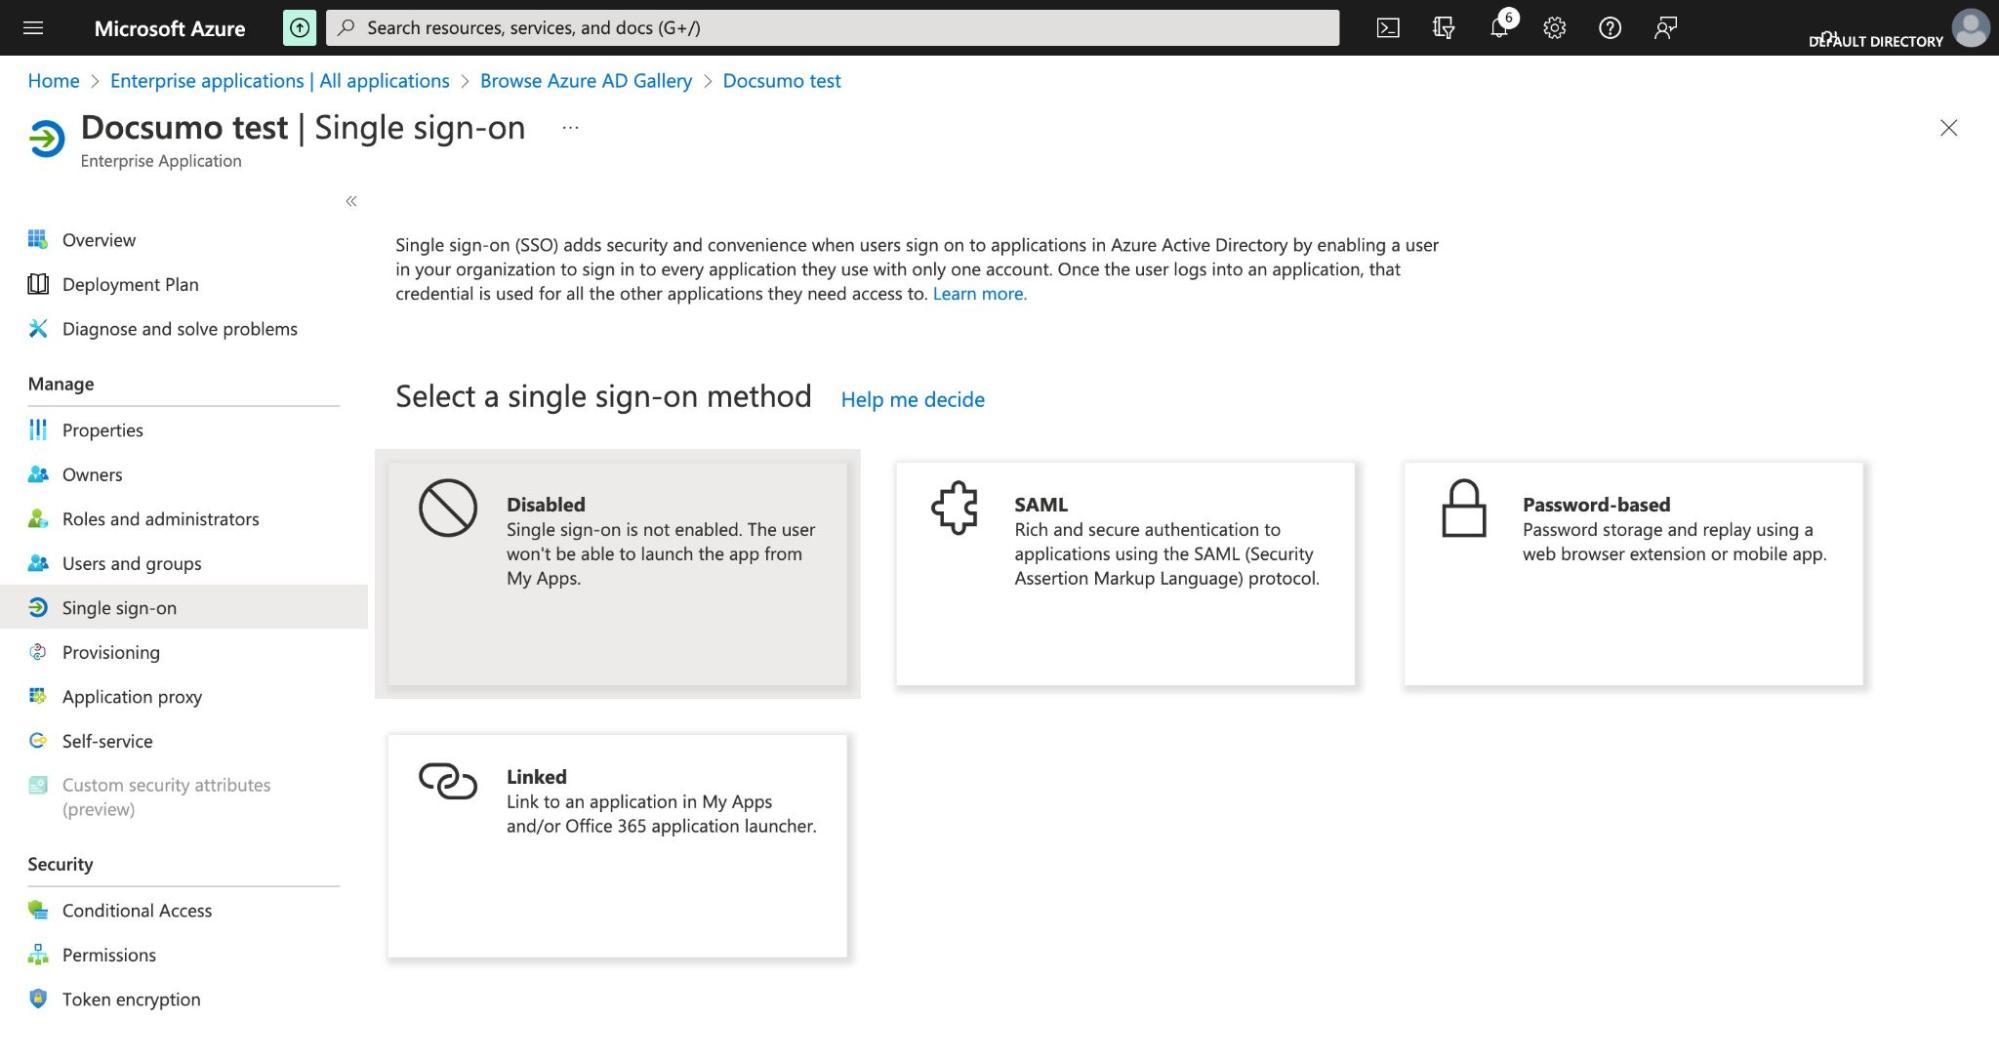
- Under the application, Select Single Sign-on
- Select SAML as the single sign on method
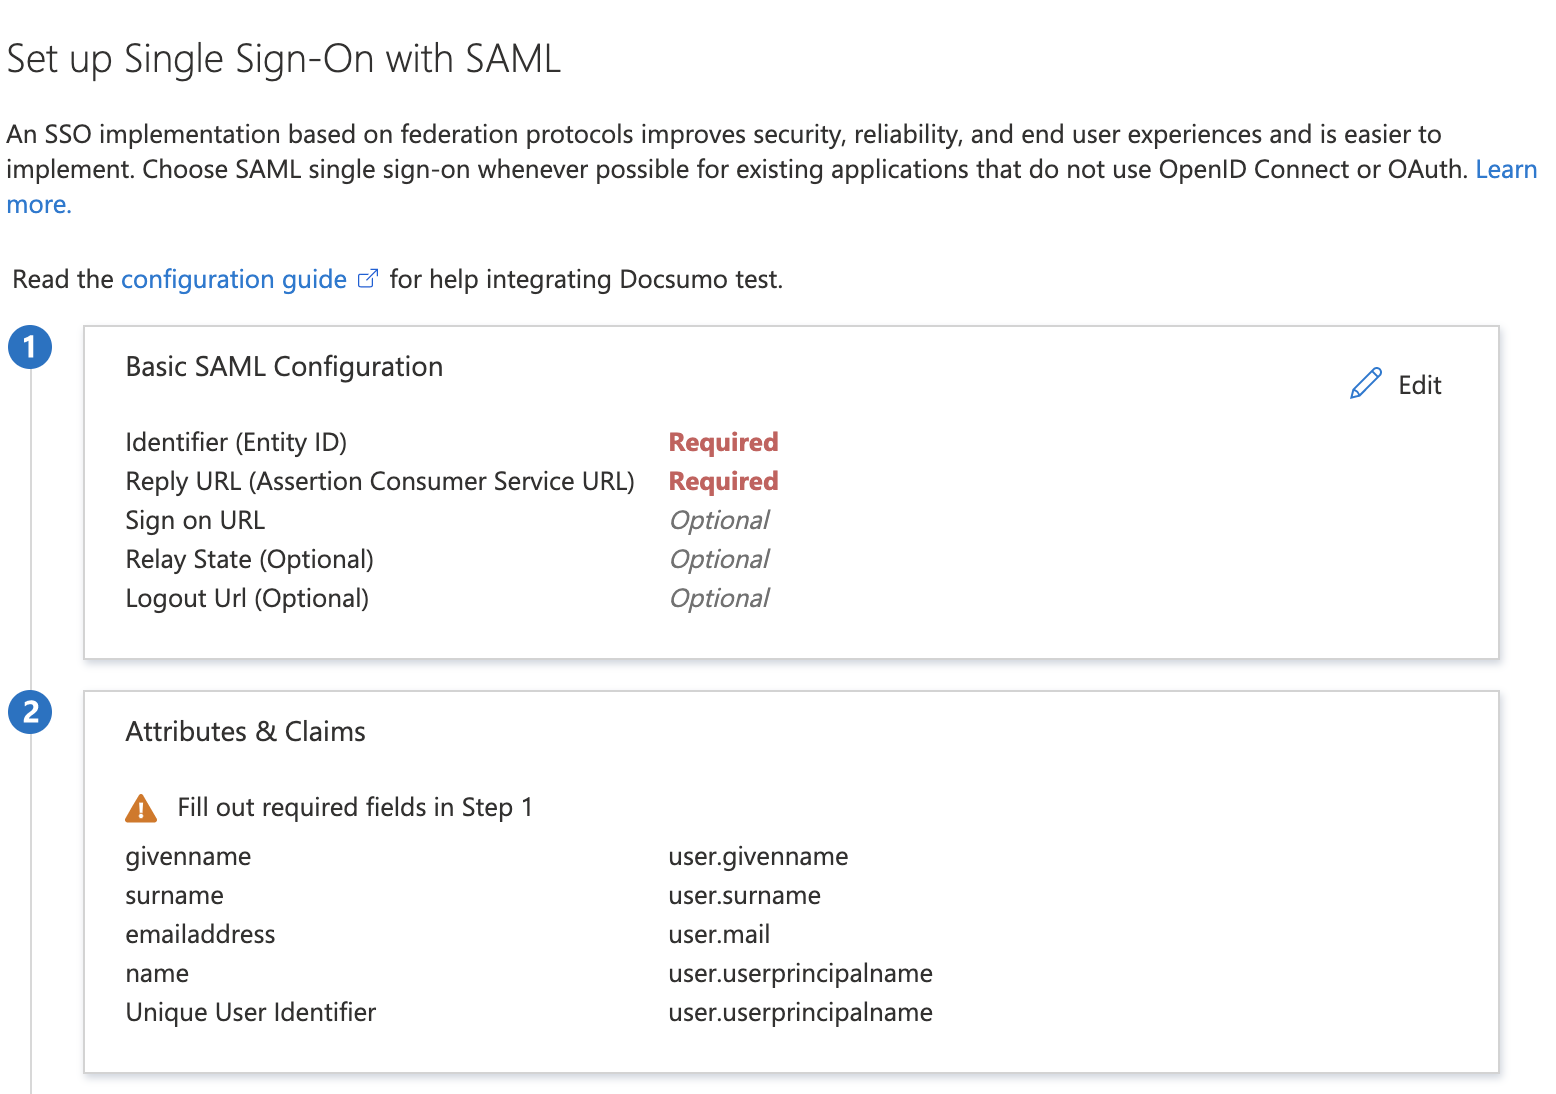
- Under Basic SAML Configuration, enter the Entity ID and Reply URL from Docsumo settings page
- Assign User Permissions:
- Azure user needs to be assigned necessary permissions to the application created in Azure (here Docsumo test).
- To assign User permission, follow the below steps:
- Open the Azure Portal and sign in as a Global Administrator or Co-admin.
- Navigate to Enterprise Applications >> Your Docsumo set up name ( Here "Docsumo test") >> User and Groups >> Add User.
- Select the user who needs to be given permission and click on Assign.
Step 2. Enter SAML Application Details in Docsumo
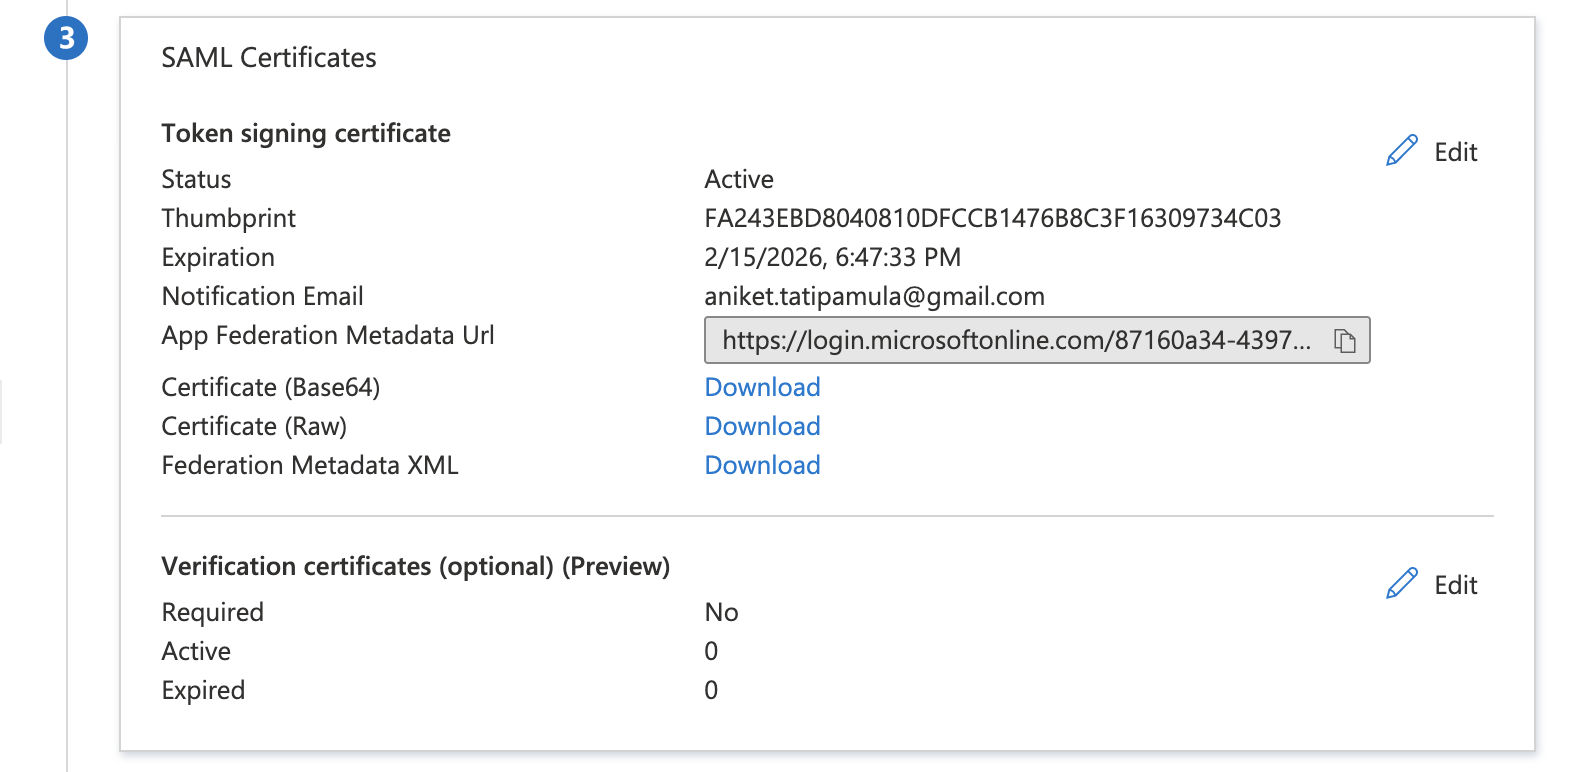
- Download the SAML Certificate (Base64) and paste it inside SSO settings
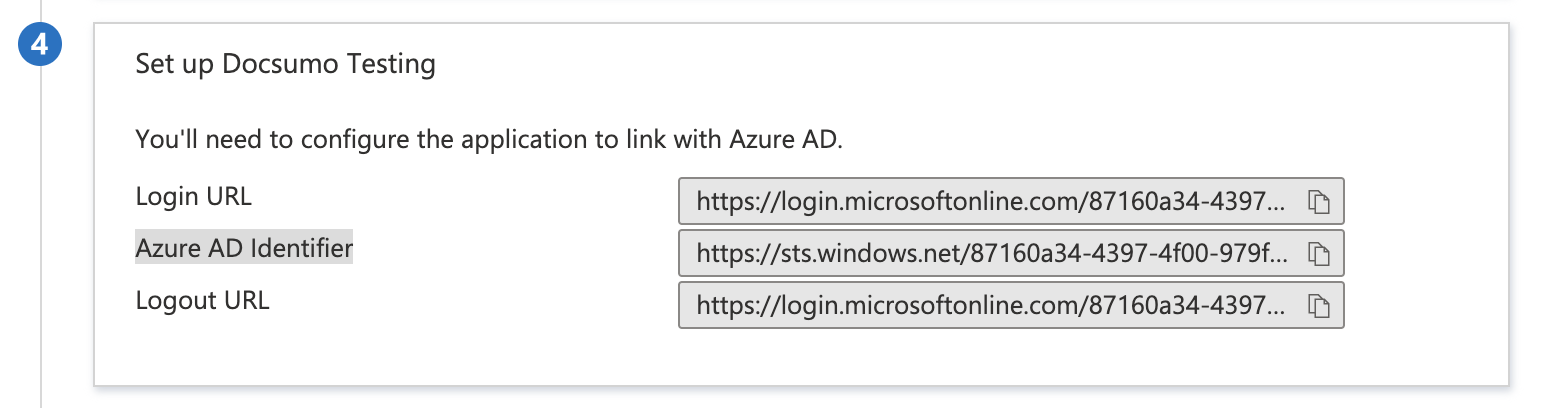
- Copy the Login URL and Azure AD Identifier and paste it inside SSO settings
- Click Test on Docsumo settings page to test the setup
- Log into Azure AD to complete the testing.
- Once testing is successful, SSO can be enabled
Attribute Mapping (Optional):
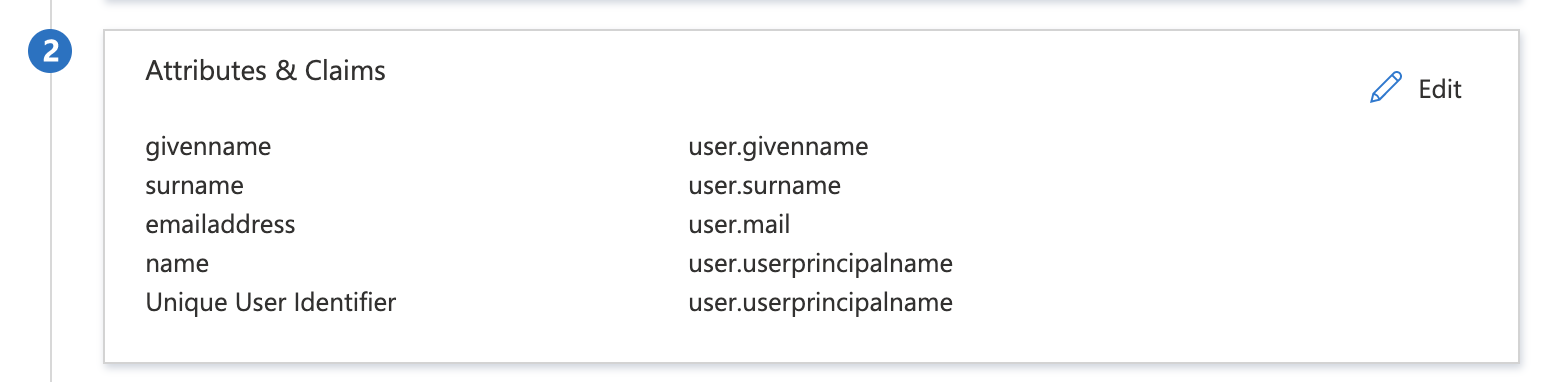
While setting up the SAML SSO details, you can map the attributes of the users with the fields so that post successful authentication, the application can receive all the user details.
- The Azure AD user accounts MUST be configured with the same email address as the one used in the Docsumo application in order to be successfully authenticated.* Eg: If the user signs up in Docsumo with [email protected], then the same email and domain needs to be configured for the user in Azure AD.* Failing to configure the custom domain, Azure AD will use the default “@onmicrosoft.com” domain which cannot be used for authentication inside the Docsumo application due to email mismatch.
How to Setup Okta SSO
Step 1. Setup Okta
- Create an account in Okta
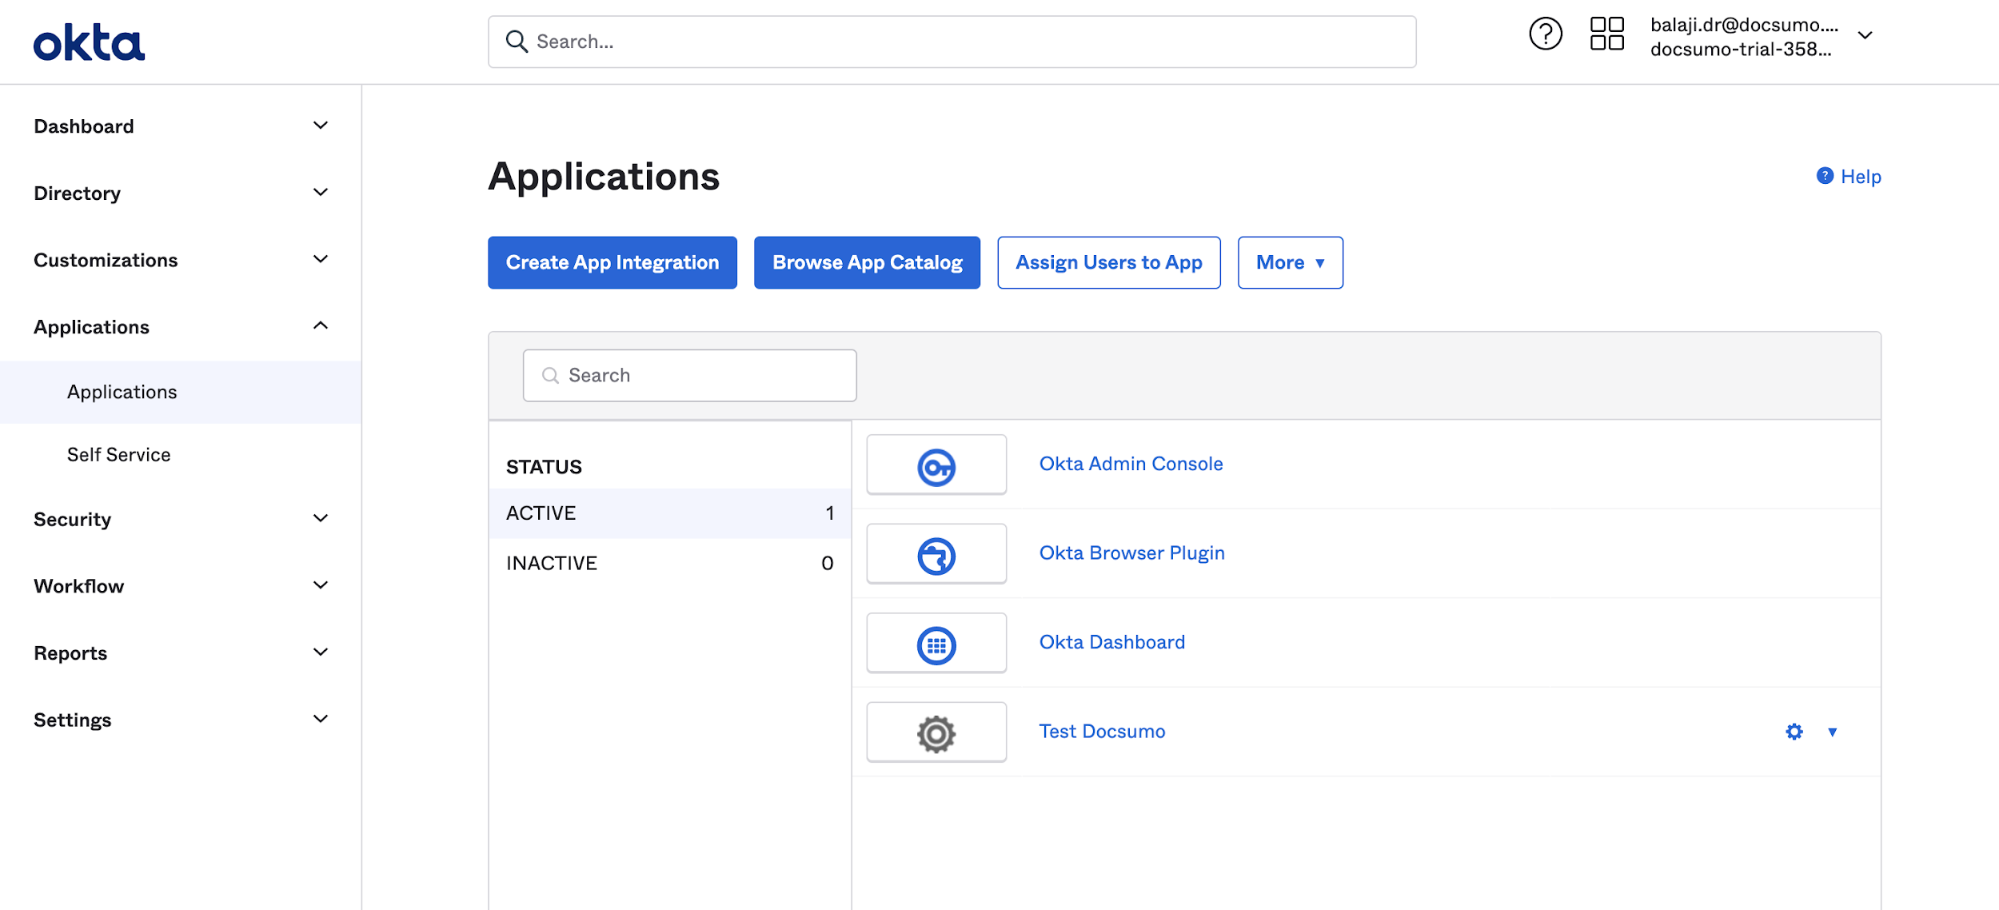
- Go to the admin panelCreate App Integration from the Applications menu
- Select SAML 2.0
- Enter the basic application details under the General Settings tab and click Next
- Under Configure SAML tab, enter the following details
- Copy the value from SP Entity Id from Docsumo and paste it into the Audience URI (SP Entity ID) of Okta
- Copy the value from SP Single Sign on URL from Docsumo and paste it into the Single sign-on URL of Okta
- Click Next
- Select “I'm a software vendor. I'd like to integrate my app with Okta” and click Finish
- Under Applications, Select the newly created application
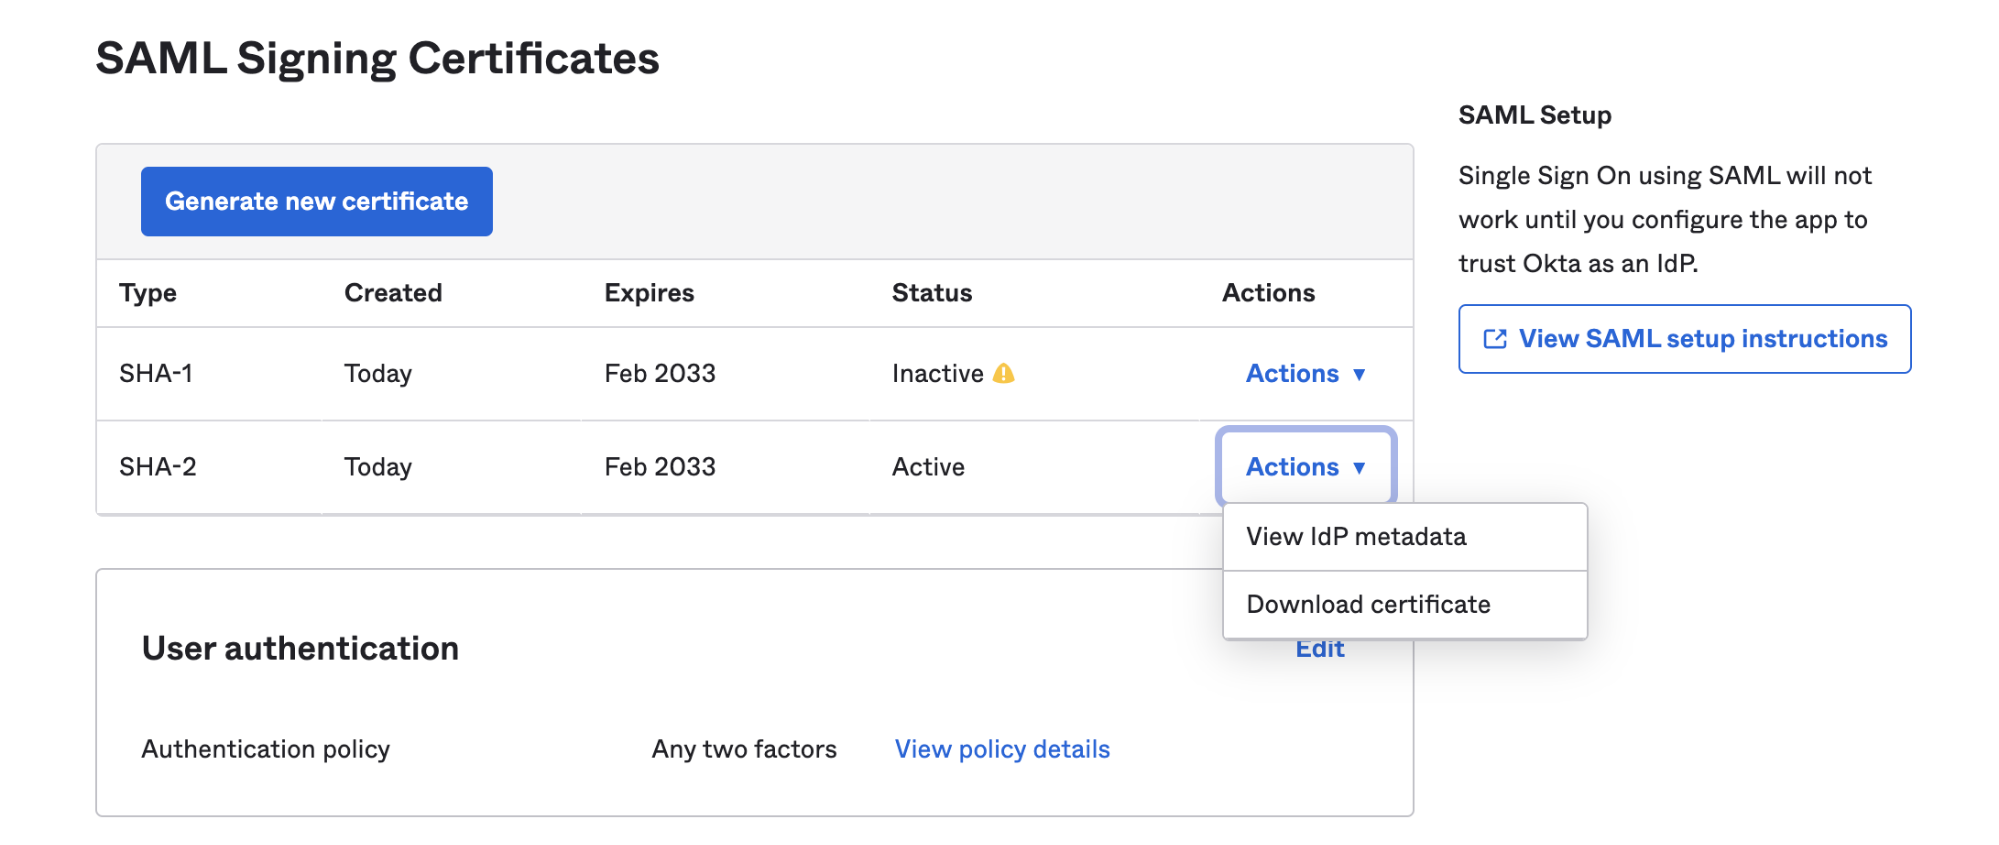
- Under SAML Signing Certificates in the Sign On tab, Click View SAML setup instructions next to the SAML Signing Certificates tab
- Assigning Users to the newly created Okta Application.
- From the Admin Panel, go to Applications >> [Your Created Application].
- Under the Assignments tab, click "Assign". Choose:
- Assign people for individual assignments.
- Assign to groups for group assignment.
- Choose and add the users/groups to the application.
- Click "Done" to complete the assignment.
- These users will now be able to use Okta for Single Sign-on into Docsumo.
Step 2. Setup Docsumo
- Copy the following details from the Okta setup page and paste them into Docsumo testing
- Copy the Identity Provider Single Sign-On URL and paste it in Idp Login URL
- Copy Identity Provider Issuer and paste it into the Issuer URI field
- Copy X.509 Certificate and paste it in Idp Public certificate field

- Click Test on Docsumo settings page to test the setup
- Log into Okta to complete the testing.
- Once testing is successful, SSO can be enabled
Updated 8 months ago
Did this page help you?