Upload Document to Docsumo Using Zapier
In this guide, we'll understand the comprehensive steps to create a Zap that is triggered each time you upload a file to a specific folder in your Google Drive and it is uploaded to one of your Docsumo document types.
Zapier is a popular automation tool that allows users to connect various applications and automate workflows. By integrating Docsumo with Zapier, users can automate document processing and streamline data extraction tasks.
Prerequisites
Before you begin the integration process, ensure that you have the following:
Zapier Account: Sign up for a Zapier account at https://zapier.com/
Docsumo API Key: Get the API Key for your Docsumo account from the integration settings - https://app.docsumo.com/settings/integration/
Integration Steps
Follow the steps below to setup automation for uploading documents to Docsumo from Google Drive using Zapier:
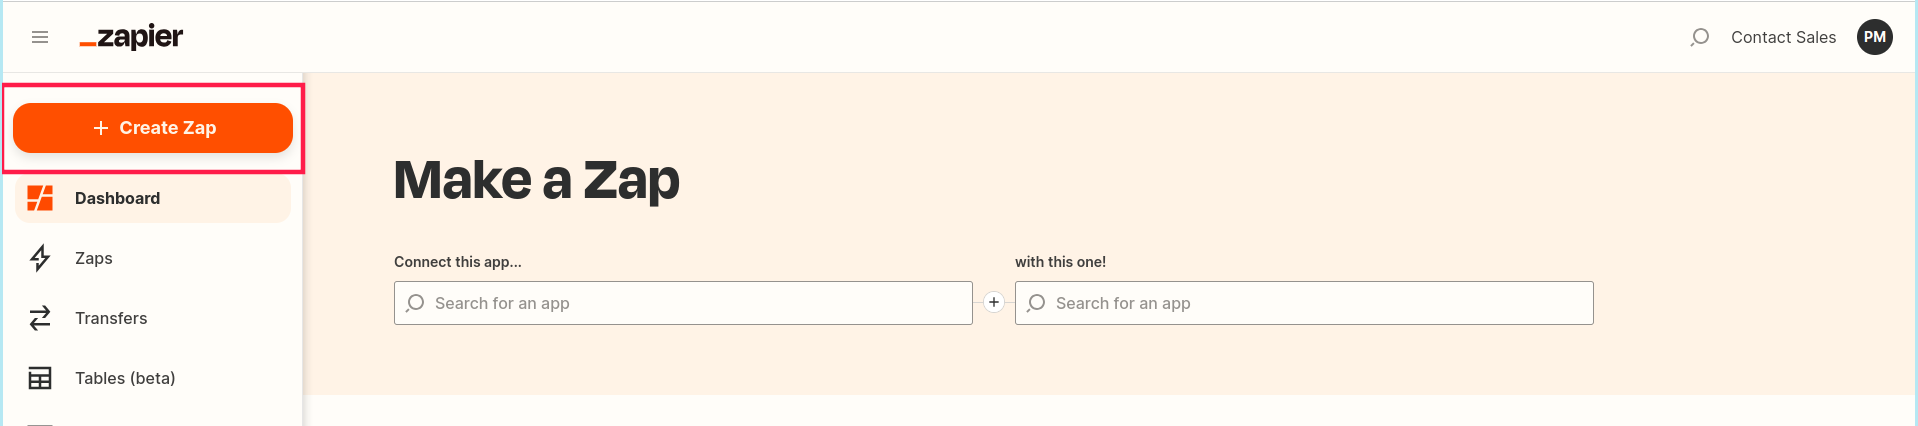
Step 1: Create a new Zap
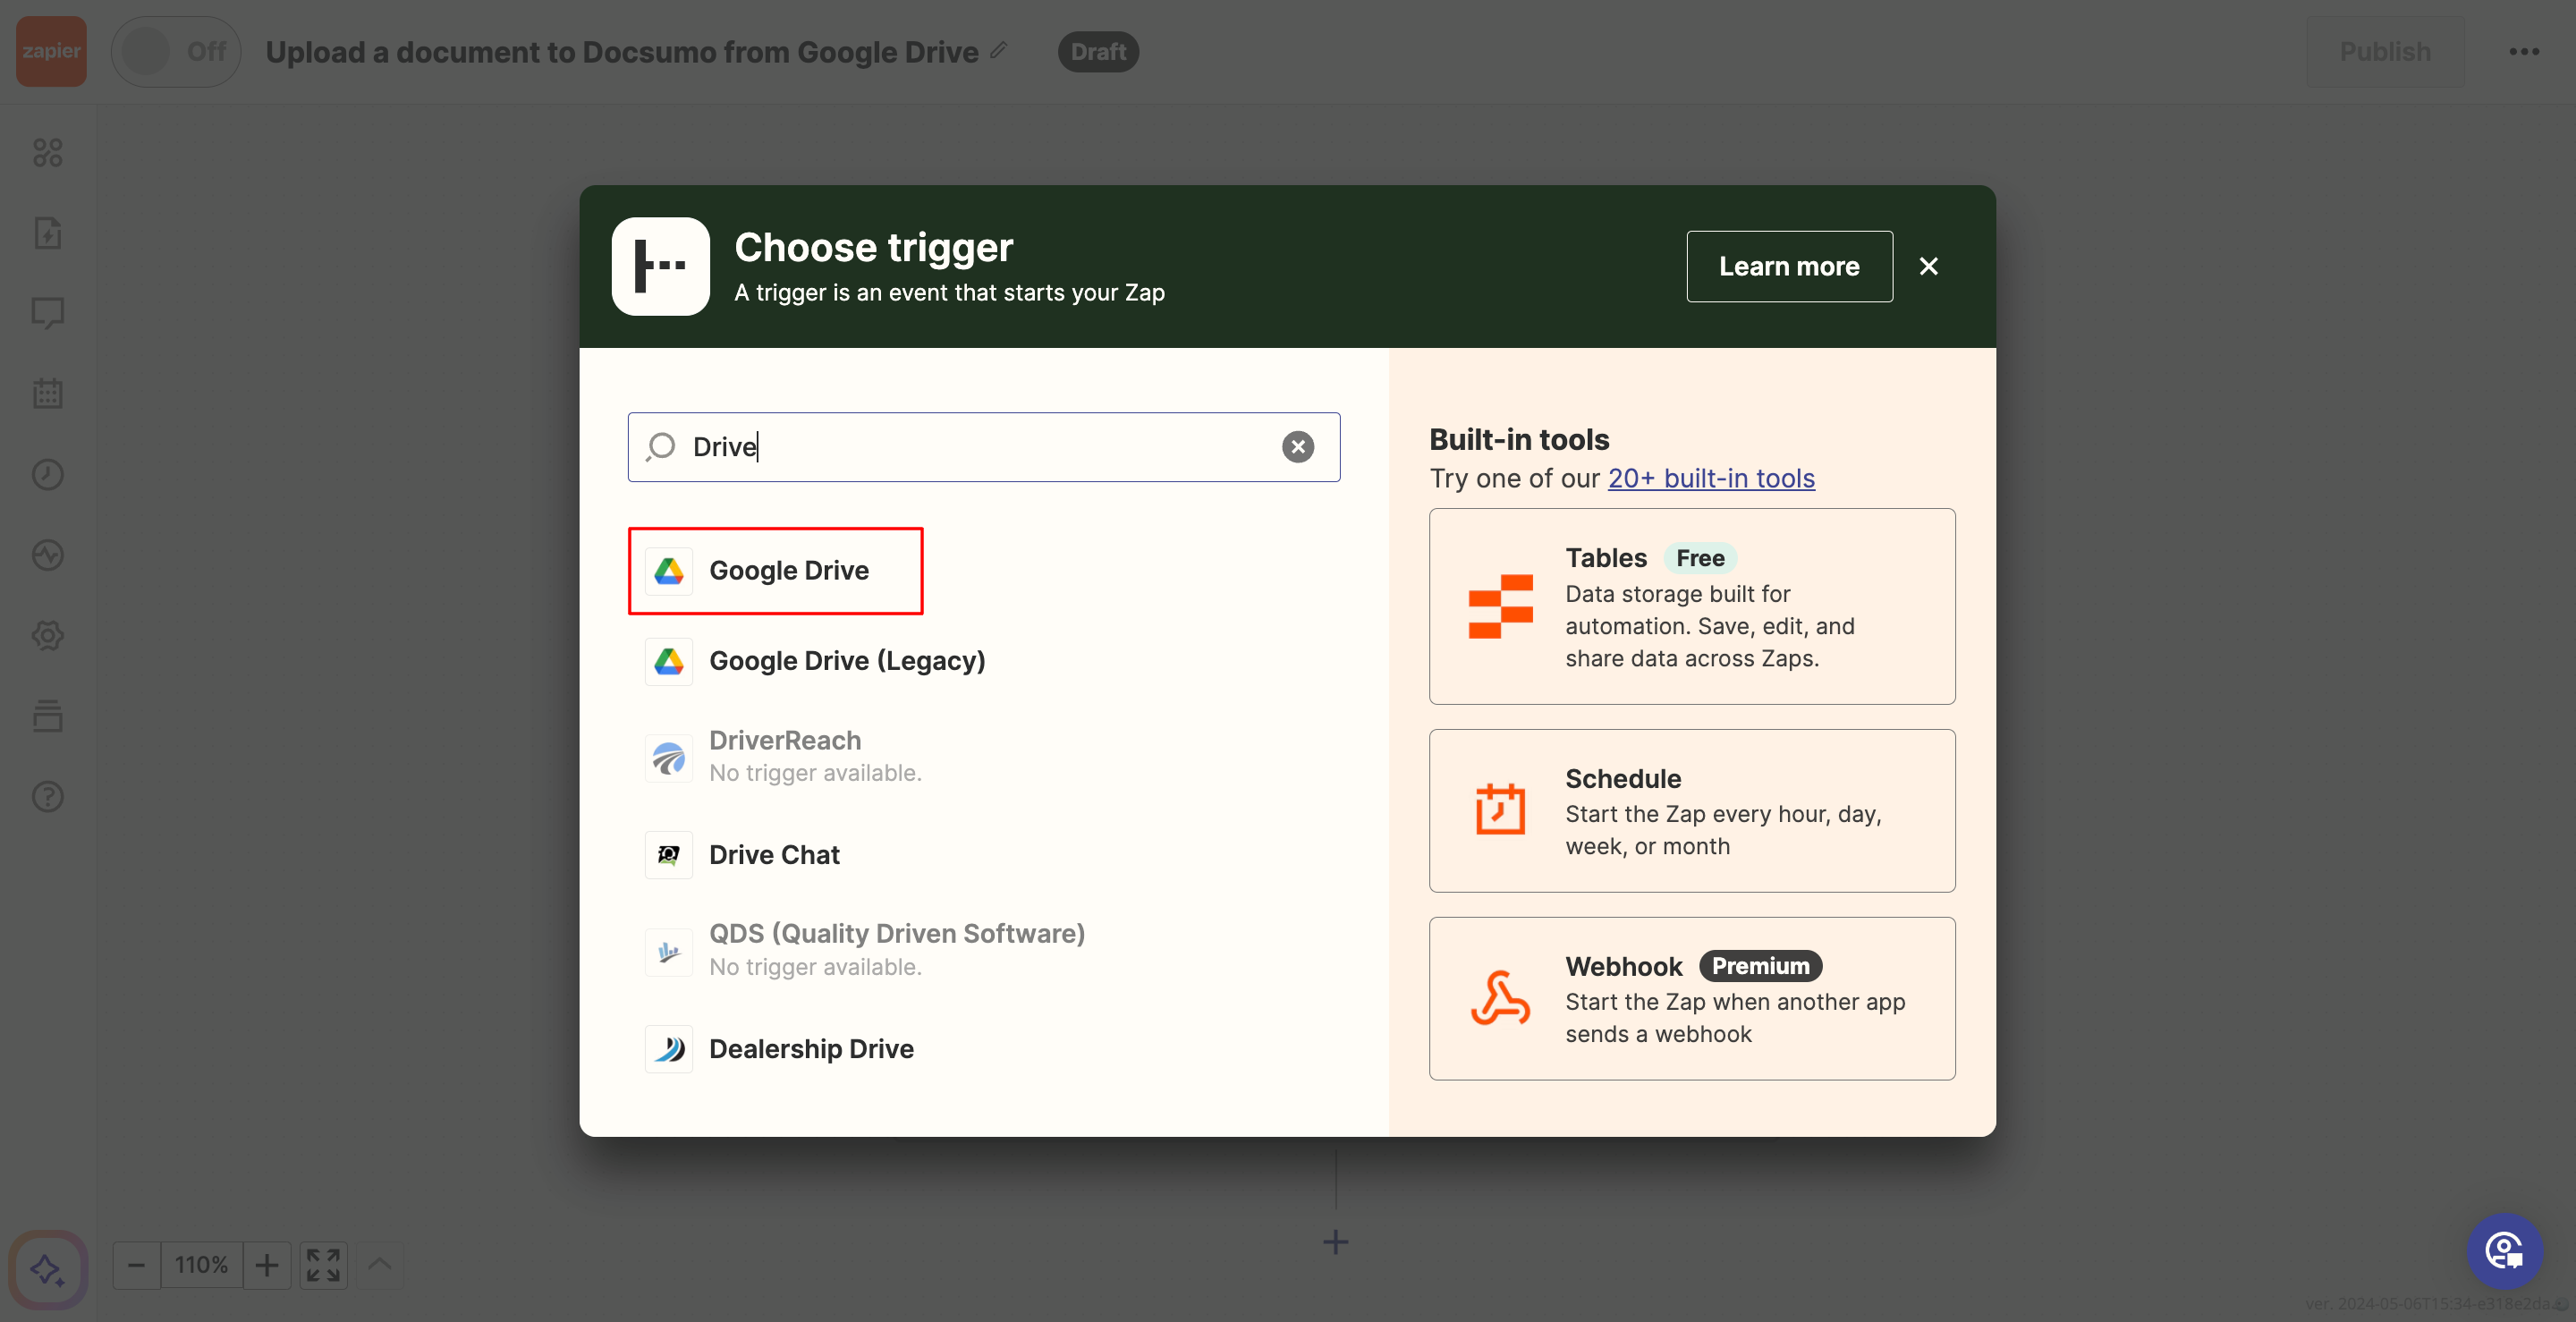
Login to Zapier account and click on create a Zap. Since "Upload a Document" from Google Drive is an action, we need to set up our trigger first. Search for Google Drive that should provide the trigger and select it.
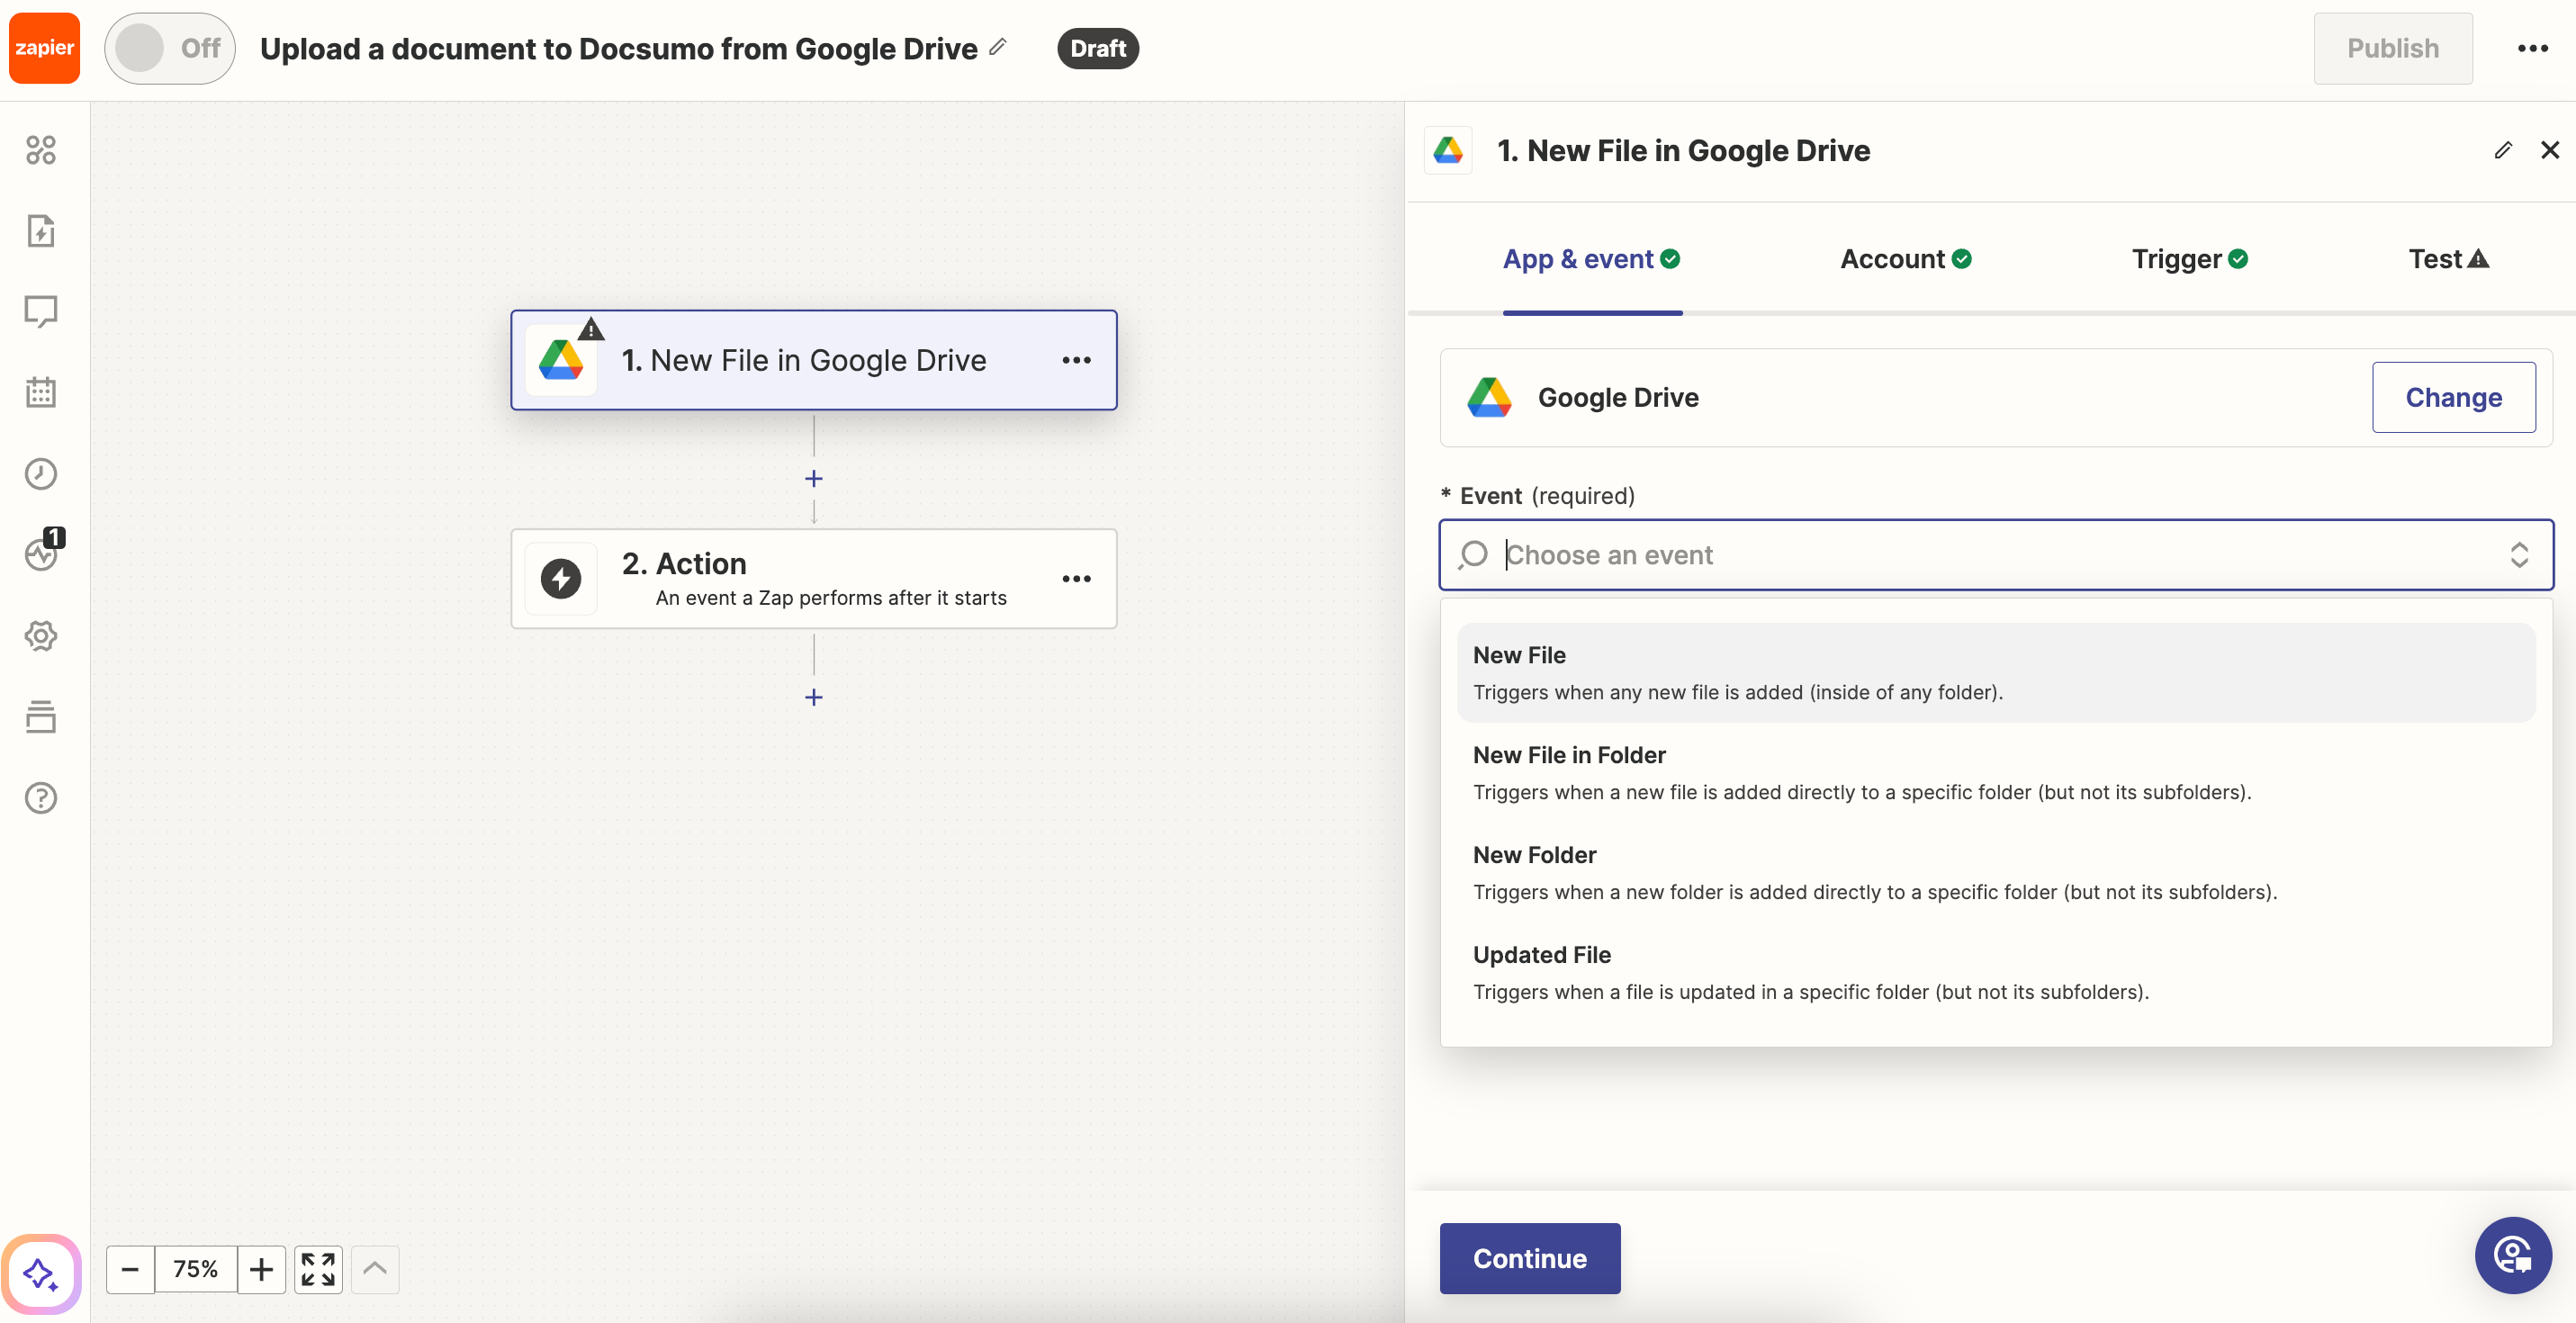
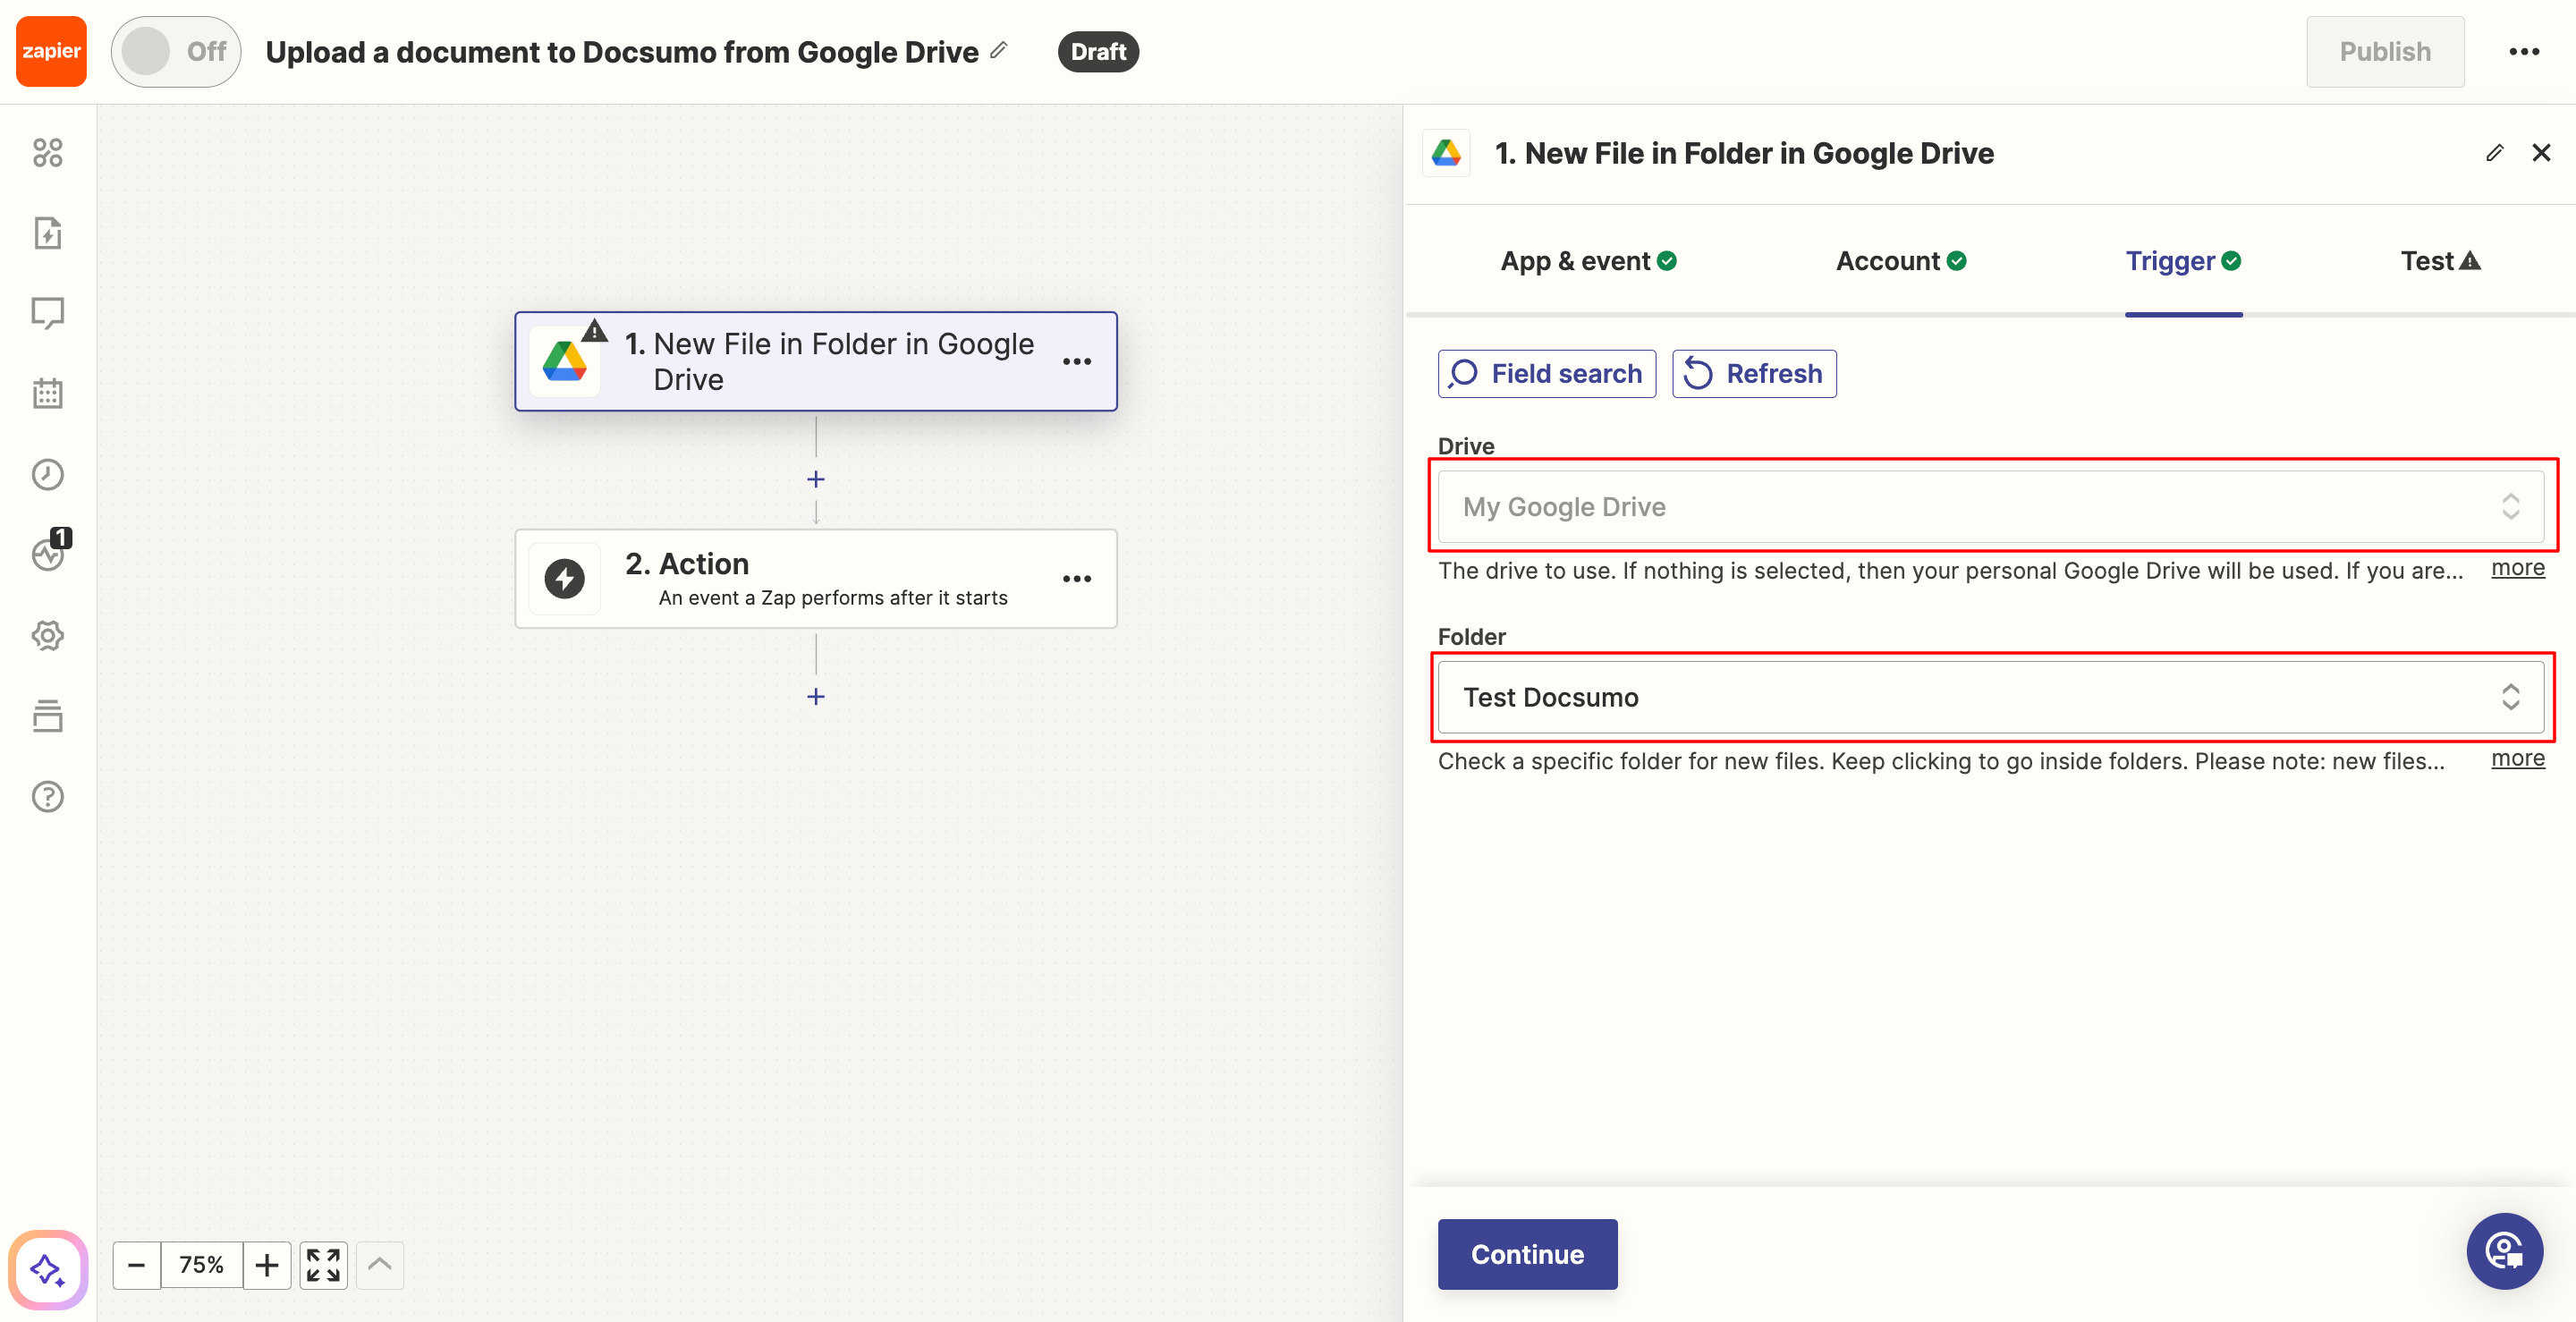
Step 2: Set up a Trigger
Select a Trigger Event, "New File in Folder". Each app has a different set of Triggers and the set up is a little different for each of them. But the overall workflow is the same.
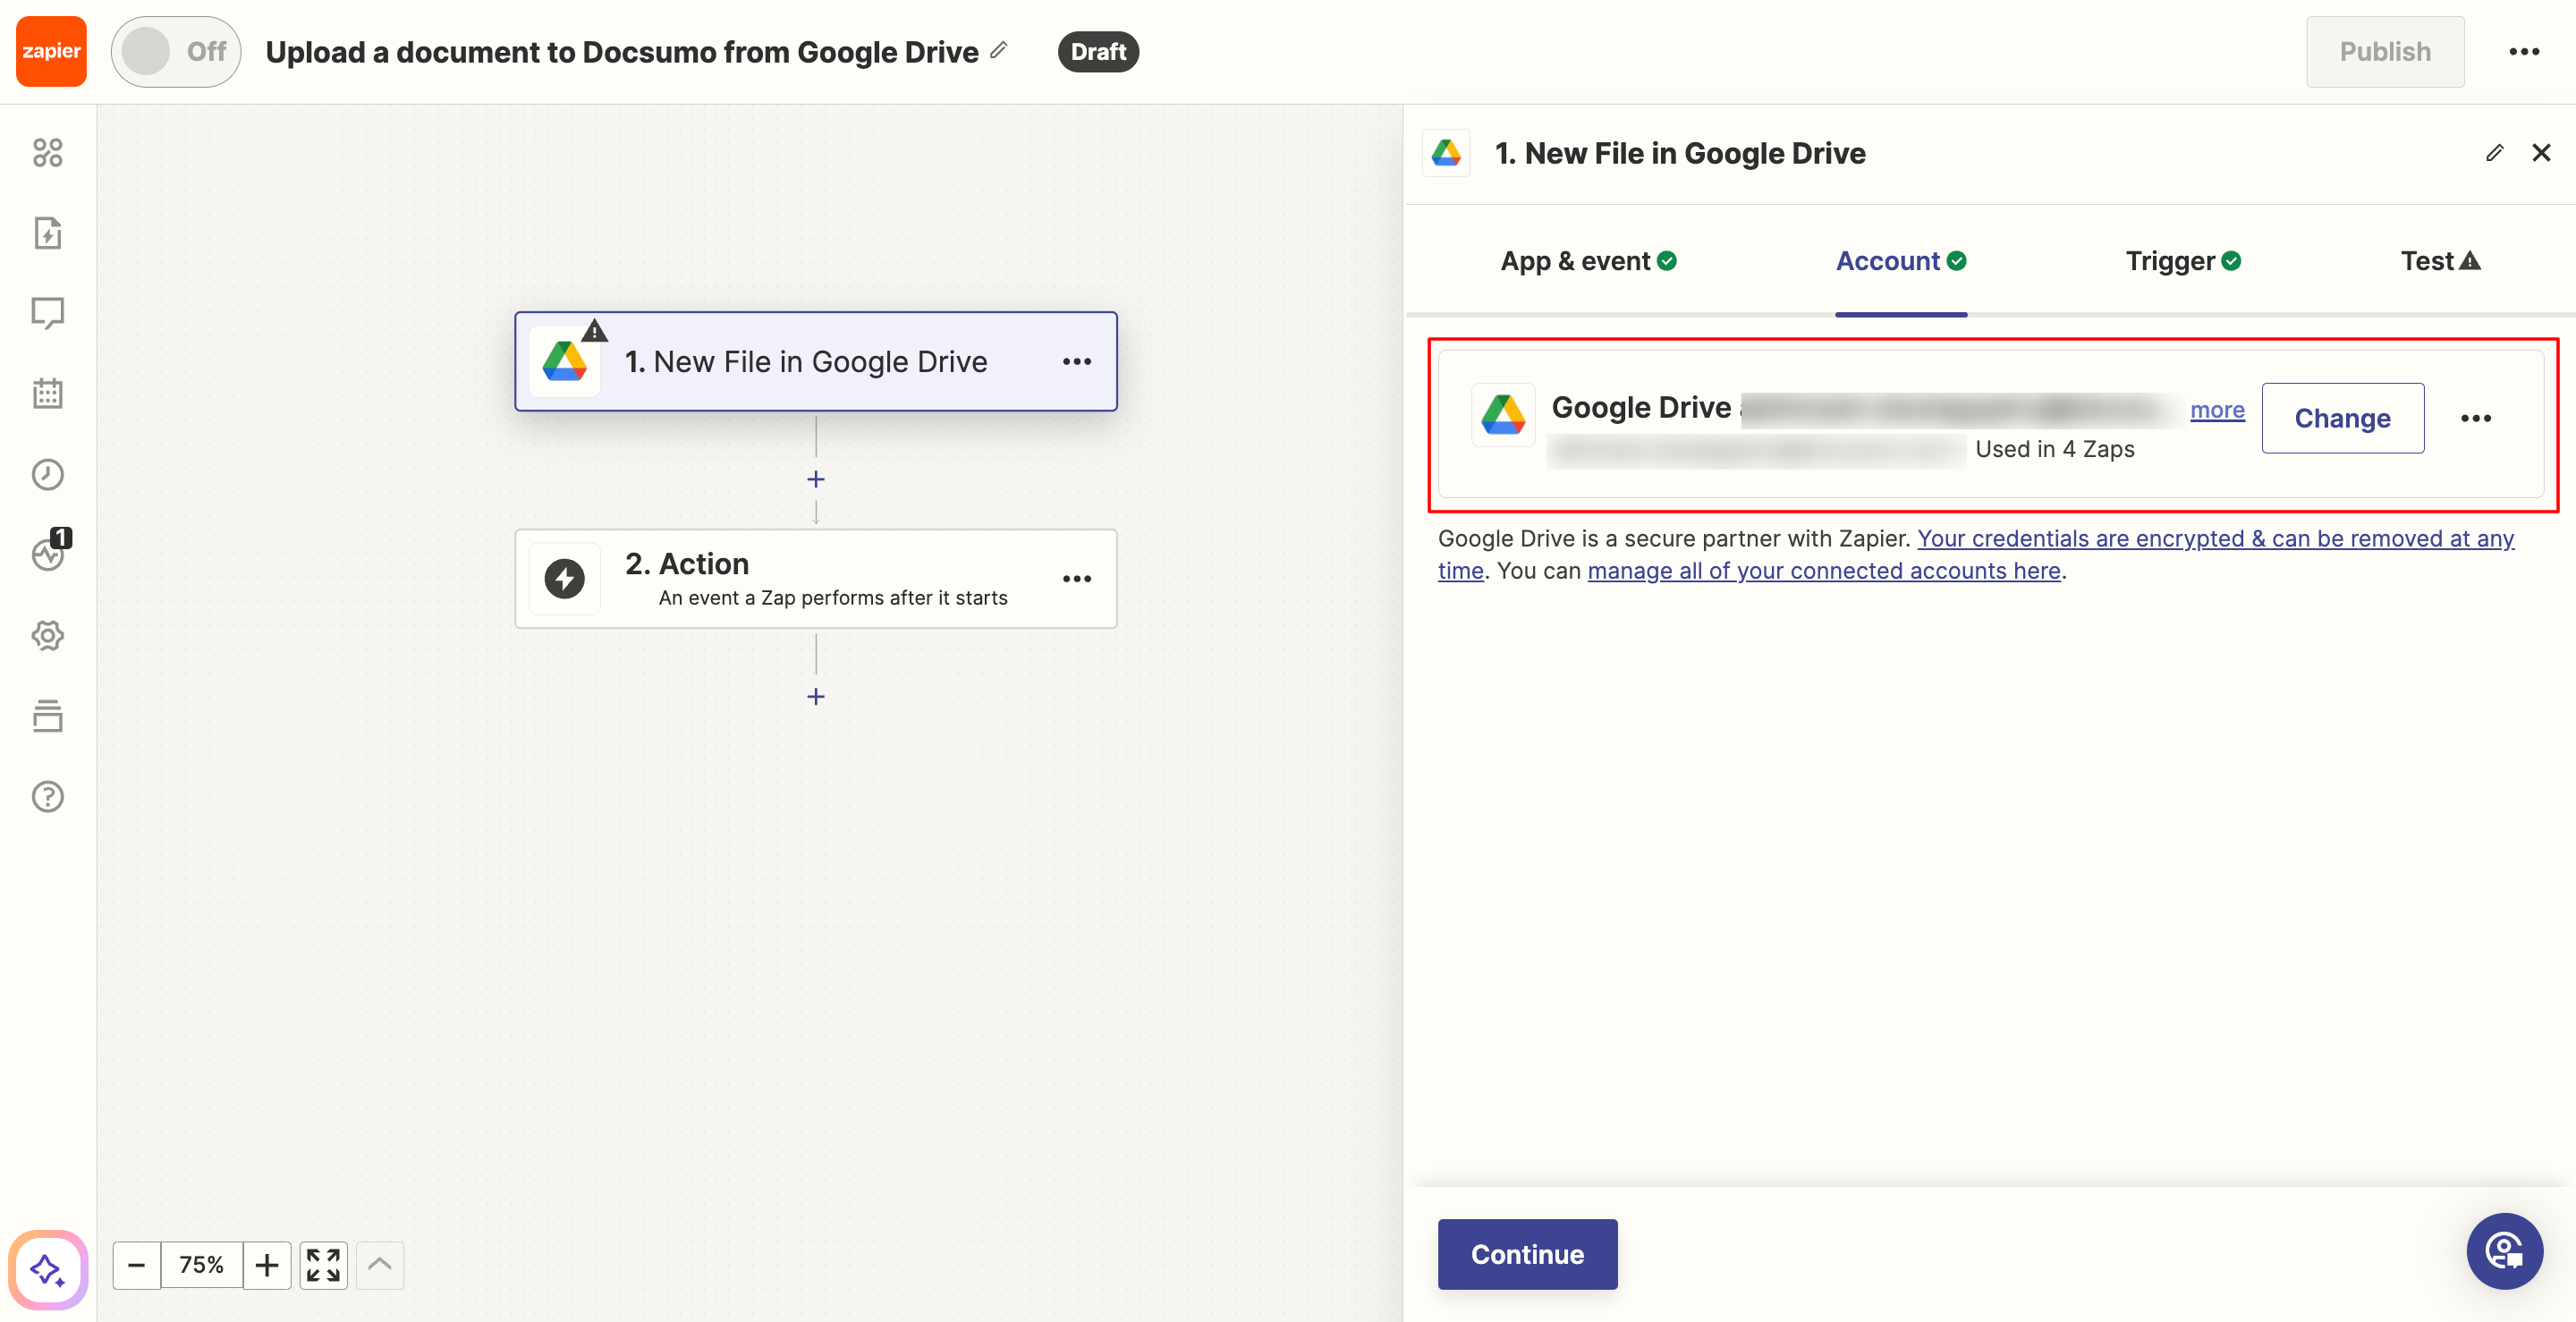
The next step usually requires you to sign in to the app. Sign in to connect your Google account.
In the next setup section for this trigger, specify the drive and the folder that should register new uploads.
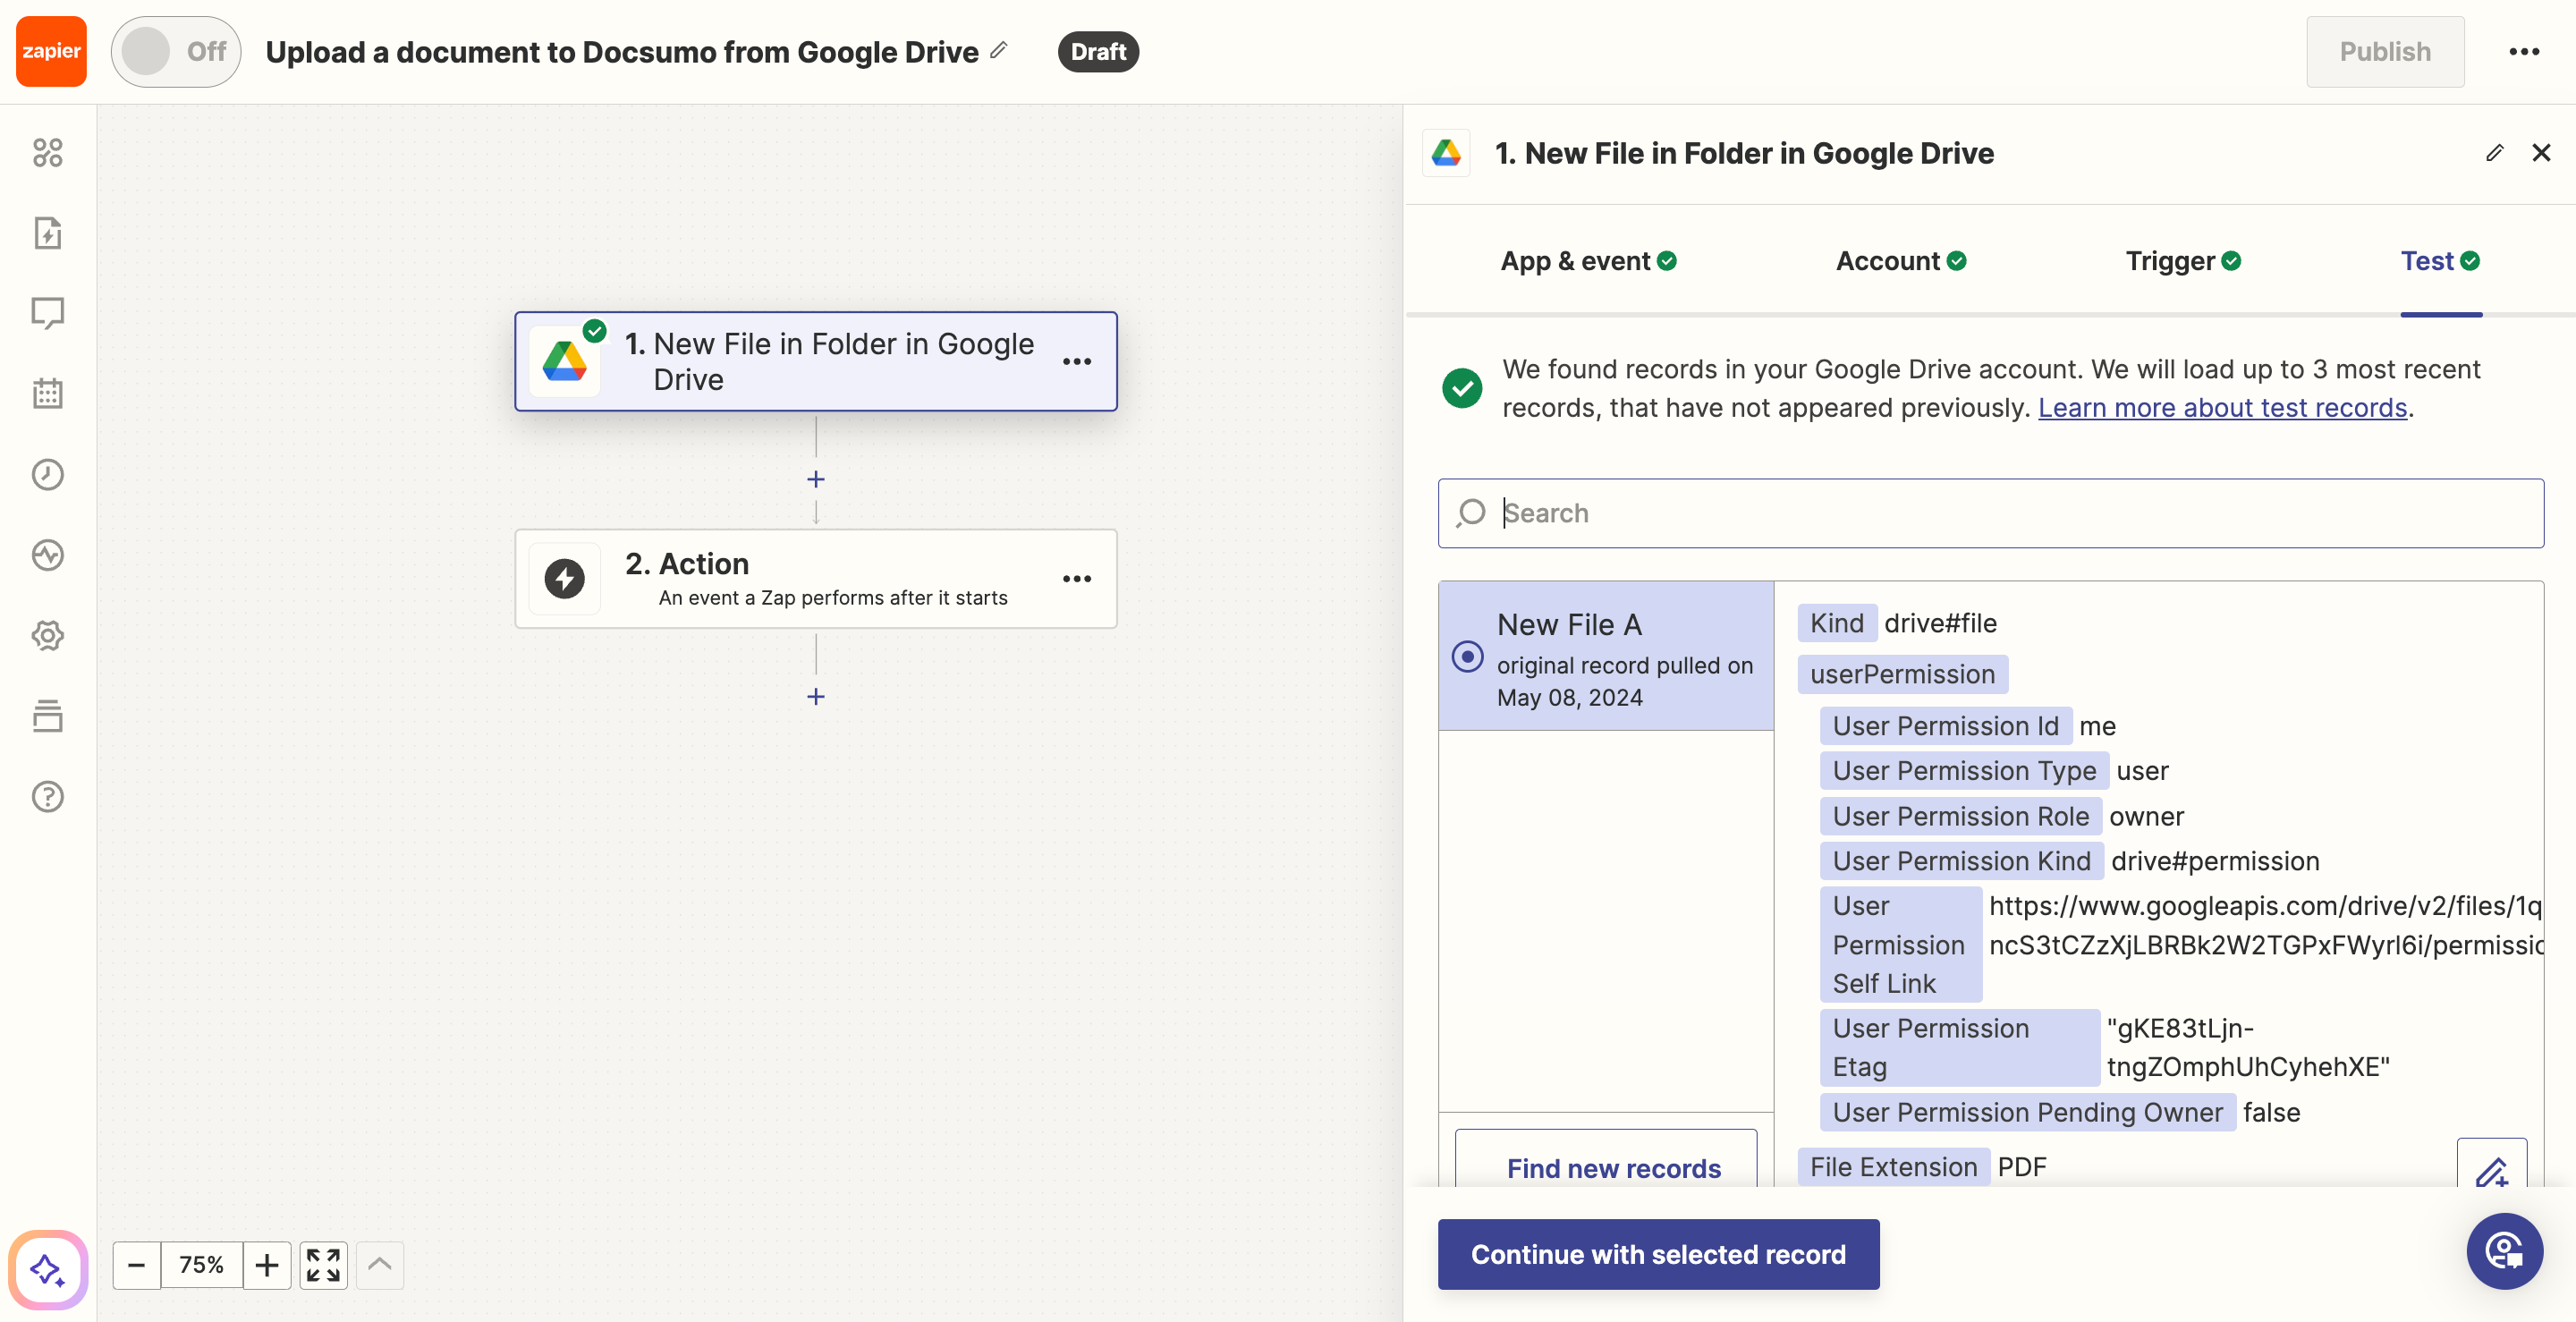
Step 3: Test the trigger
The final section of any setup (both for triggers and action) is testing. This step checks if the trigger was configured properly and conducts a test run, which will generate output data. The output of this step is important, as it will dictate what data will be shown during the configuration of our next Zap step.
Select New File A, which is an Invoice (PDF) stored in the drive.
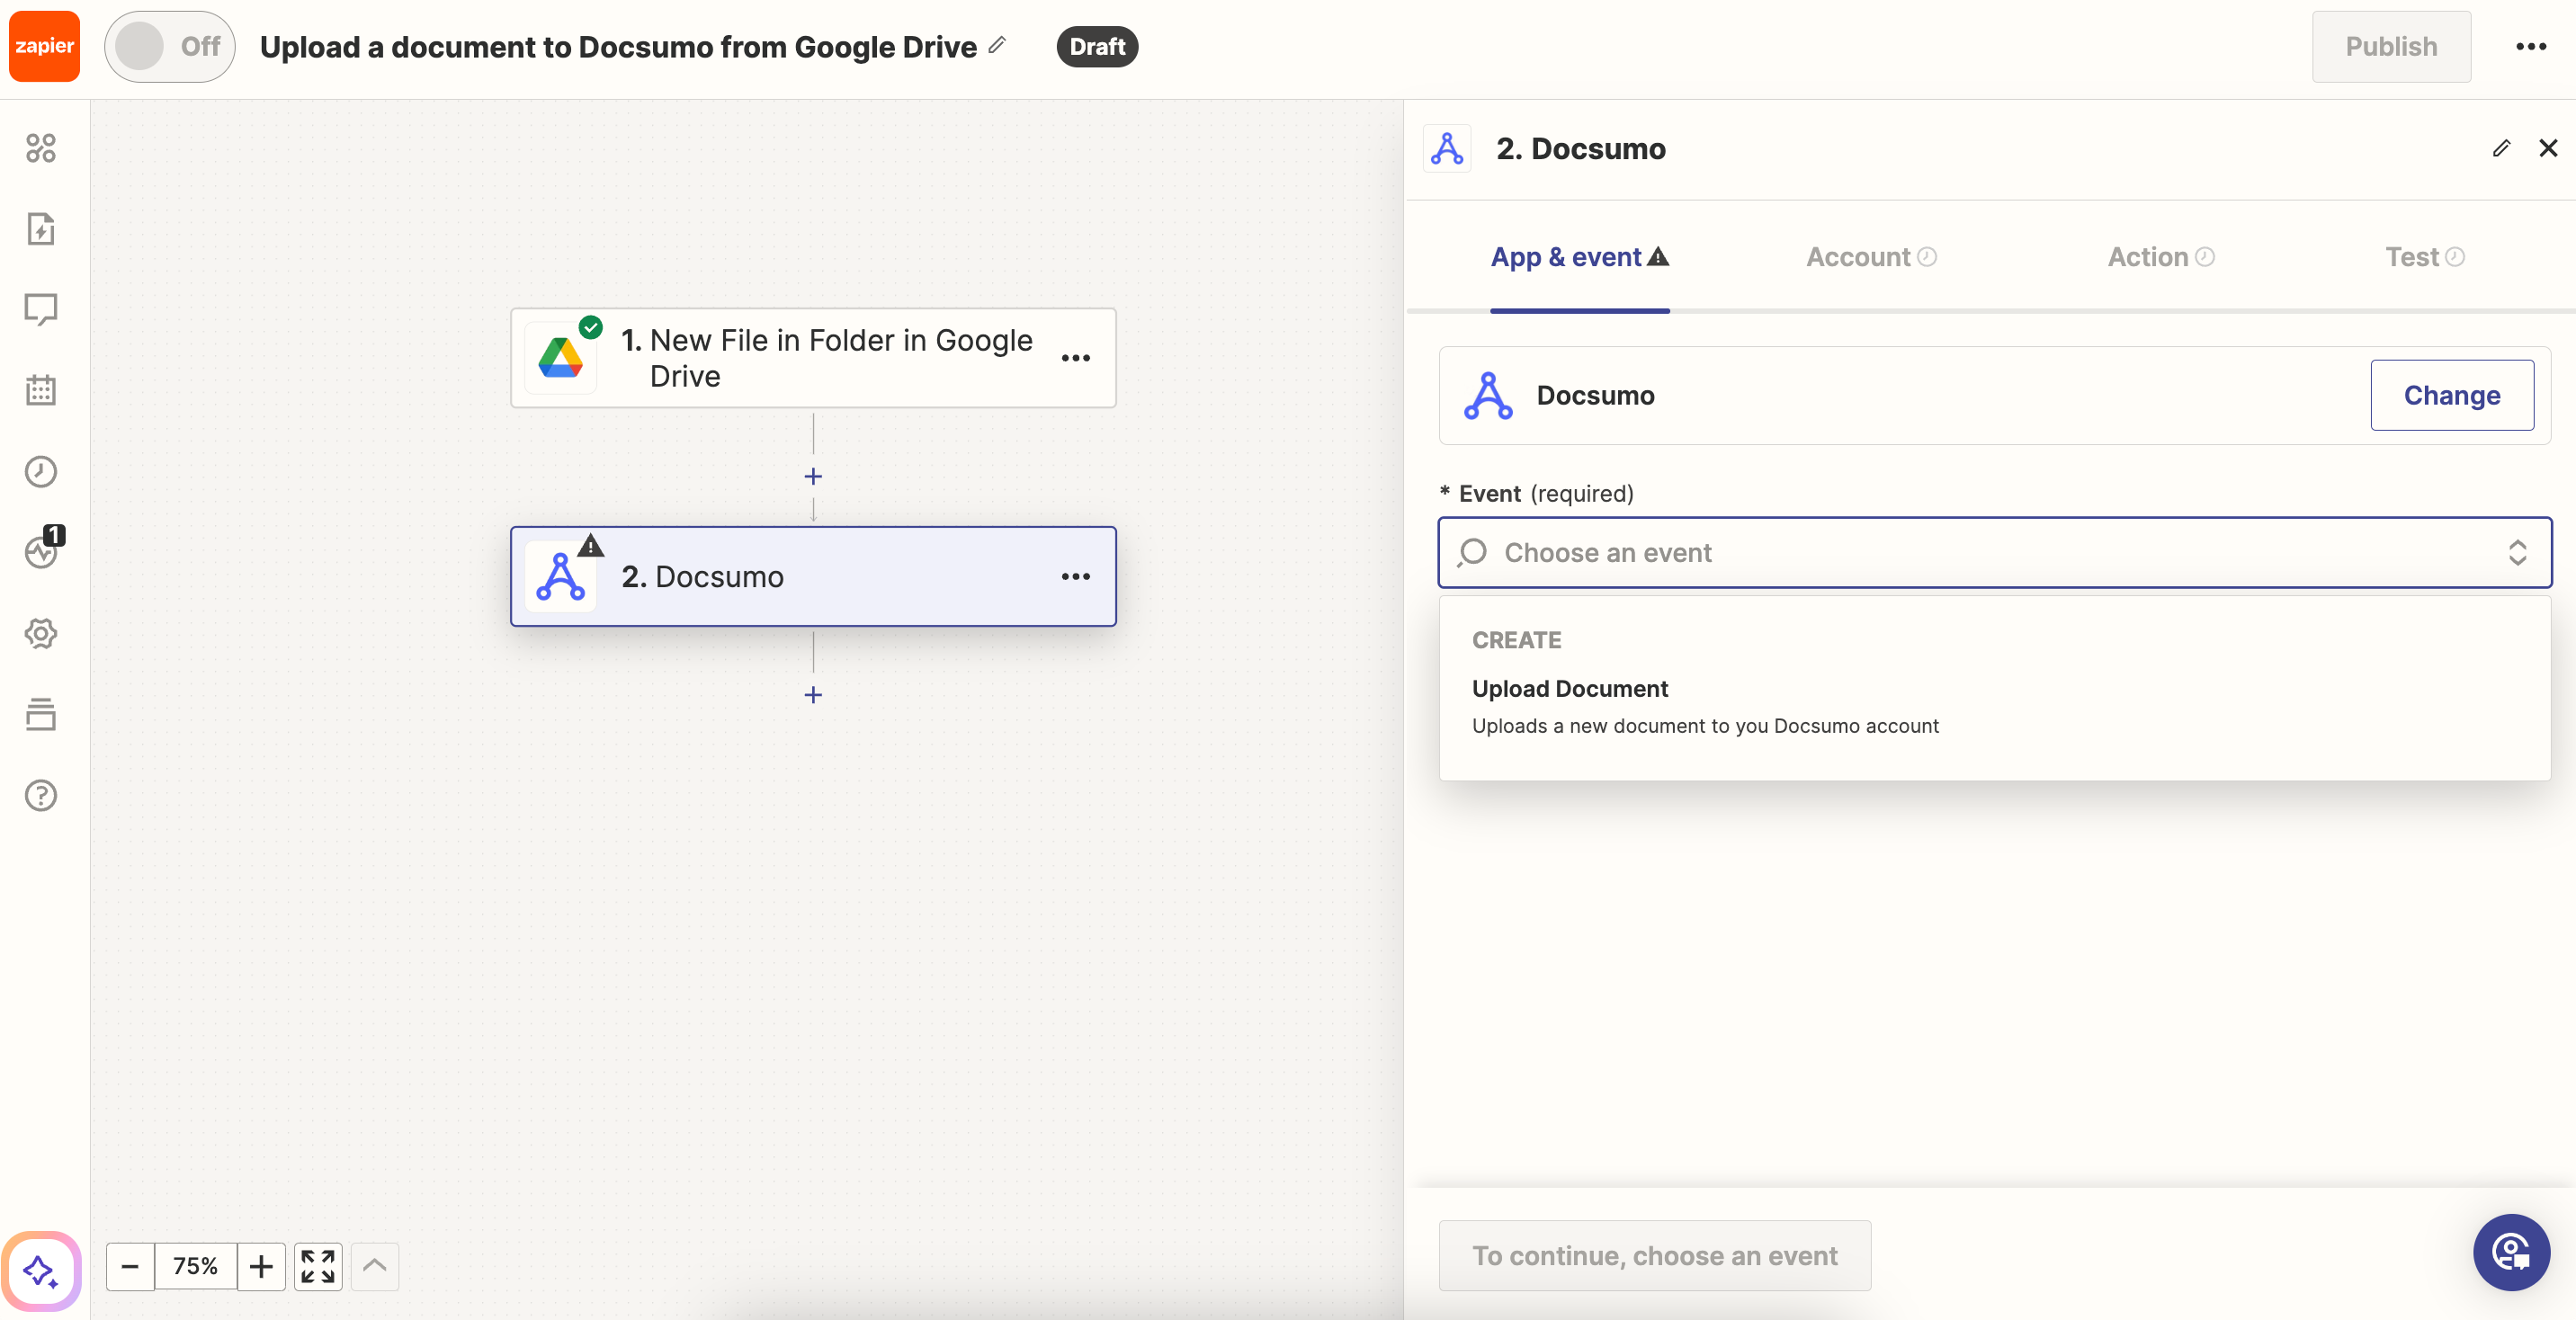
Step 4: Set up the Docsumo "Upload Document" action
In the next Zap step, select Docsumo and the "Upload Document" action.
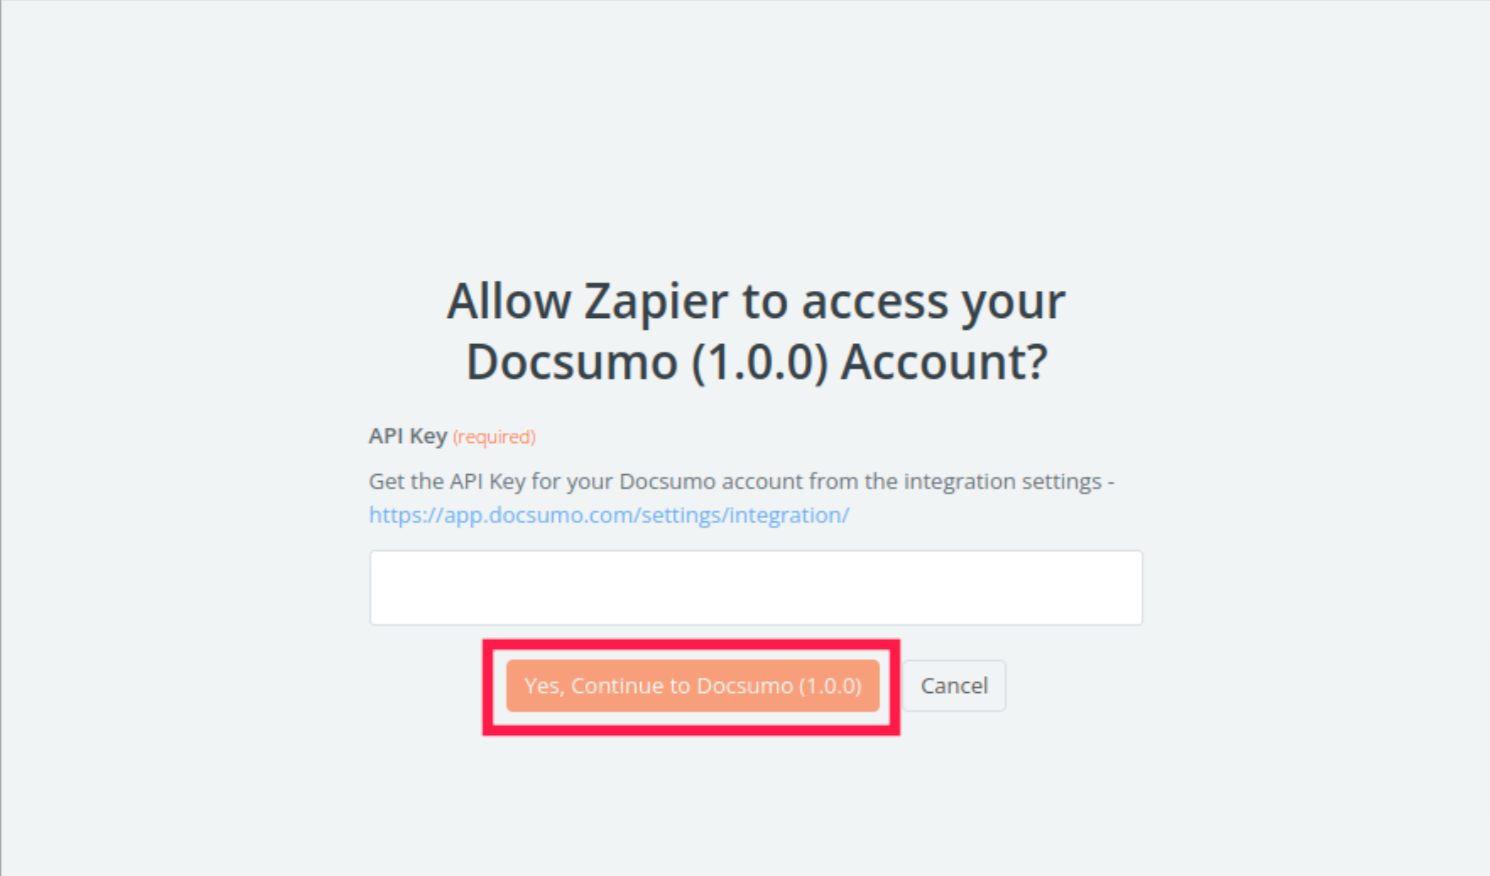
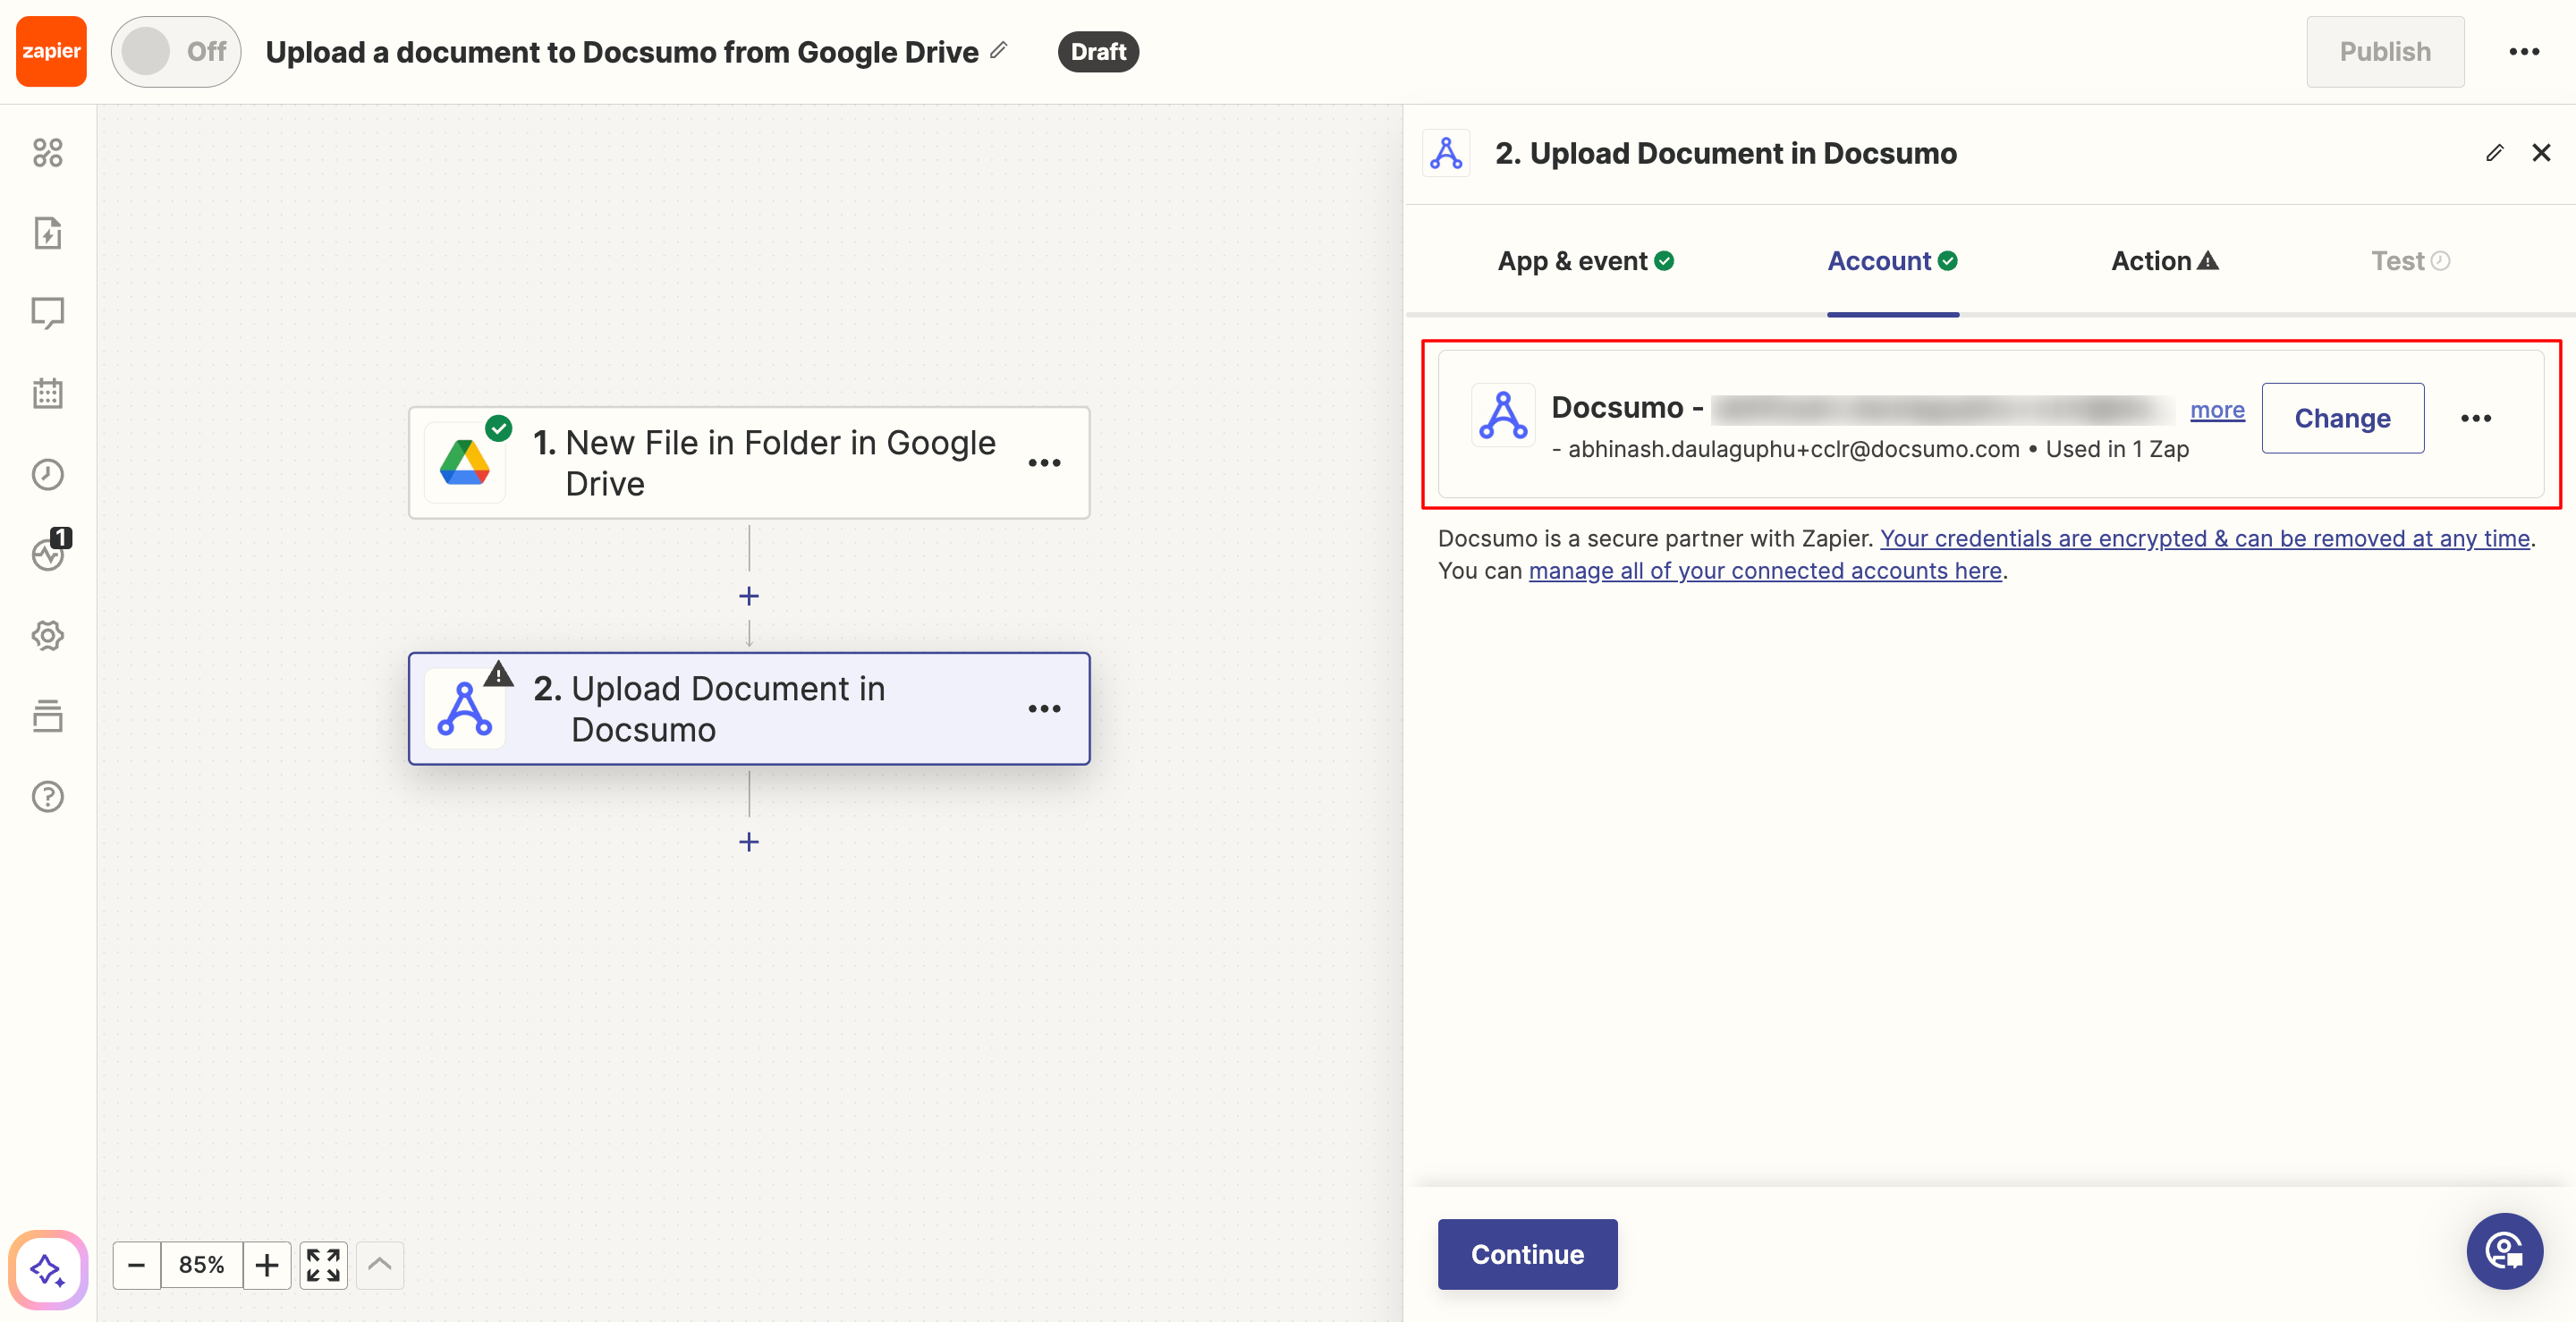
Again, the next step is concerned with authentication. Sign in to connect to Docsumo.
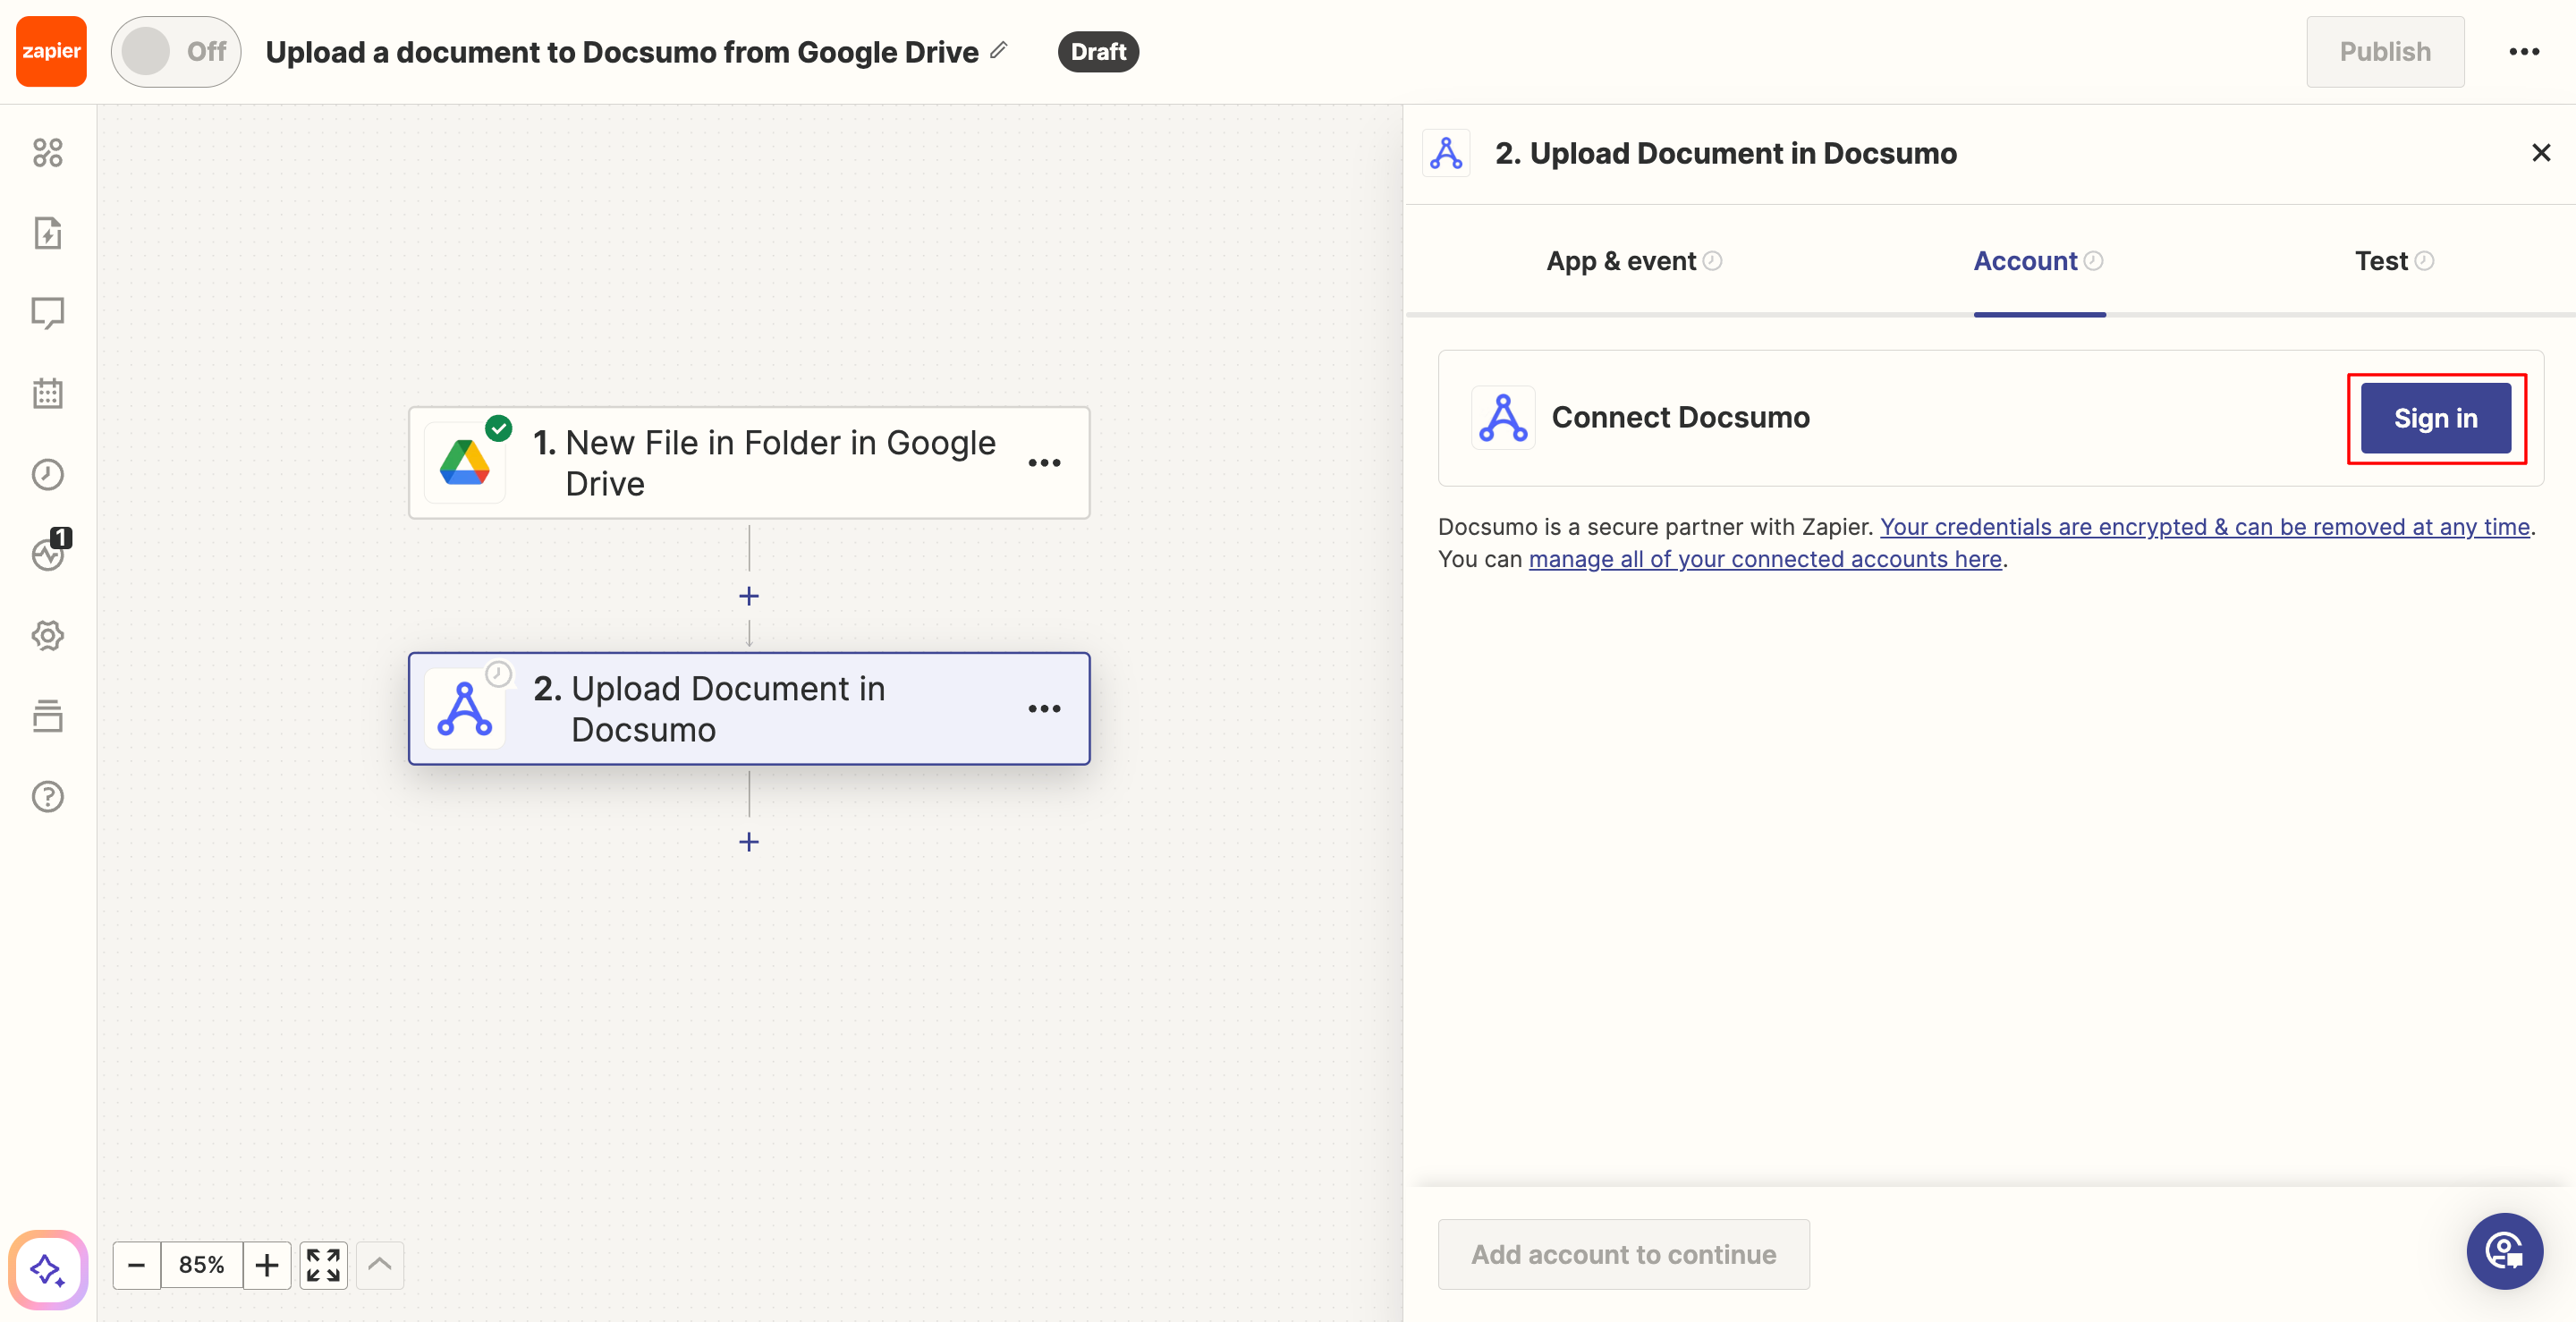
You will need to provide your Docsumo API key to authorize the integration
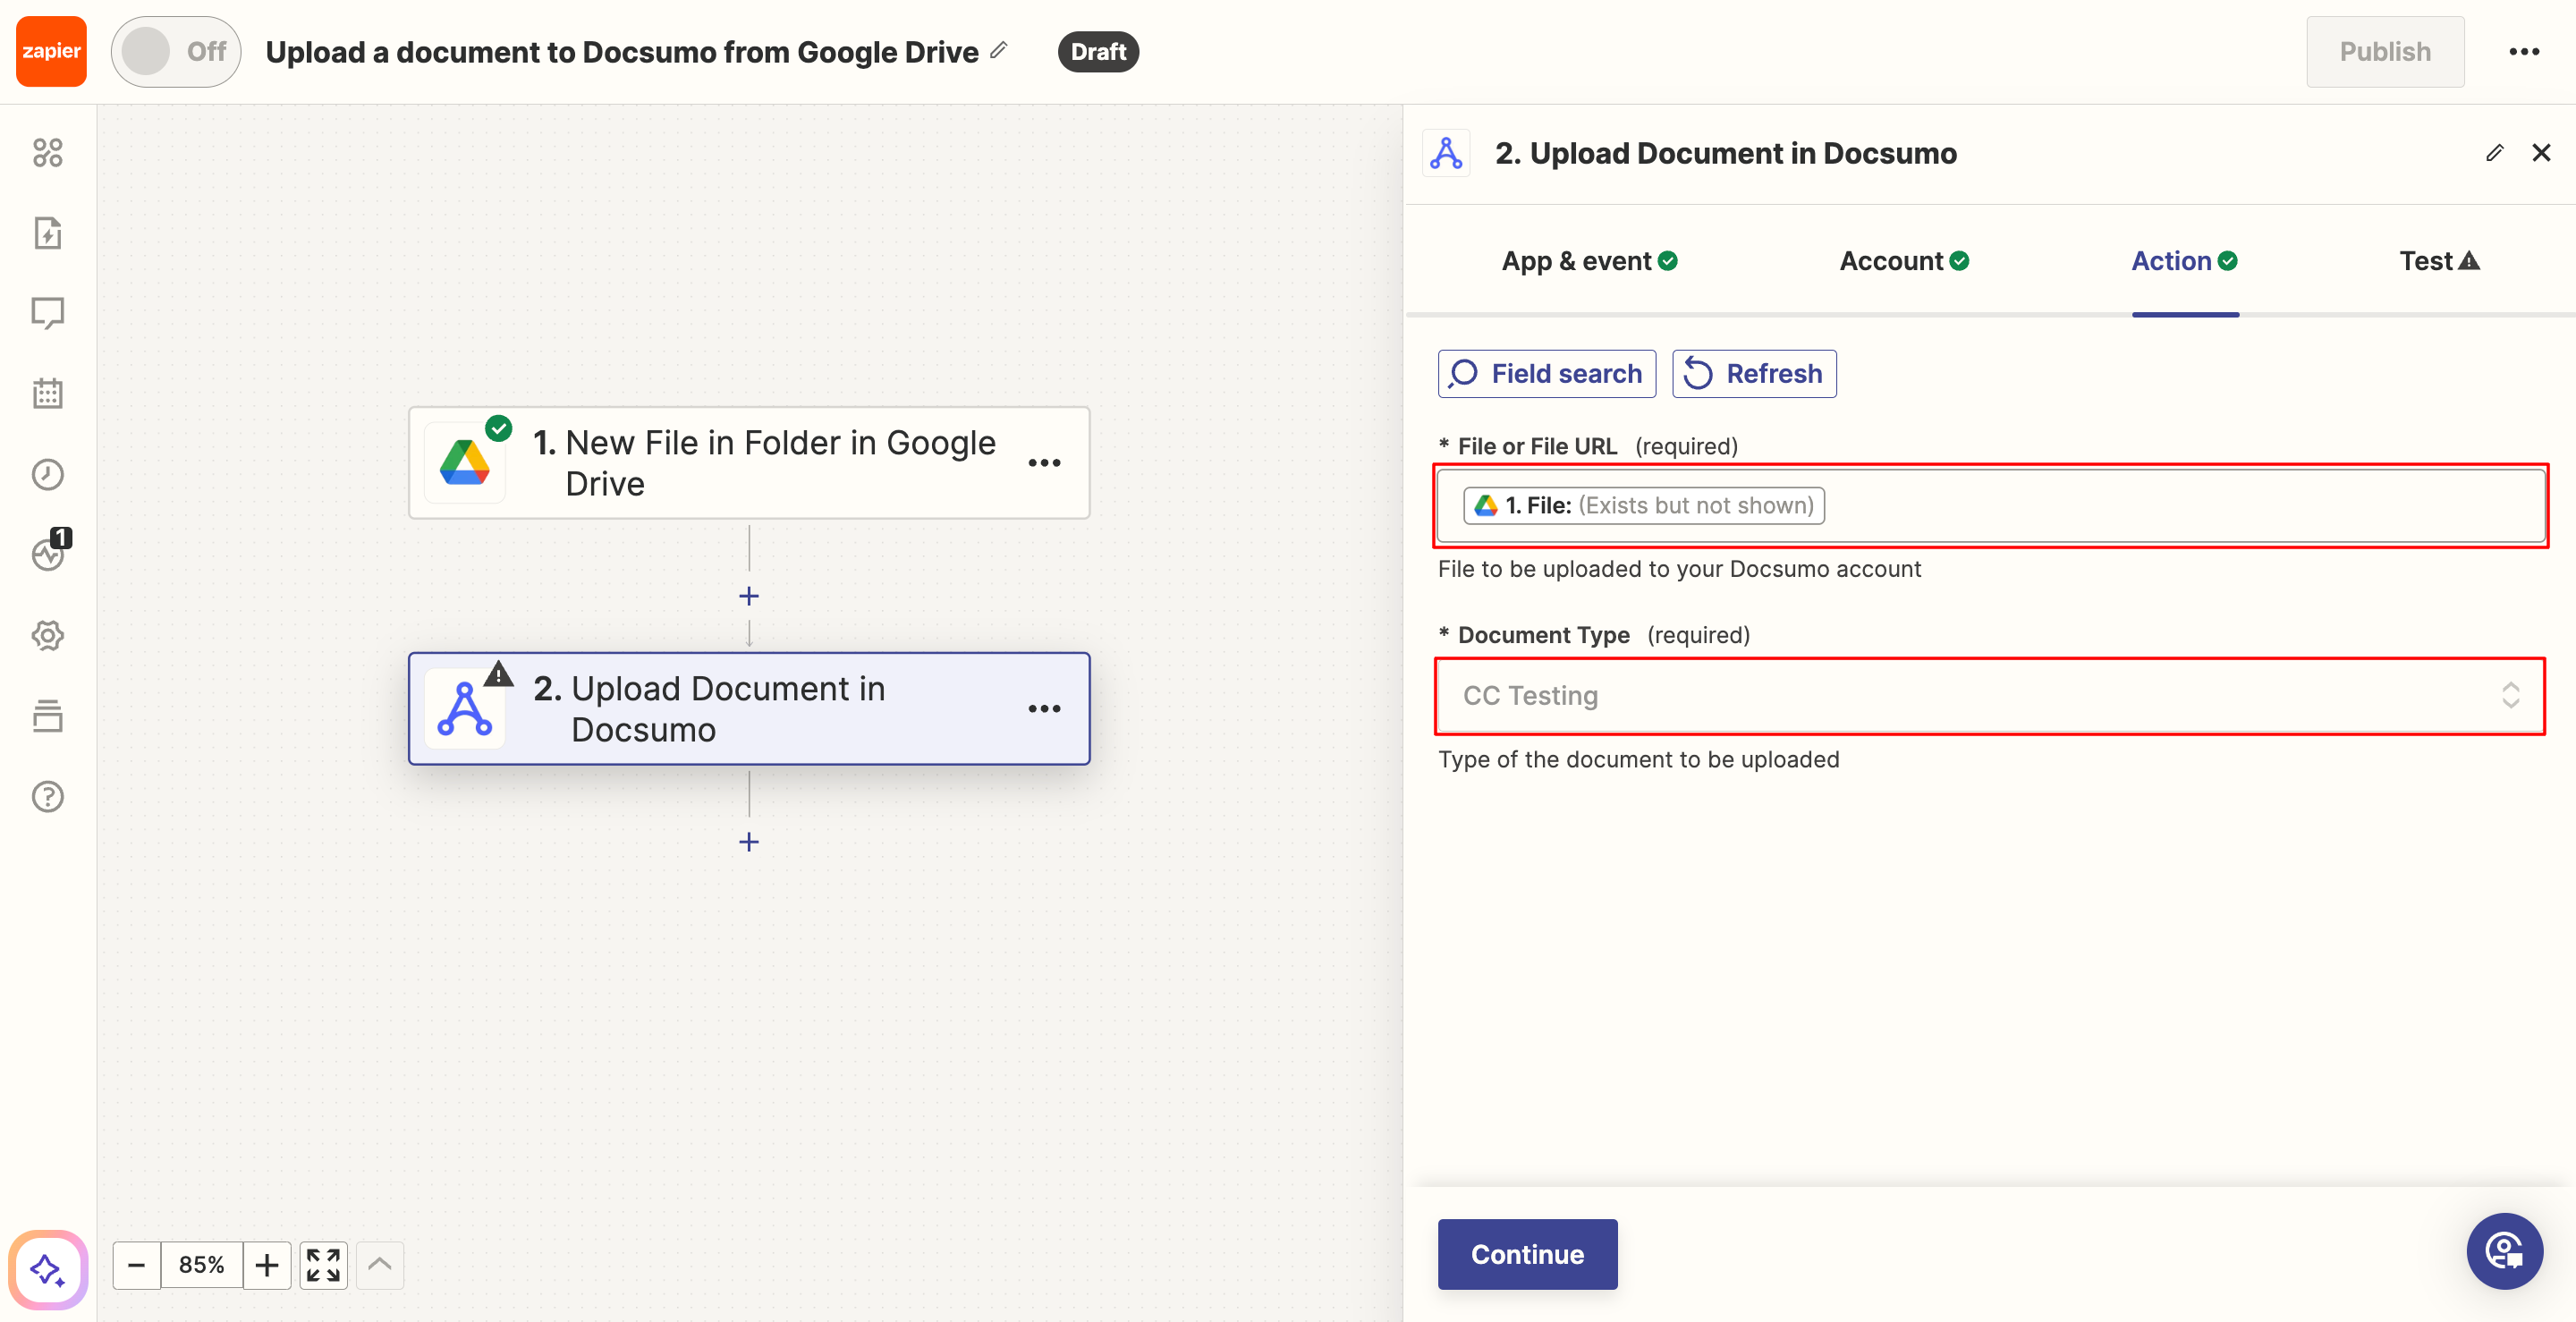
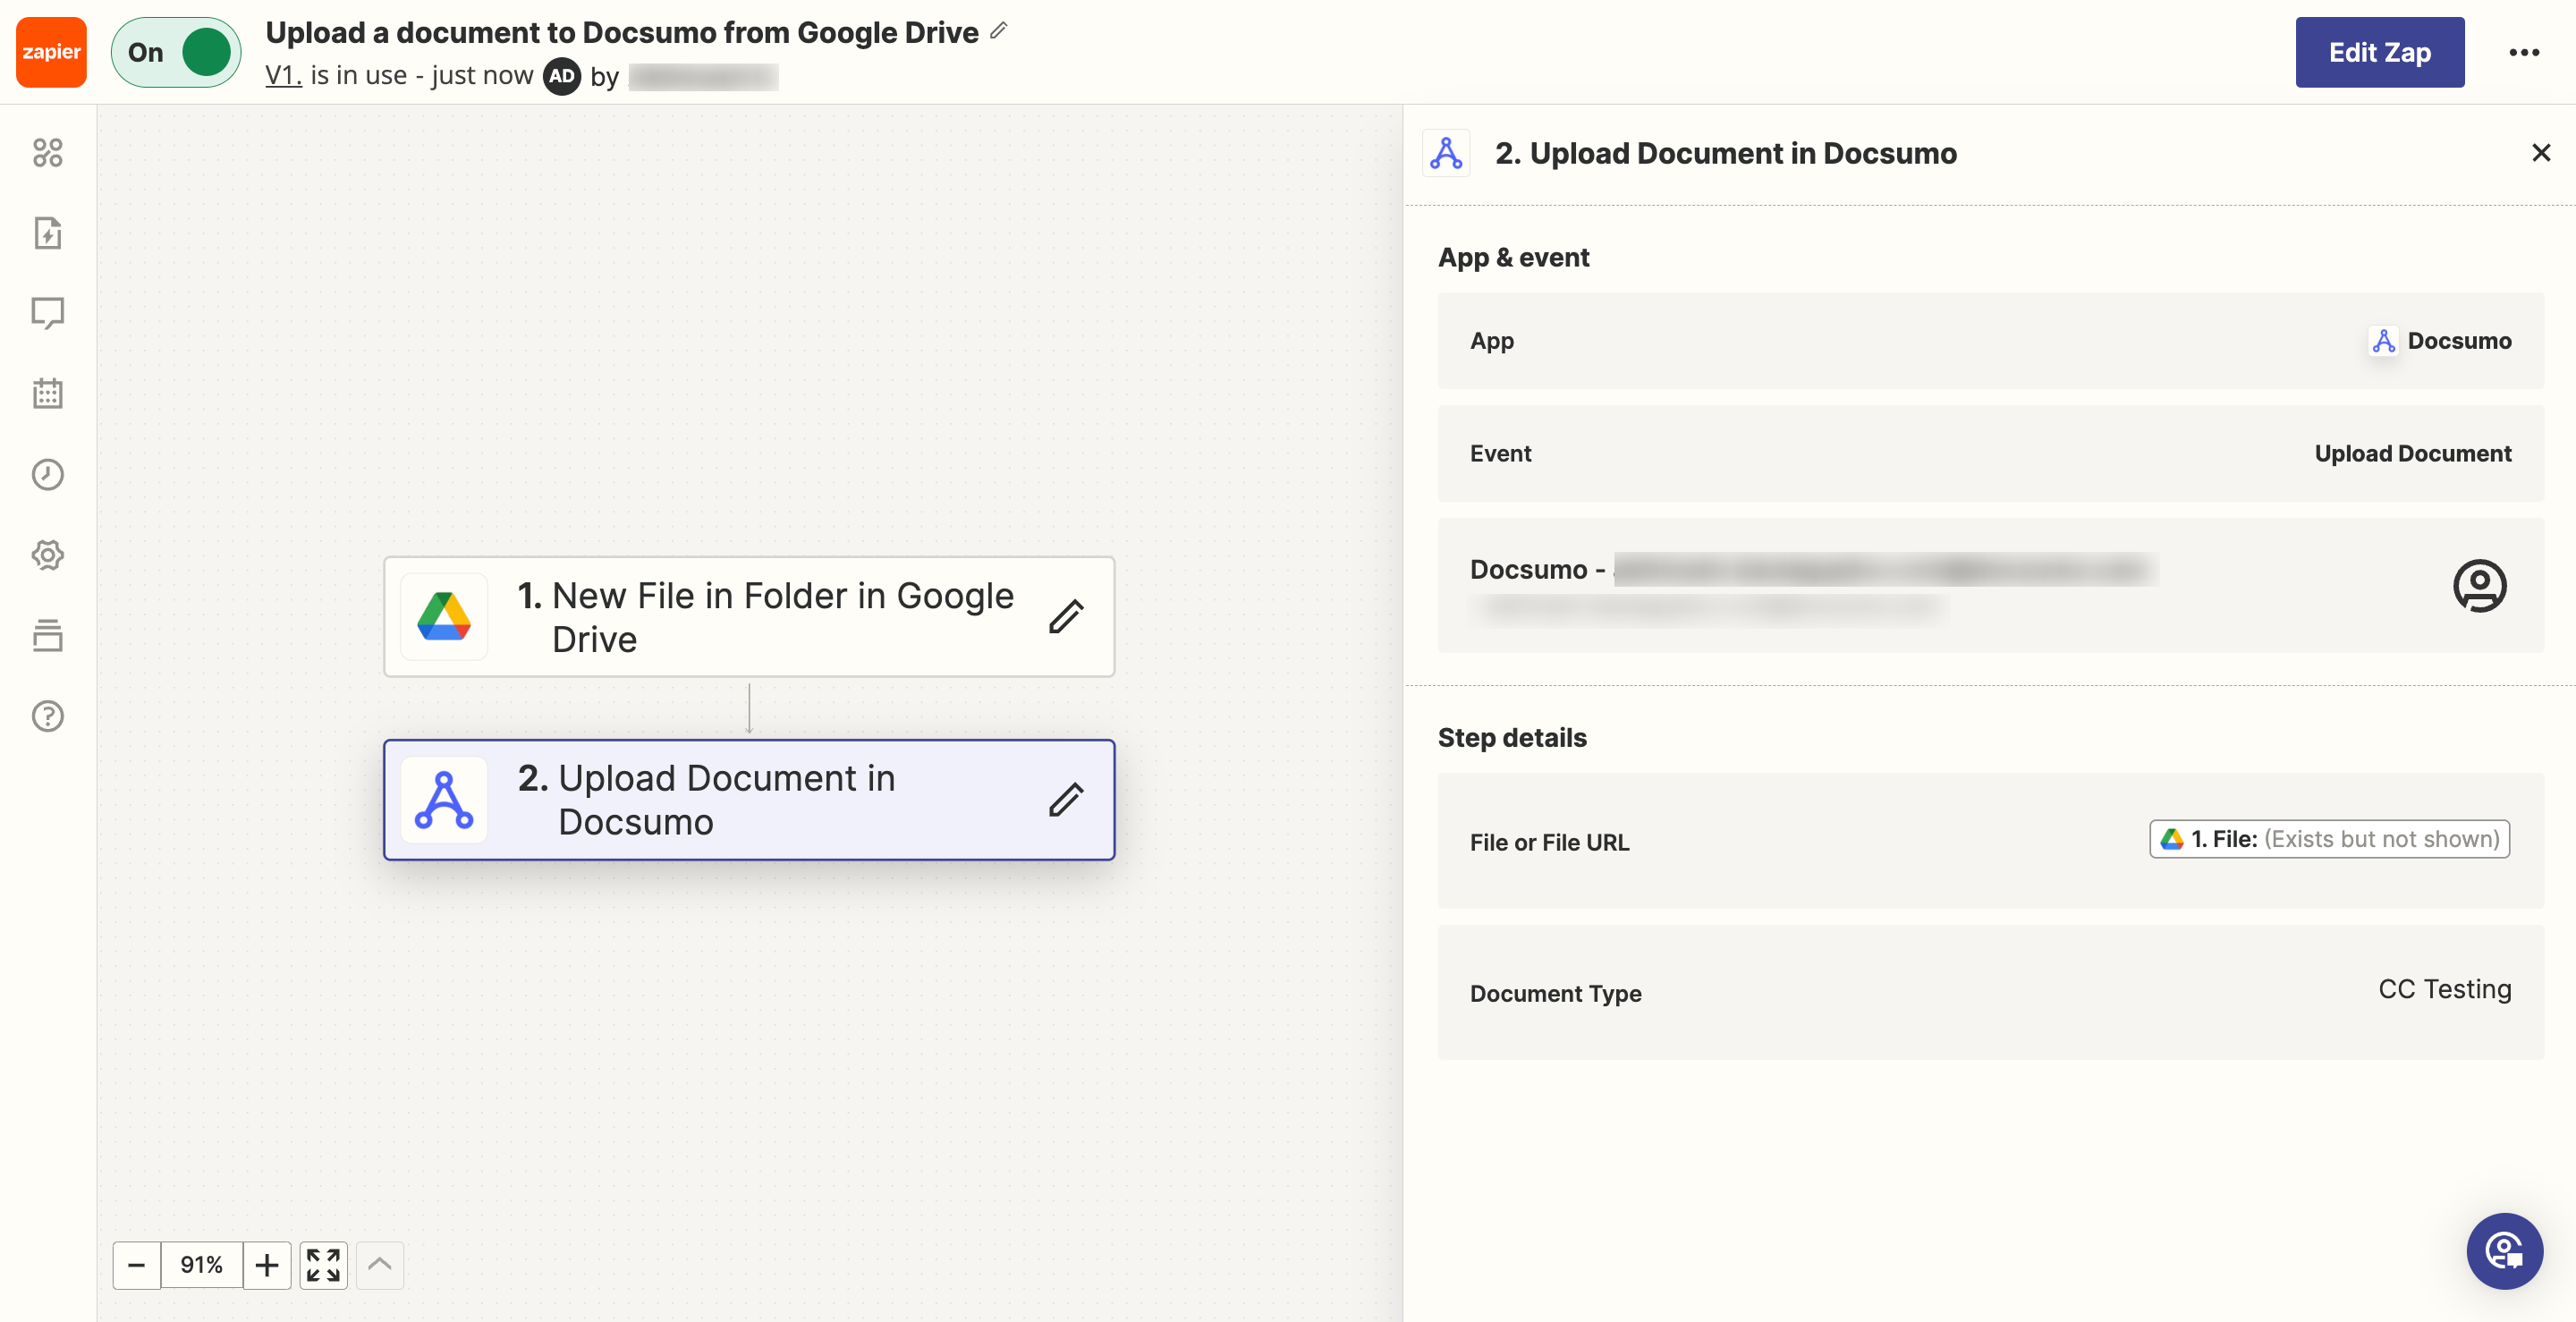
Step 5: Configure the Action
- Select a field which has (Exists but not shown), it indicates that there is a raw file data in there.
- Select the Document Type where you want to upload the document in Docsumo.
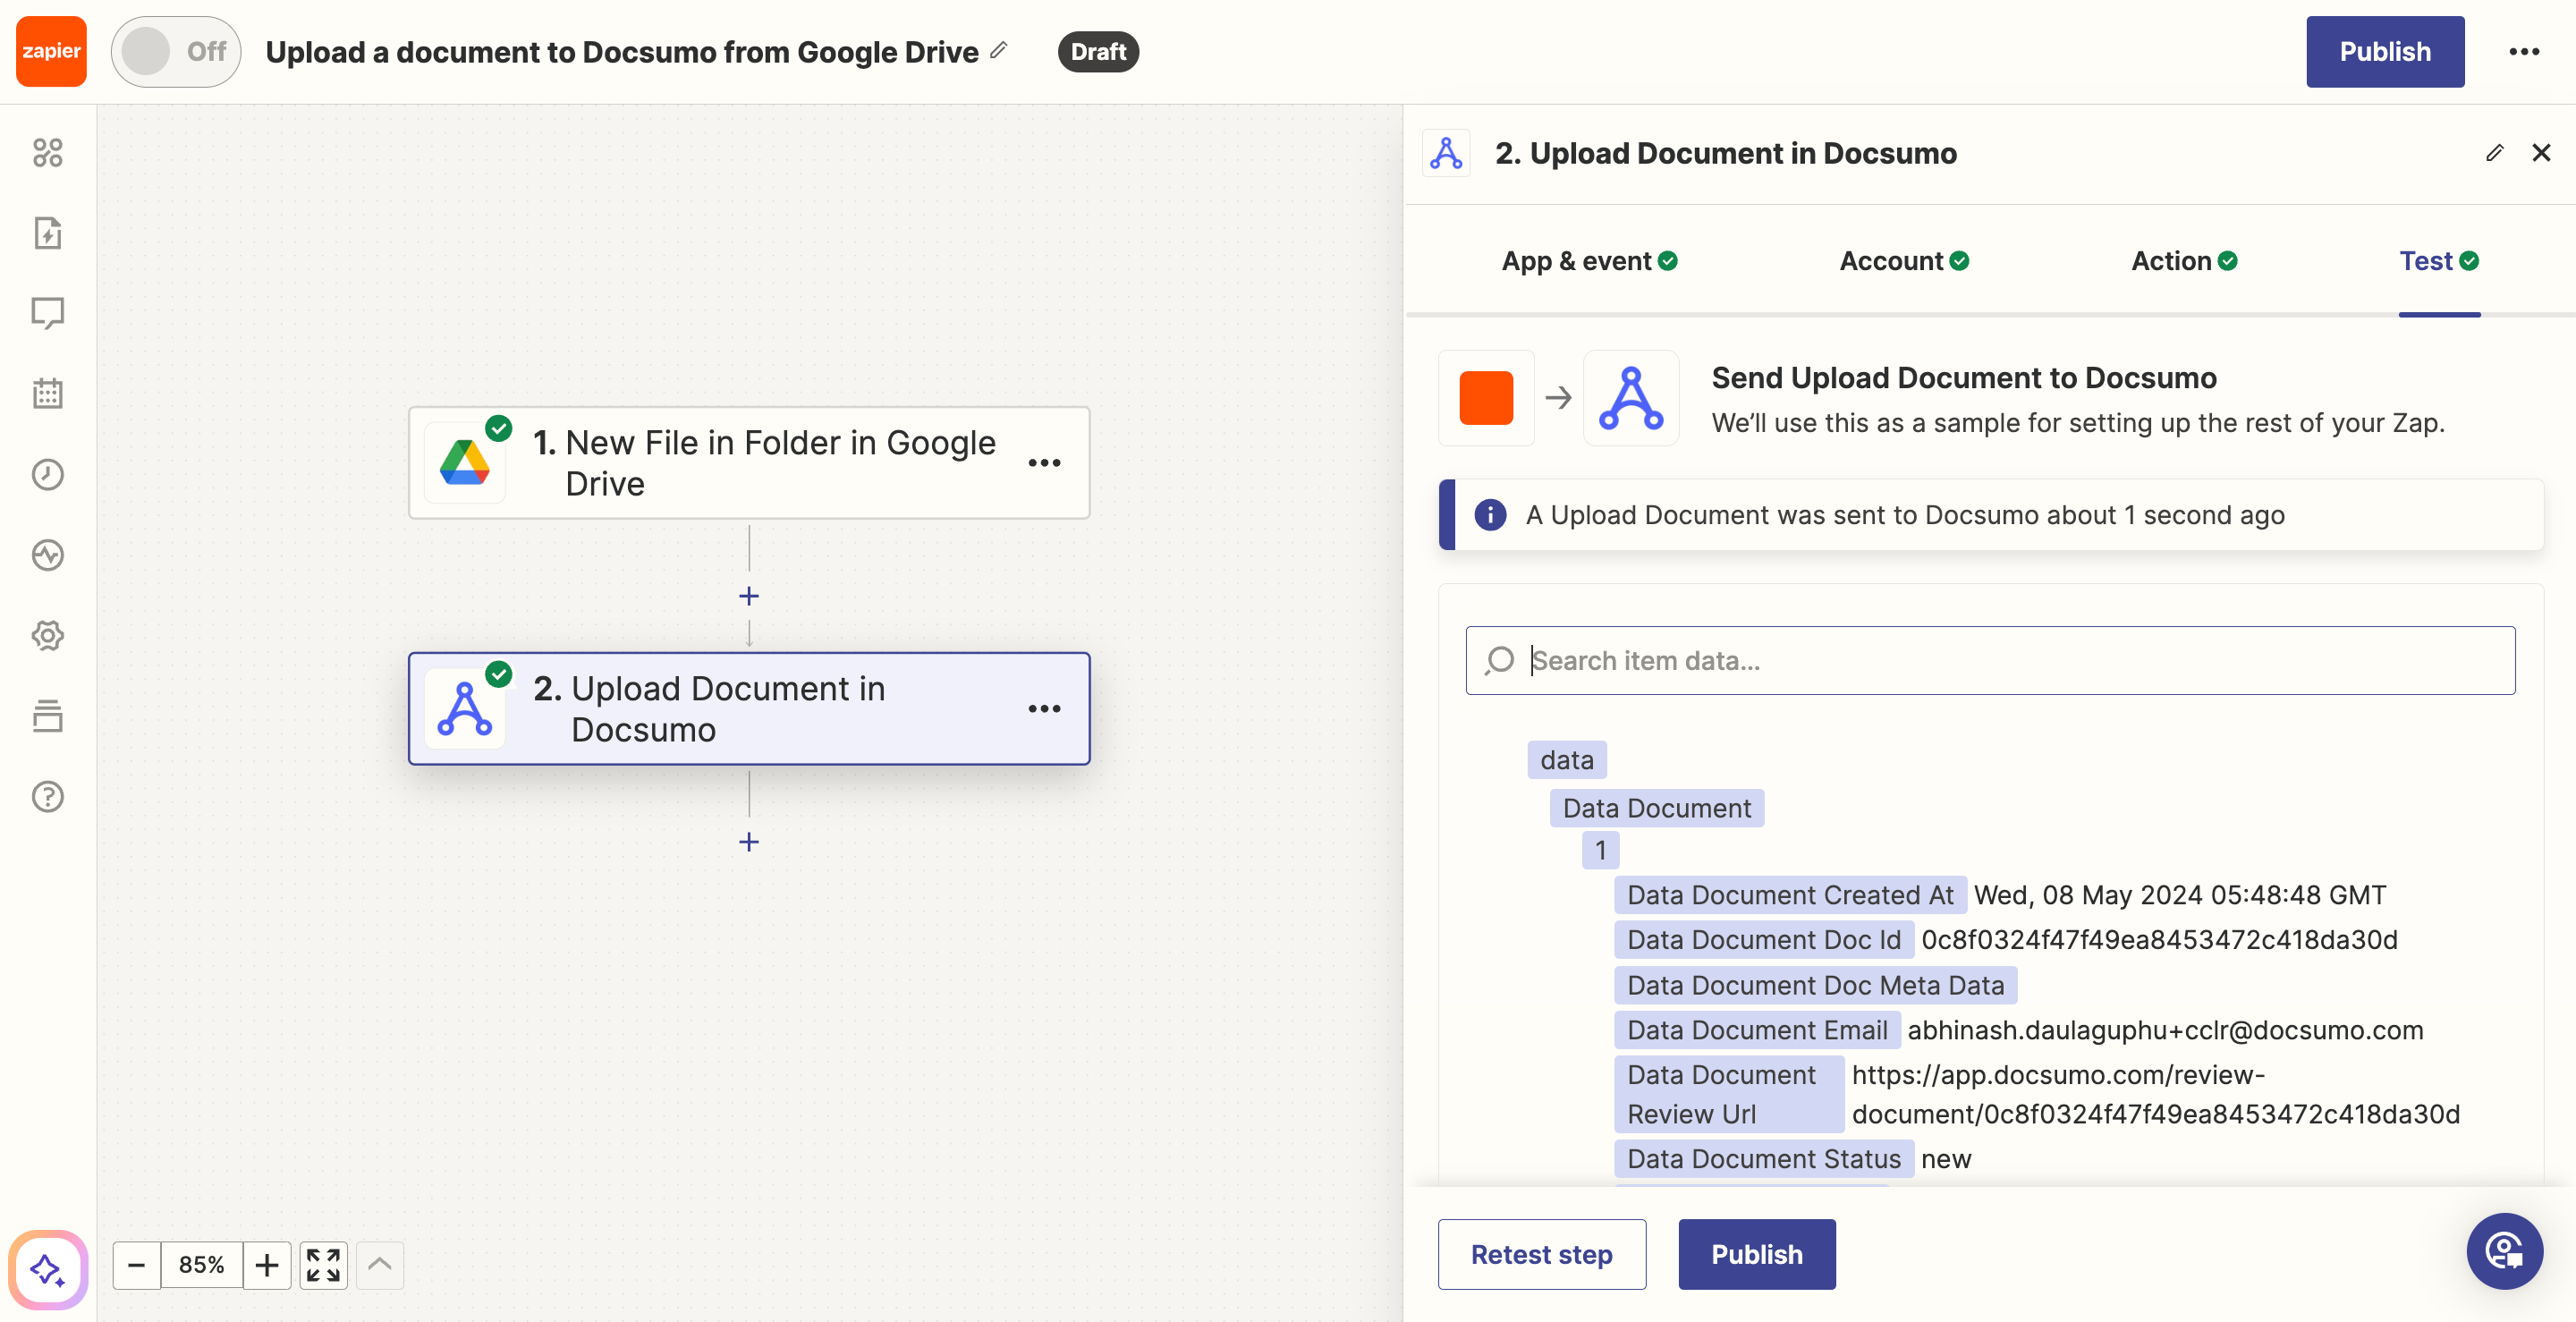
Step 6: Test the "Upload Document" action
Just like with the trigger, even this step needs to be tested. Here you can also see the output of the upload call.

Test run will actually upload the document. A file will be uploaded to Docsumo.
Step 7: Get Started with the Zapier automation
Now, all we need to do is to turn this Zap on. Your automation to upload documents from Drive to Docsumo is ready!
Start leveraging the power of automation today, and make your document processing faster, smarter, and more efficient!
Should you have any questions or encounter any issues during the process, feel free reach out to us at [email protected], and we'll be more than happy to help you.
Updated 9 months ago