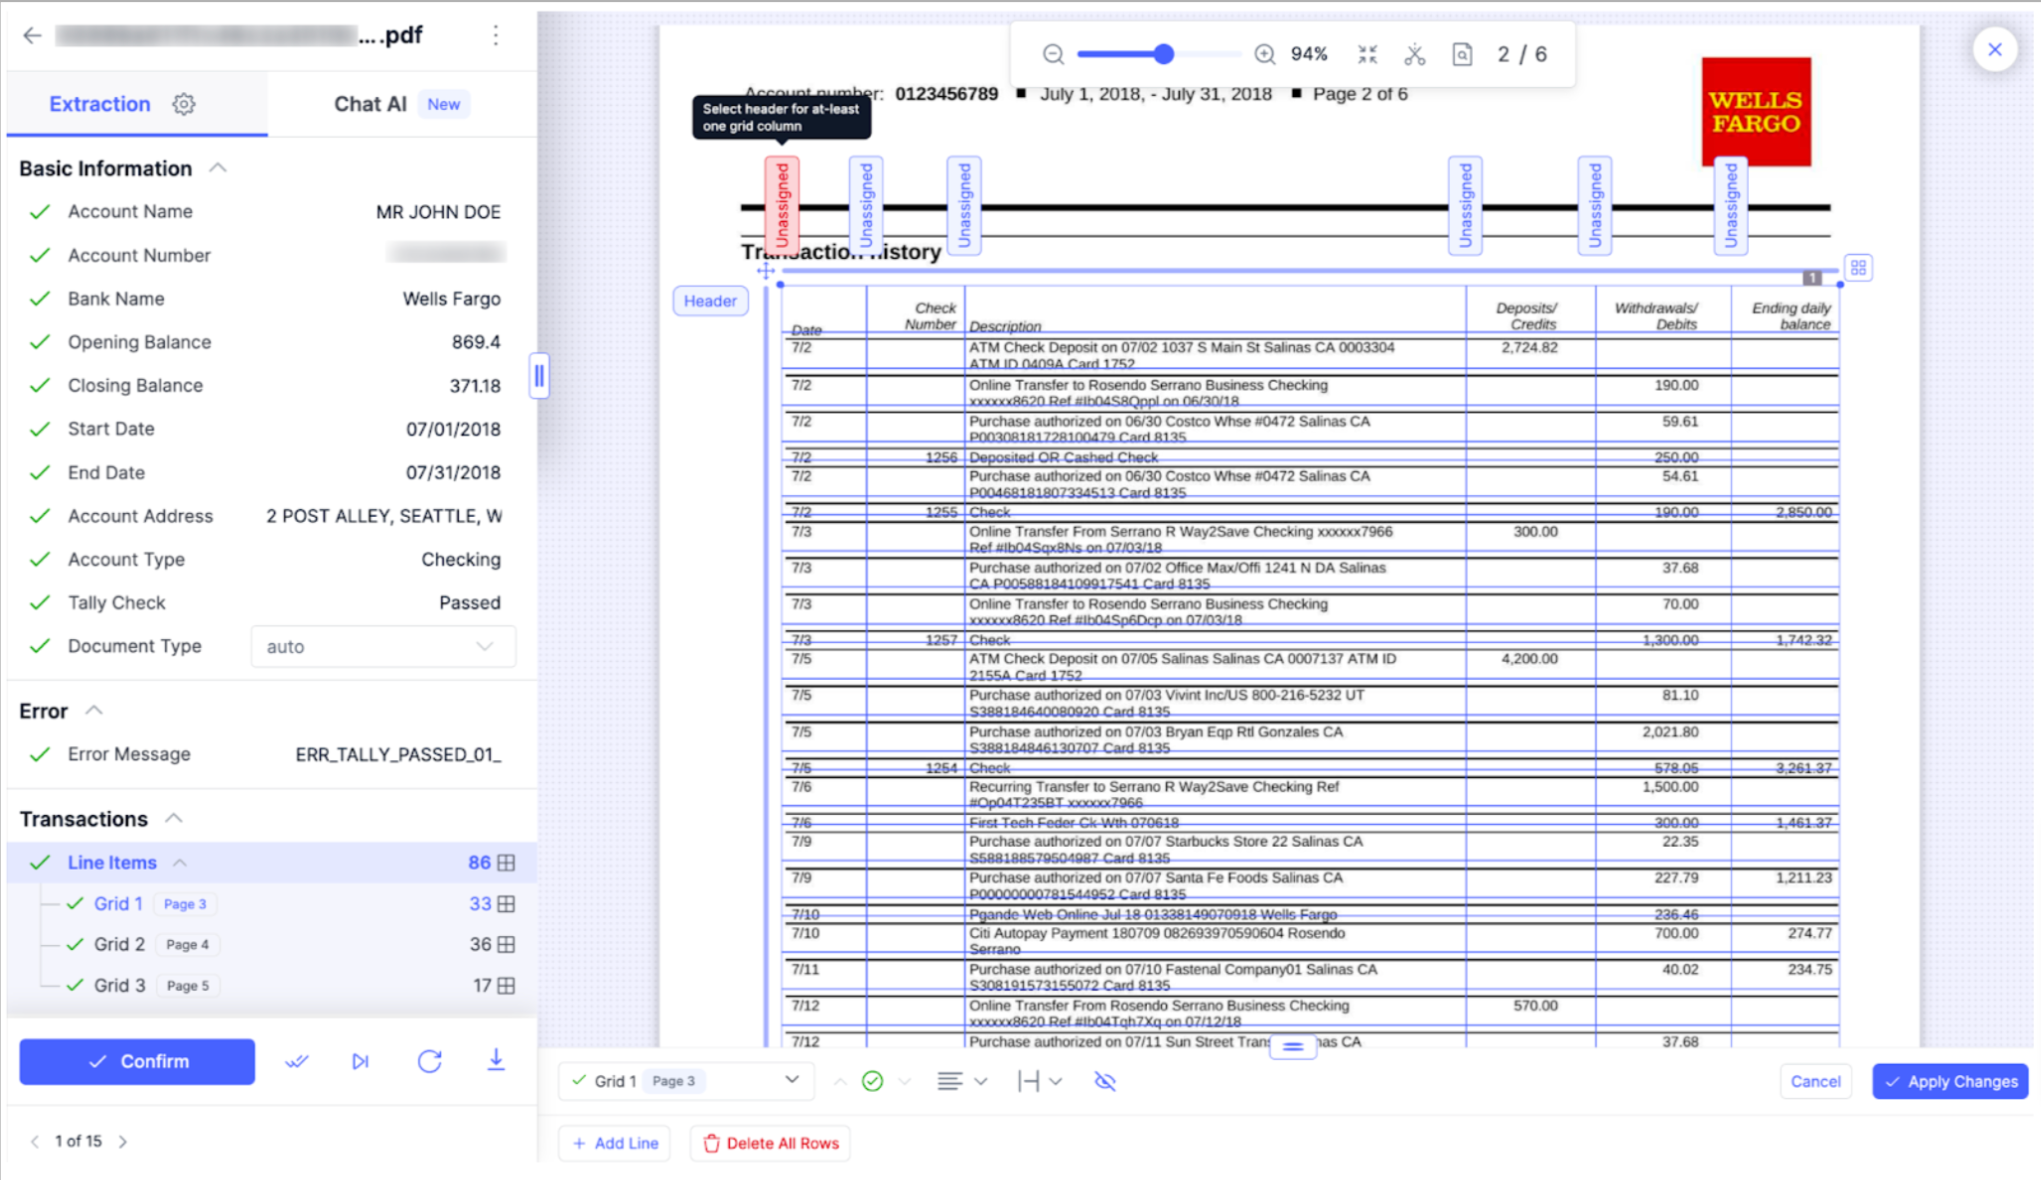
Table Grid
Table grids is the tool which you can use to pick tables directly from the original document. It is a simple bounding box or table like structure which can be used to pick tabular data from your documents. This feature offers several benefits, including:
1. Table interactions: Define the header and map column names for capturing data (eg: Credit, Debit). Additionally, add, reposition, or remove rows and columns seamlessly.
2. Independent grids: Change multiple grid properties in a line item without affecting others, adjust column mappings and widths independently for each grid, and view grid-specific data in the extracted fields.
3. Grid edit options: Grid edit options allow users to make changes to the layout and content of multiple grids at once.
- Copy columns to all grids: Copy the columns from one grid and apply them to all other grids, ensuring consistency in the layout of the data.
- Copy grid: Duplicate a grid and its header/column content, making it easier to create multiple similar grids.
- Extract similar table: Extract various tables which have same column mappings in your document.
- Remove grid: Delete a specific grid from the line item.
- Remove all grids: Clear all grids in from all line items and start fresh with a blank canvas.
Here are the steps to using table grids:
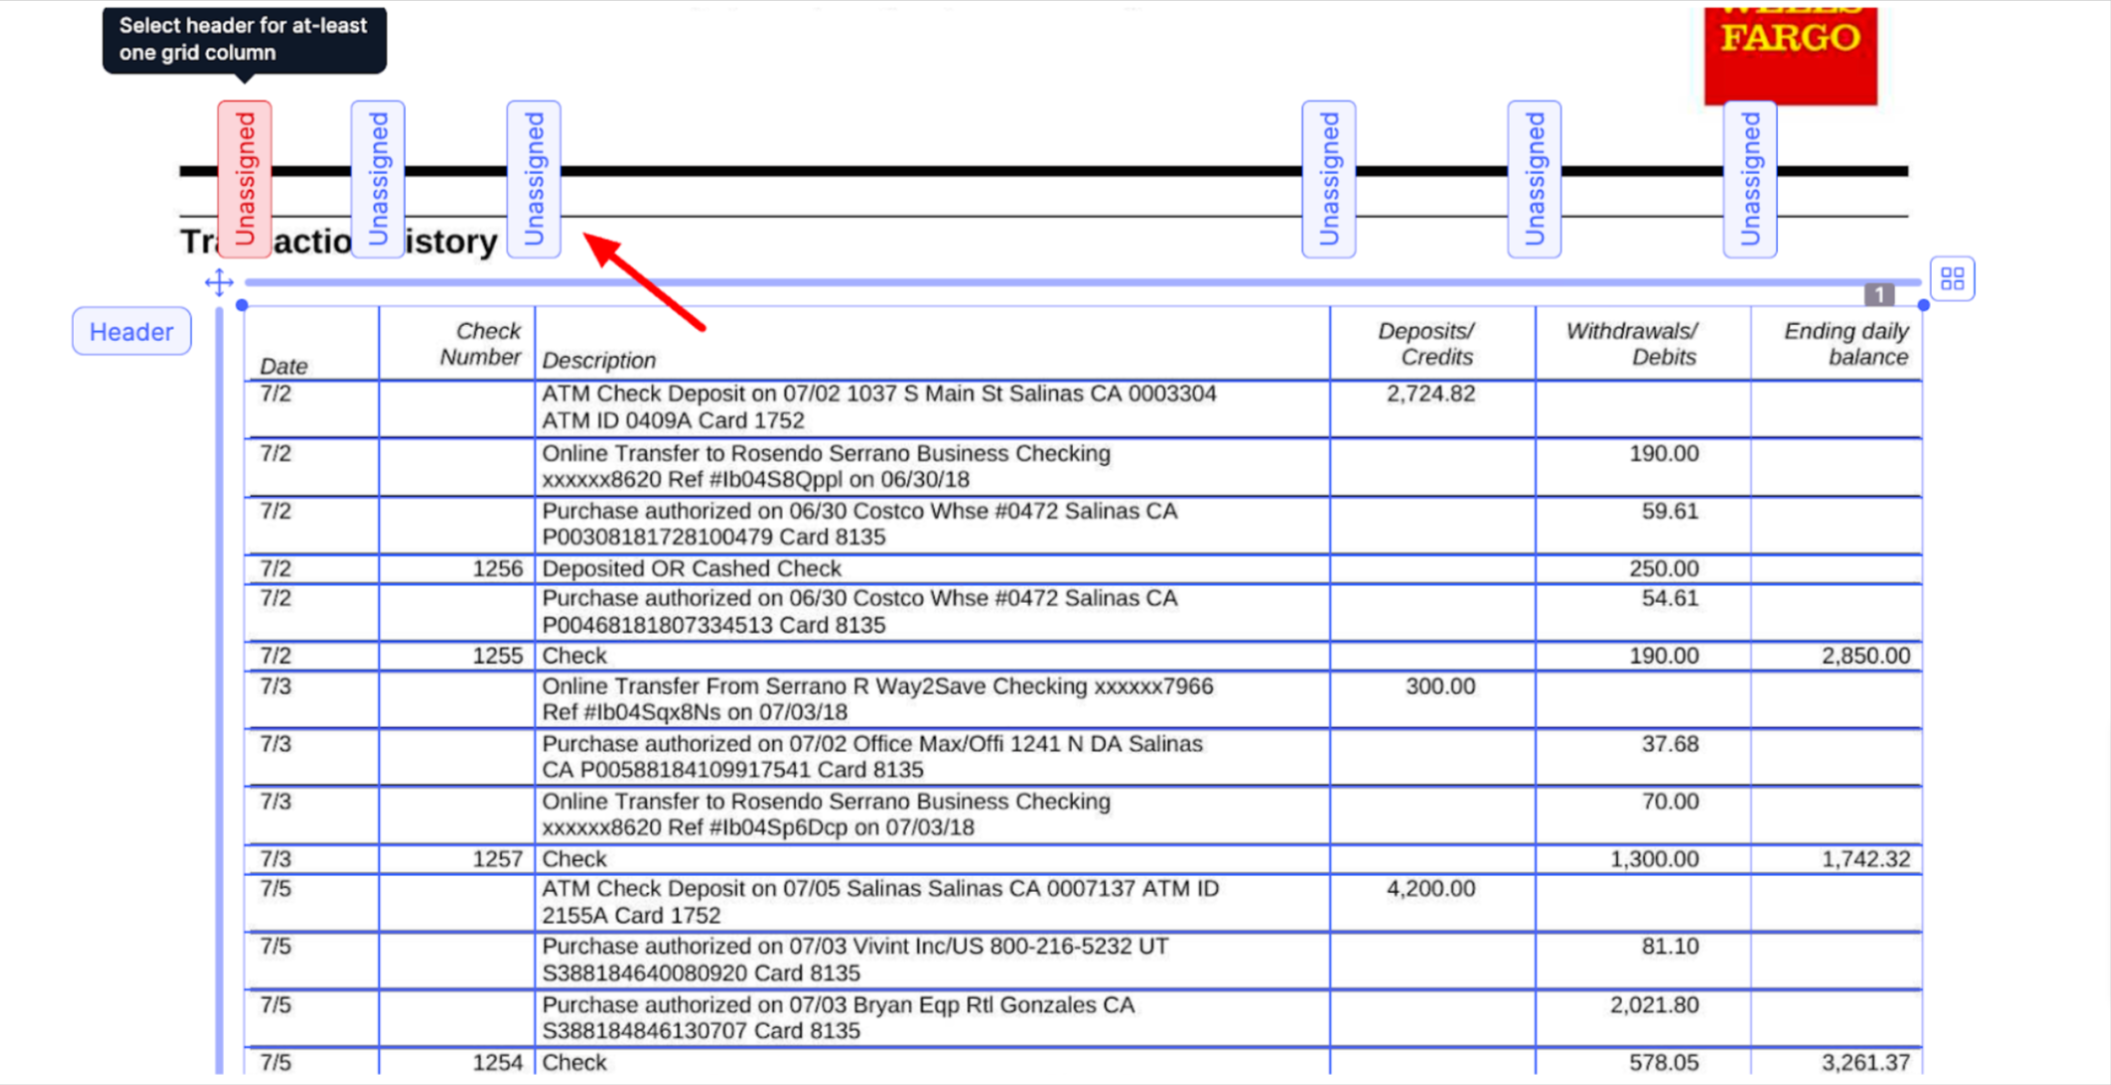
Step 1: Drag to Draw a Table Grid.
-
Draw a table grid on the canvas by selecting and dragging the cursor on the table.
Step 2: Row and Columns
-
Rows and columns should be separated automatically. If you want to add rows or columns, click on blue bar on the side and above of table. Click "X" to delete rows and columns.


Step 3: Ignore Rows.
-
If you want to ignore a certain row, click on 'X' that appears when you hover on that row.

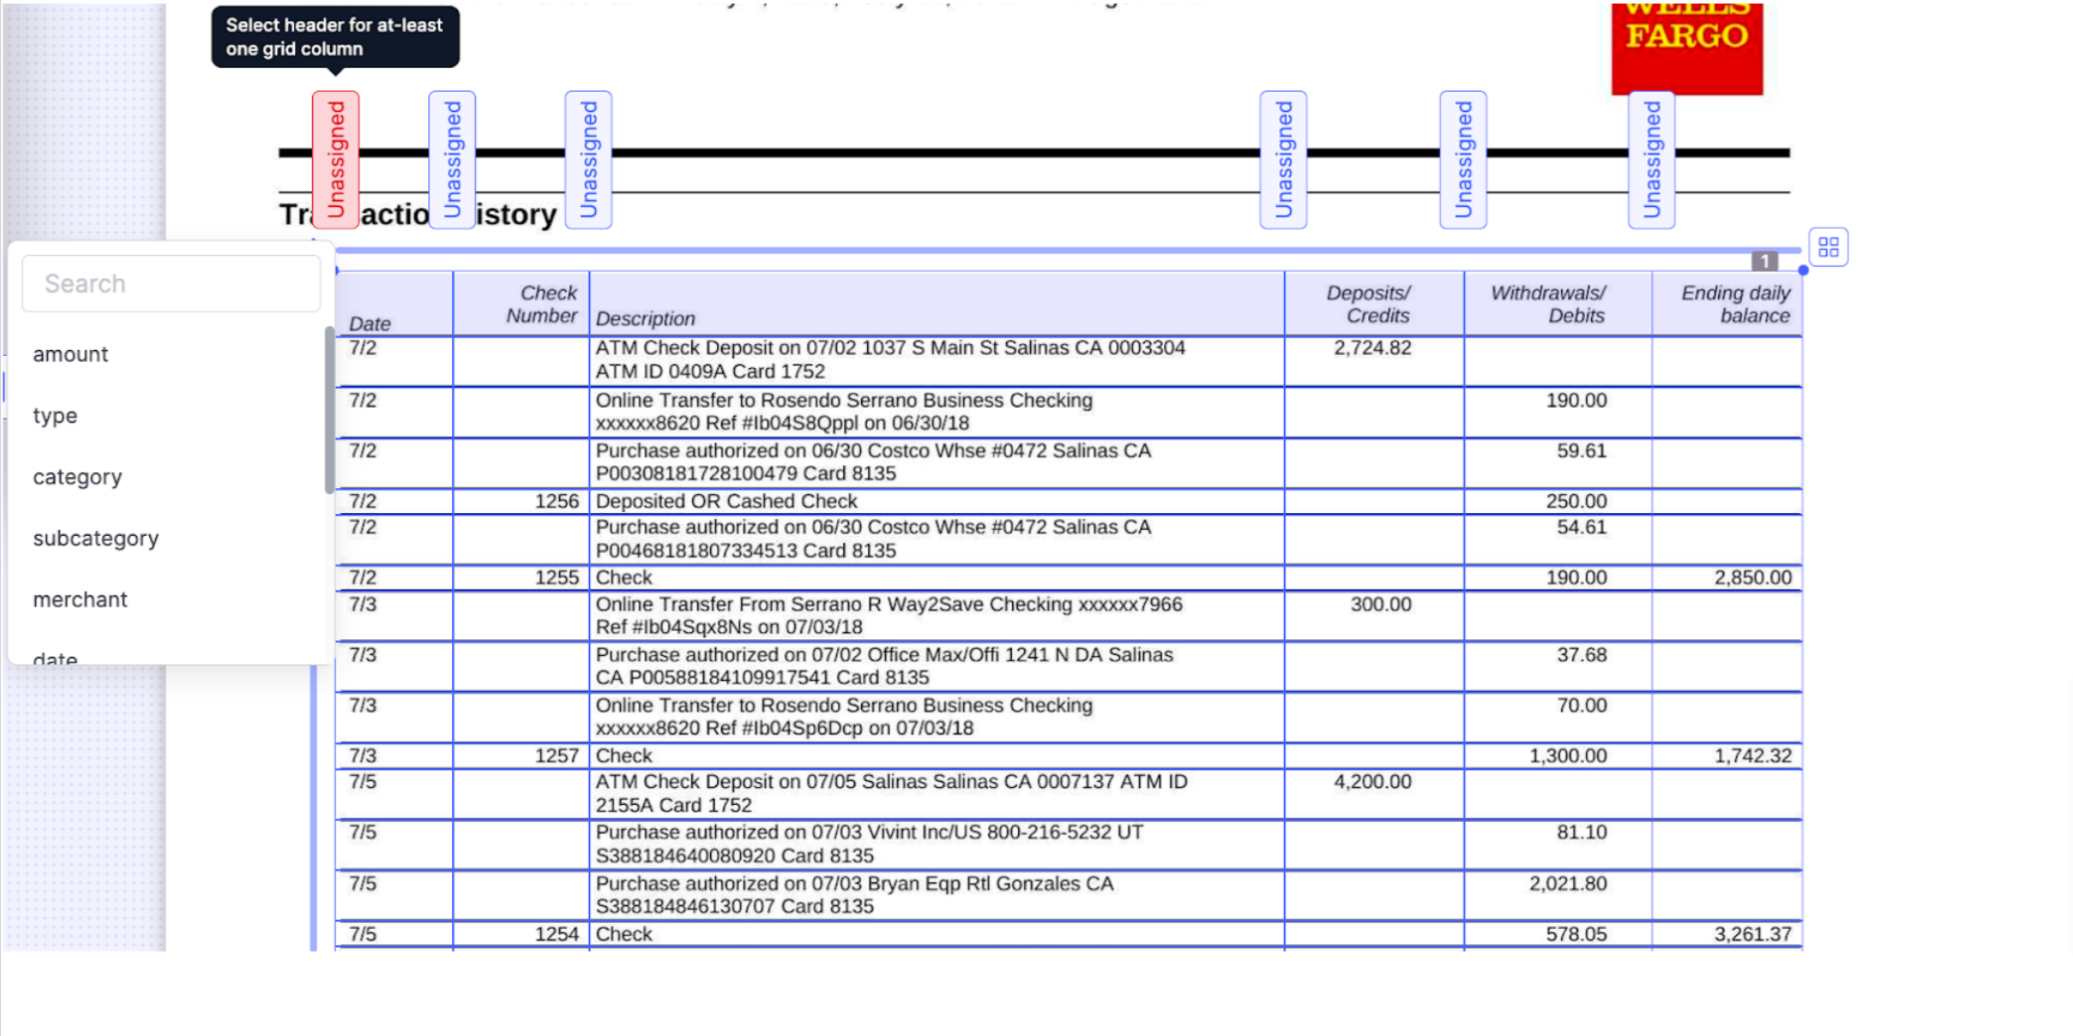
Step 4: Column Header Naming
-
Assign the columns name. Not all columns need headers.
Step 5: Apply Changes
-
After all columns are assigned, click on 'Apply Changes'.
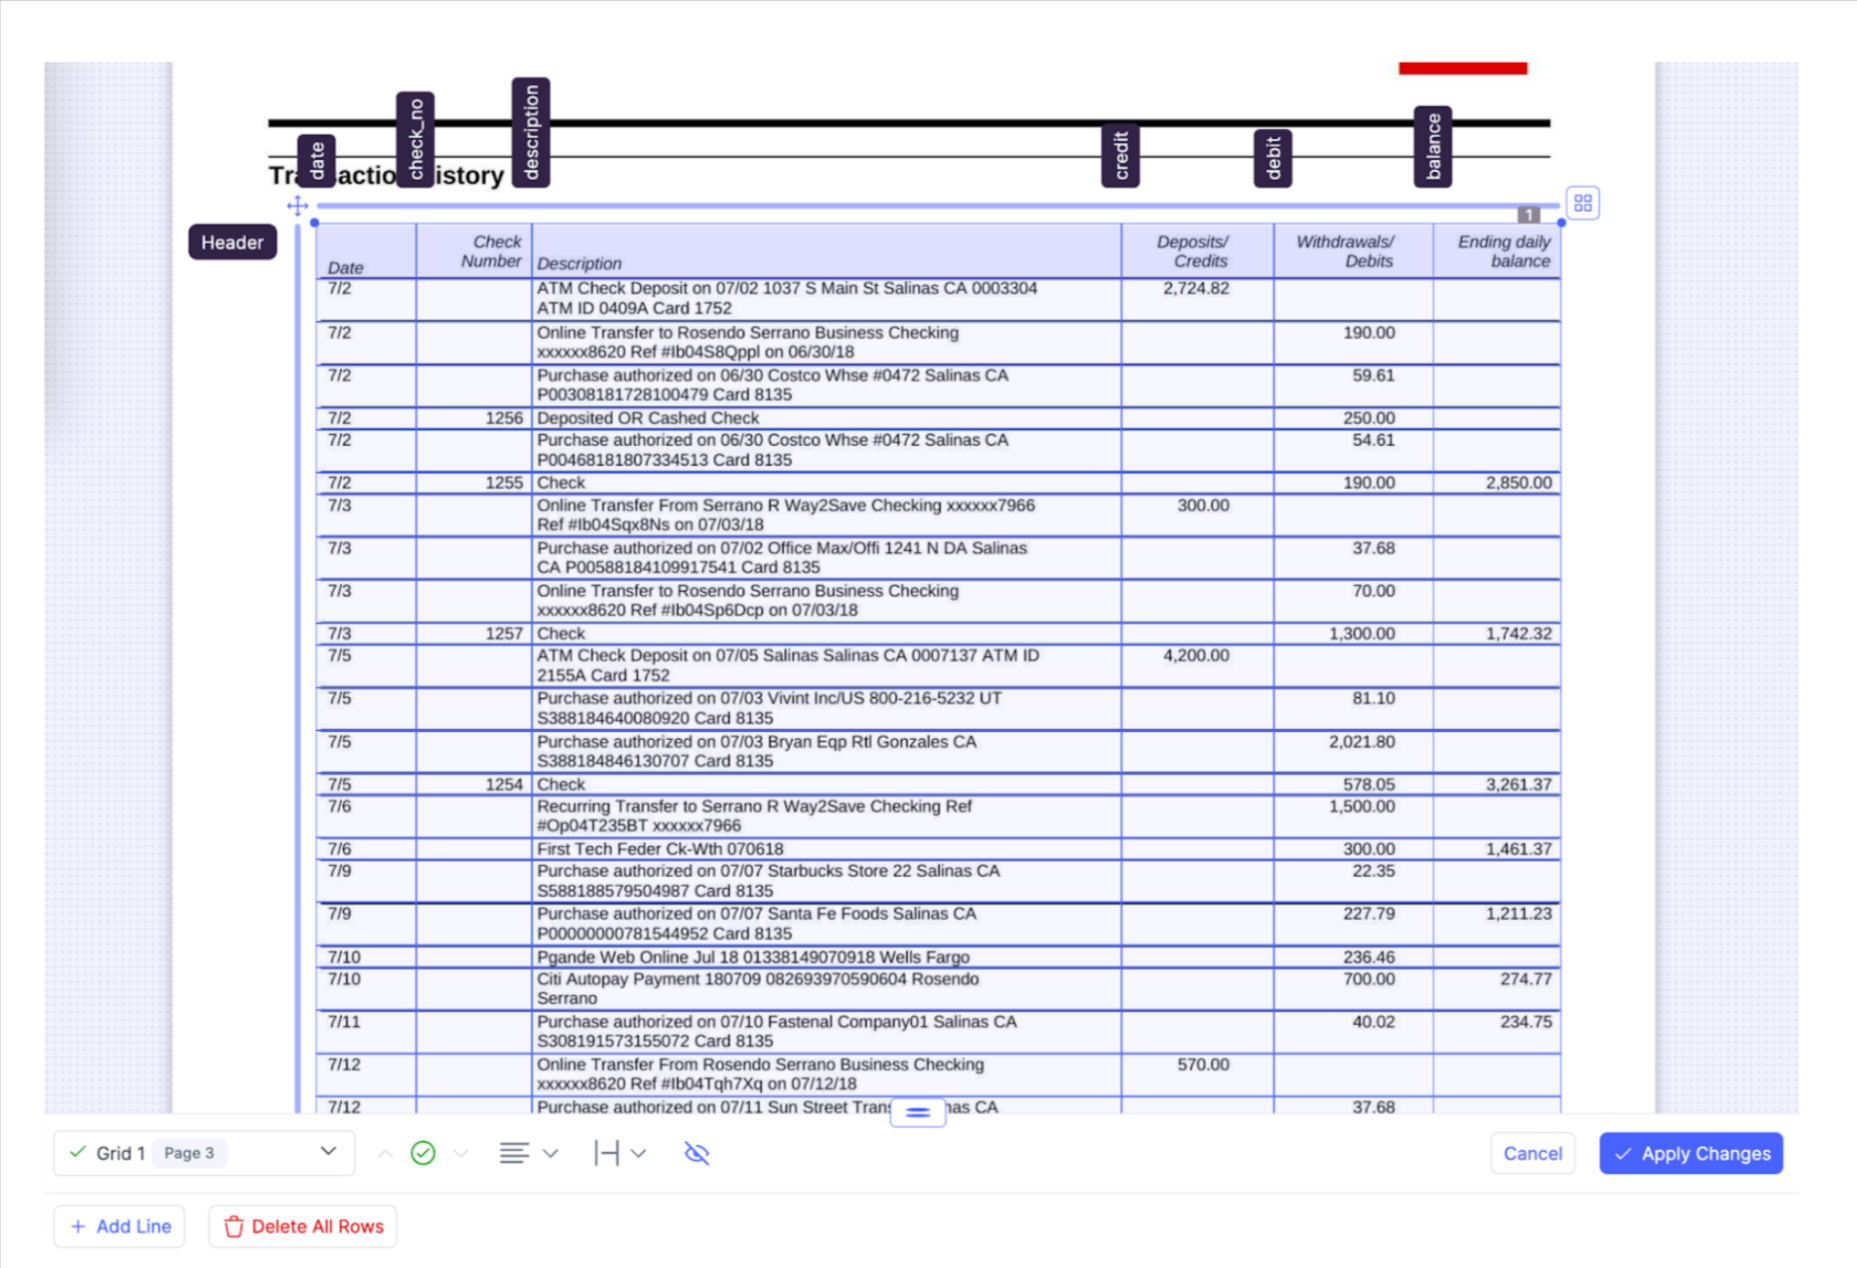
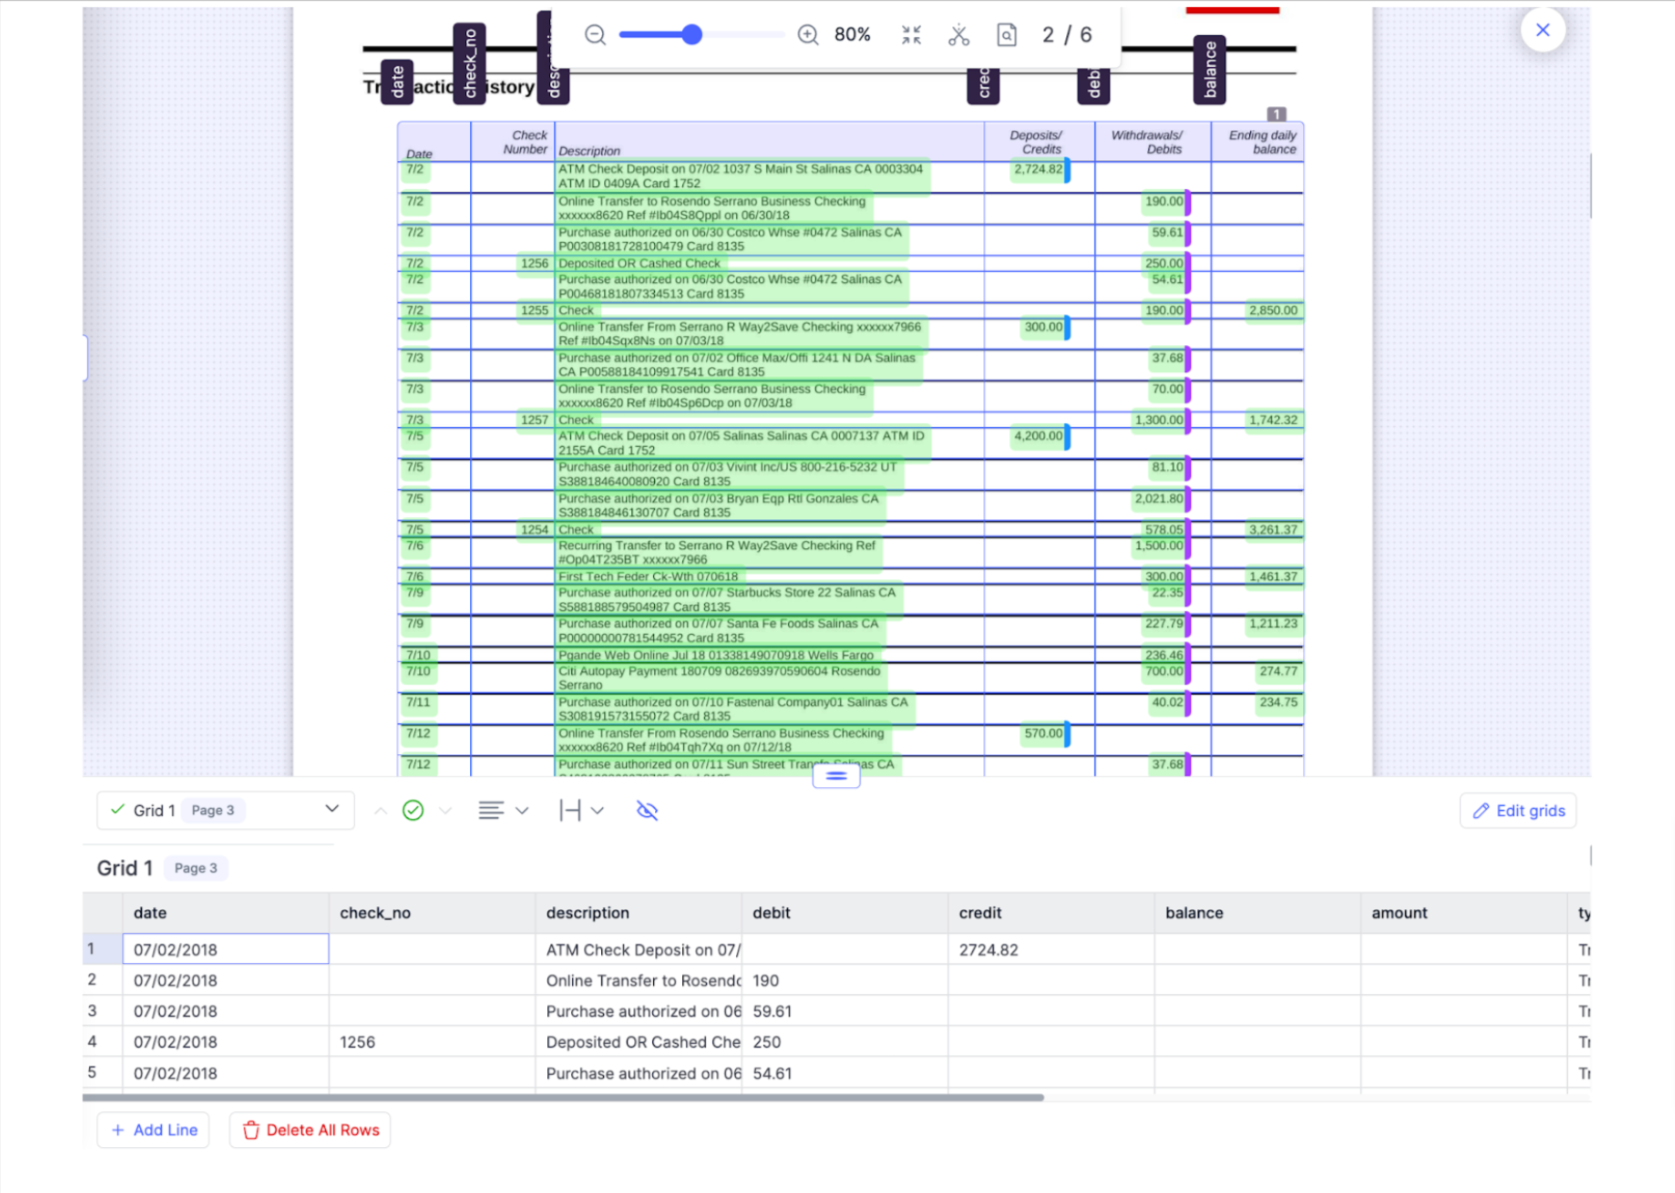
Step 6: Your Table is Extracted.
-
Now you will see the table data in the table section on the bottom of your screen.
Step 7: Editing the grid properties
-
Click on ‘Edit grid’ and then click on ‘View other grid options’. Update the grid properties accordingly by selecting the options.

Step 8: Navigation
-
Click on ‘Grid navigation’ to navigate across the grids. Additionally, you can navigate across the grids from the left panel by clicking on the grid list.
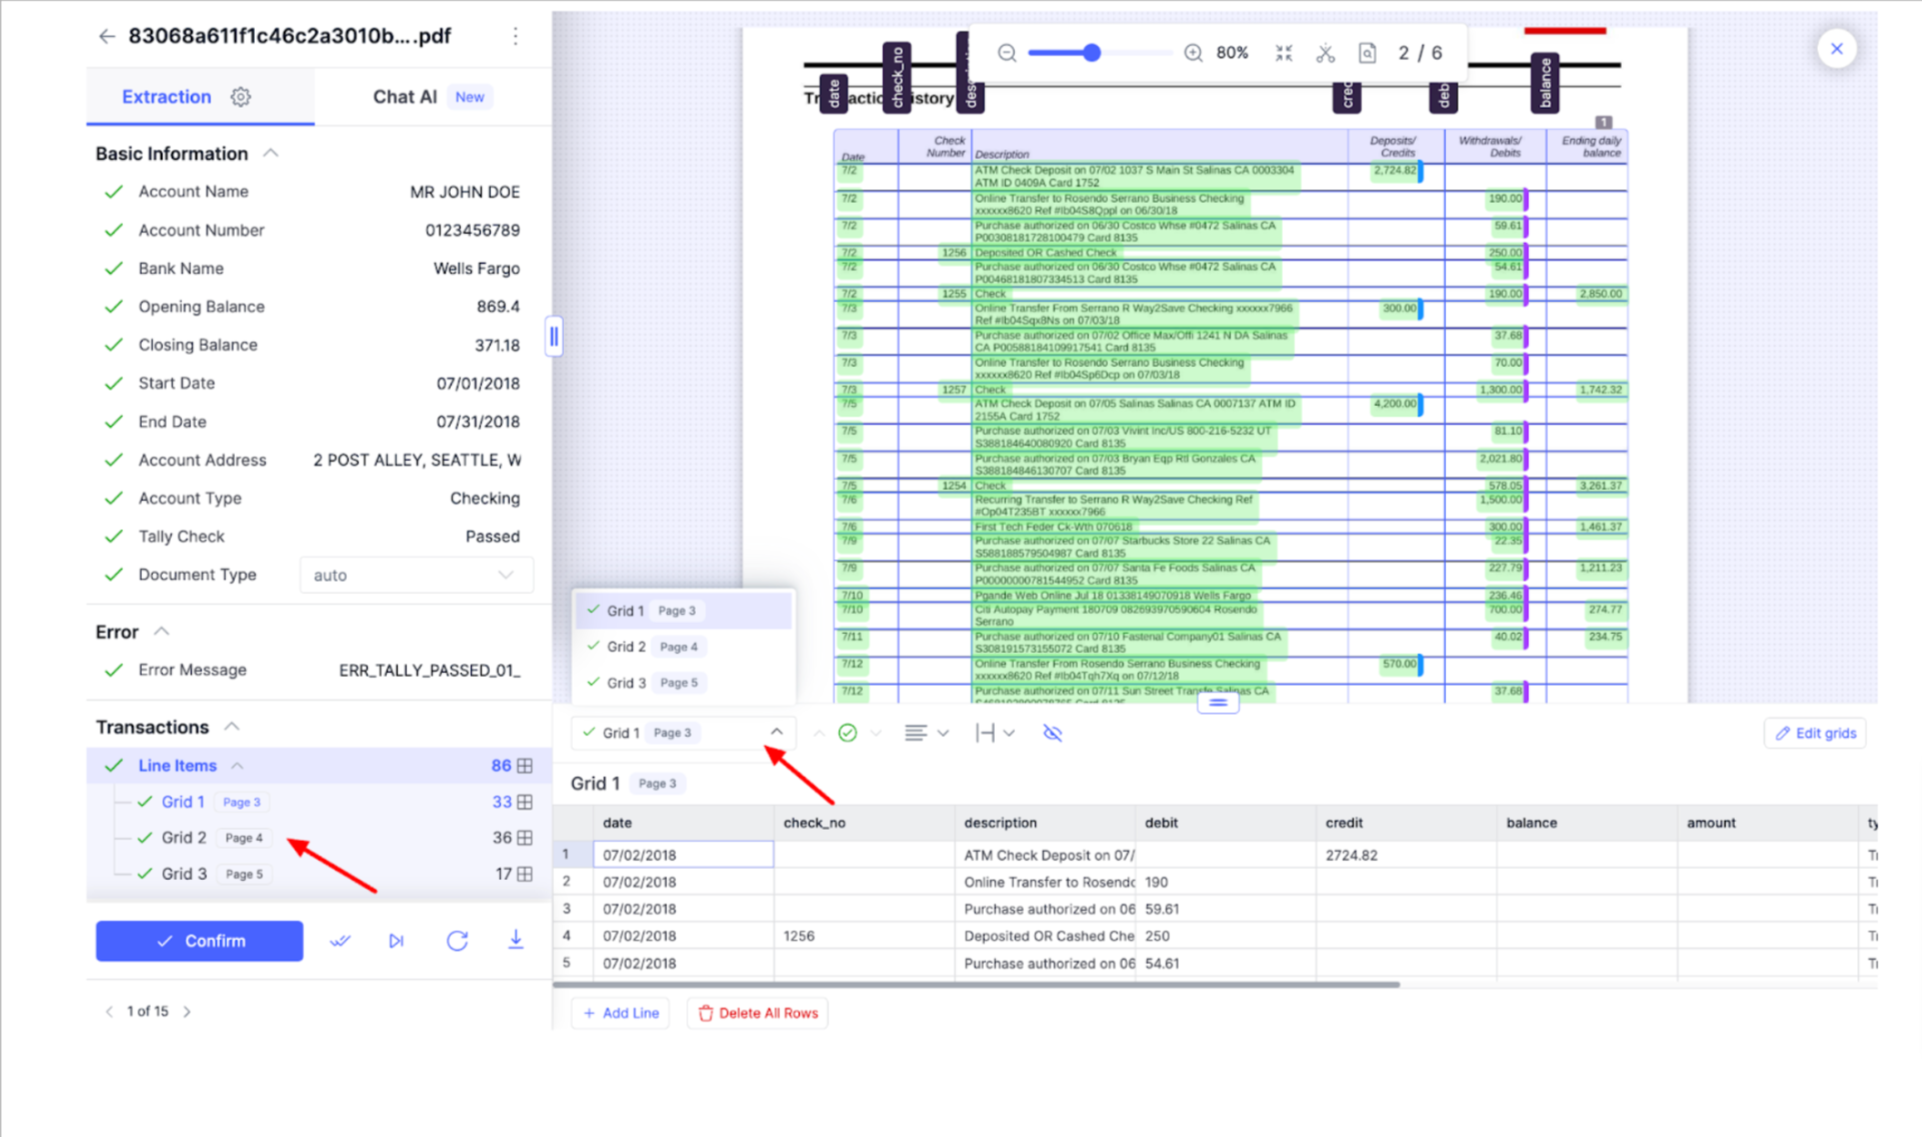
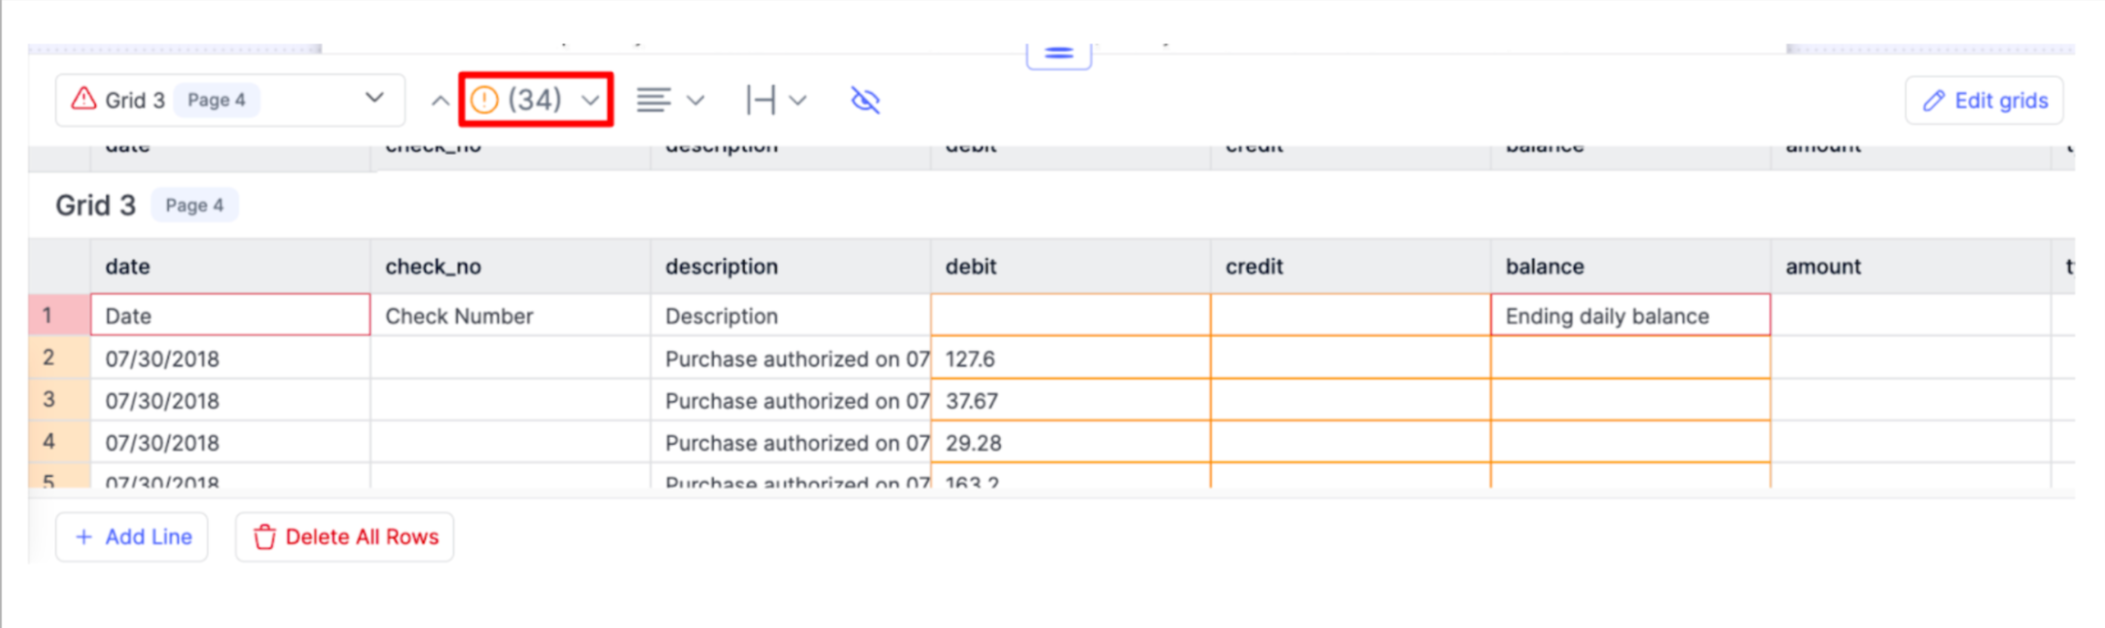
-
Click on ‘Confidence Navigation’ to navigate through the extracted fields and identify the fields with a low confidence score.
Happy data extraction!
Updated 8 months ago