Salesforce Integration
Overview
Integrate Docsumo with Salesforce to automate document processing and streamline data extraction. This guide provides step-by-step instructions for installing the package, configuring settings, and troubleshooting issues.
Key Benefits
✅ Automated data extraction from invoices, receipts, and documents
✅ Direct sync with Salesforce Objects (Leads, Contacts, Accounts, etc.)
✅ Custom field mapping for tailored workflows
✅ Error handling and validation before data sync
For a step-by-step walkthrough for using Docsumo-Salesforce integration, watch this video:

Prerequisites
Docsumo
- Plan: Enterprise. Learn more.
- Access:
- Admin access to Docsumo Webhook & API settings.
- A valid Docsumo API Key.
- Ability to generate an Auth Token for webhook authentication.
Salesforce
- Access:
- Admin access to Salesforce Setup to install packages and configure permissions.
- A Salesforce Site (required to receive webhook requests).
- Permissions to modify Custom Metadata Types, Apex Classes, and Flows.
Step 1: Install the Docsumo Package
Click the link below to install the Docsumo package in Salesforce: Learn more about managing packages in Salesforce.
- Log into Salesforce as an Admin.
- Click on the link above to install the package.
- Approve third-party access when prompted.
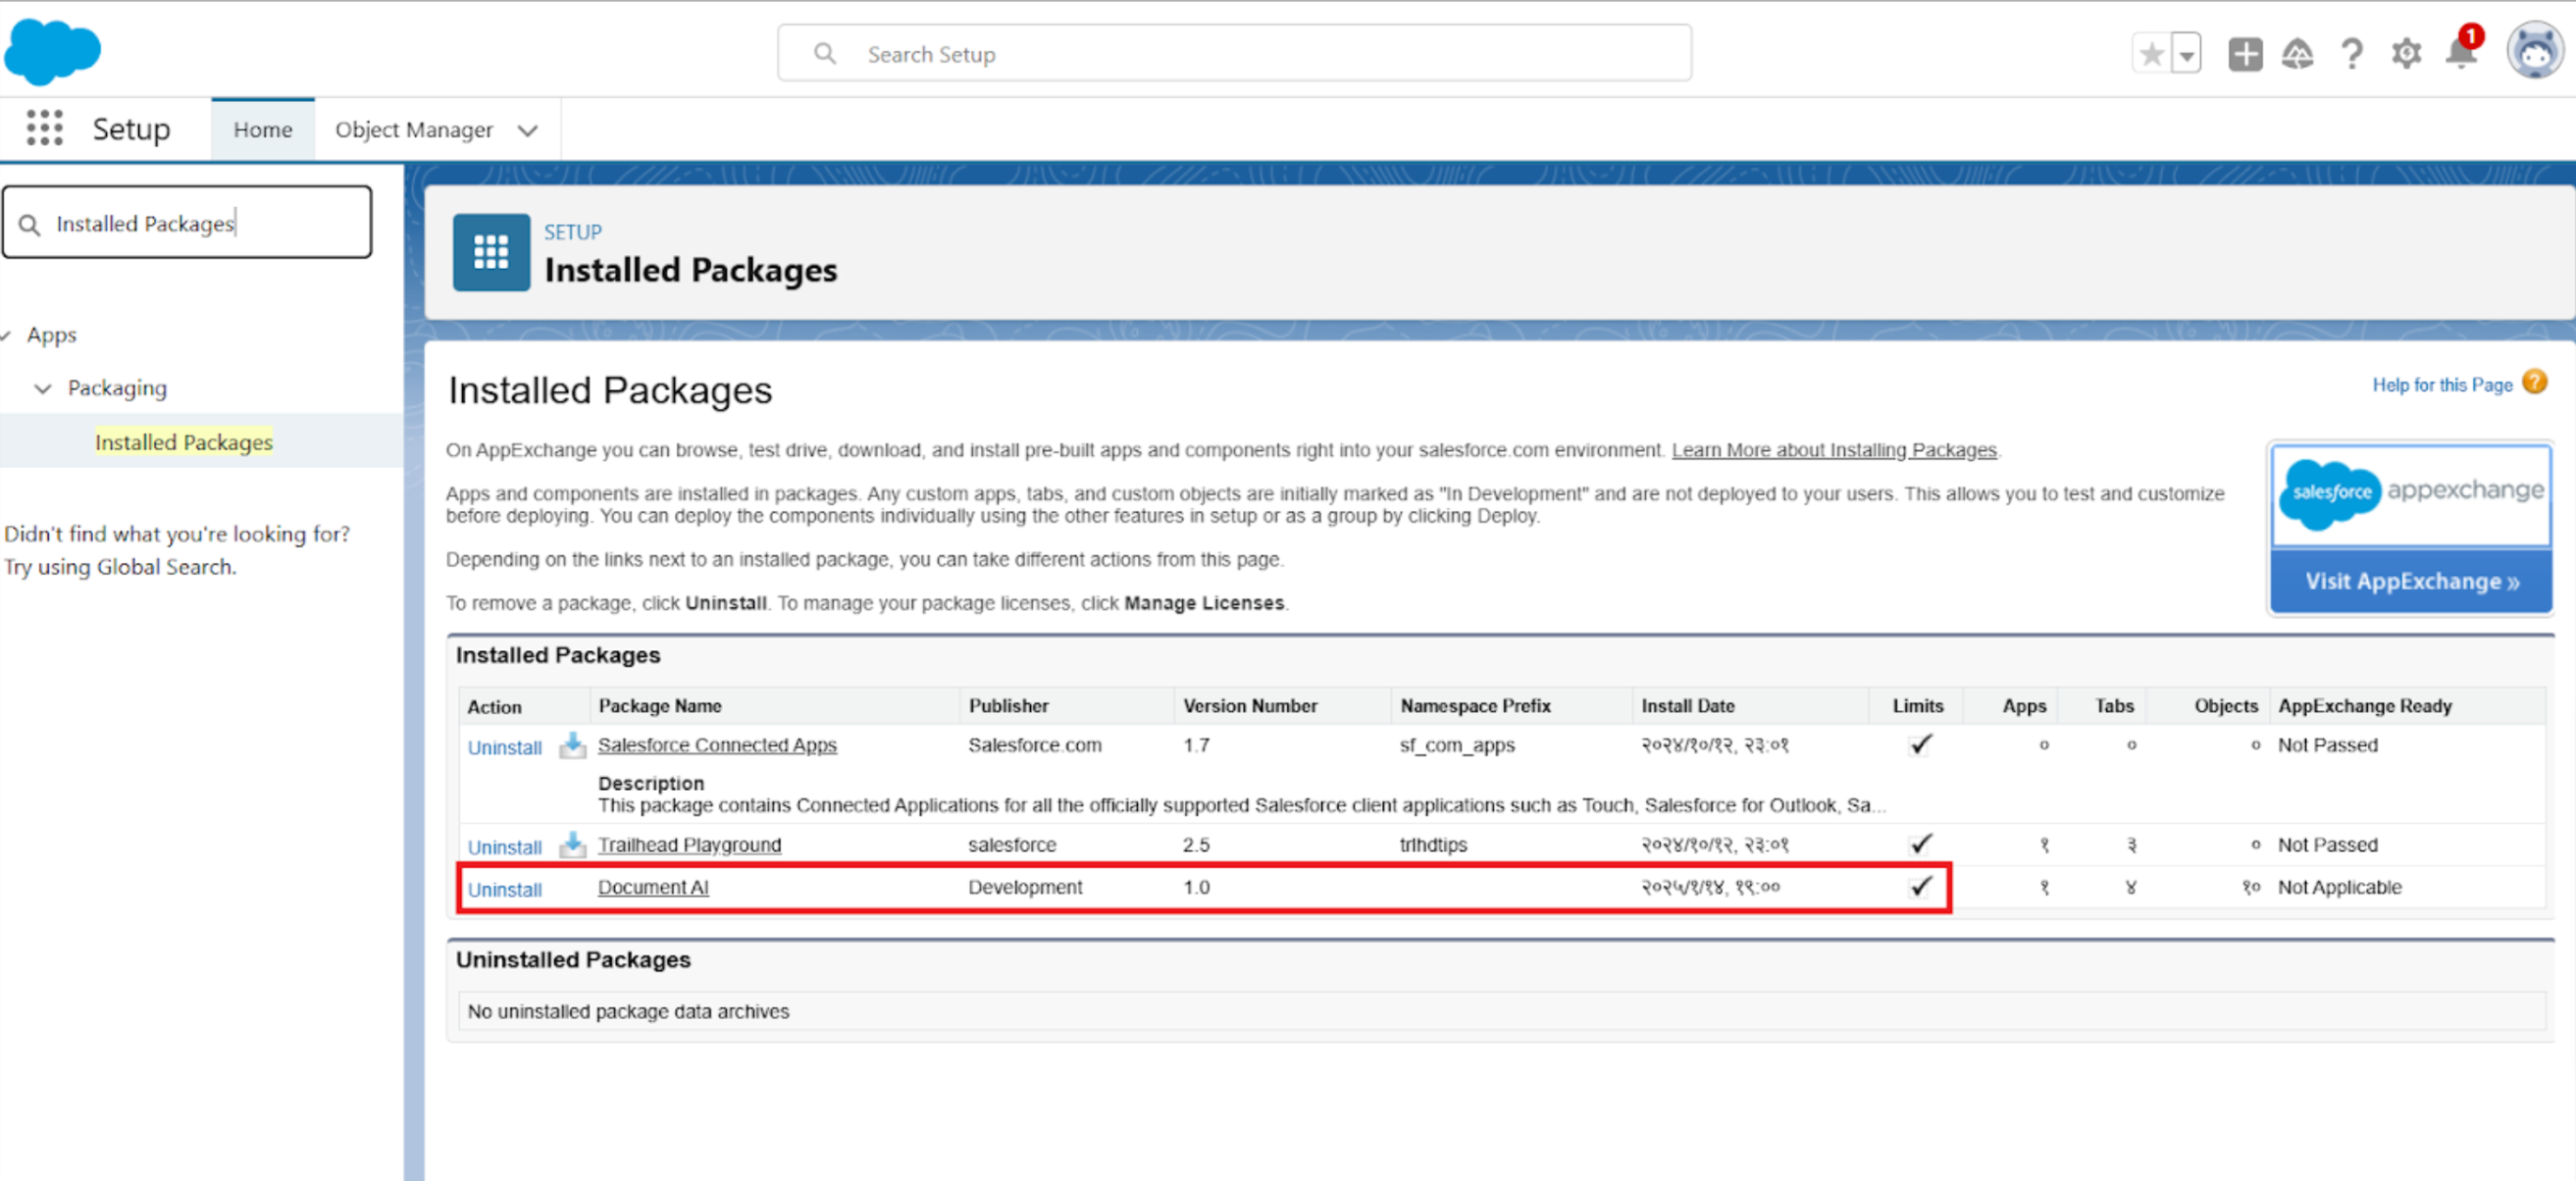
Once installed, verify the package from Setup and search Installed Packages.
Step 2: Manage Permissions & Access
Enable Site Access for Webhooks
- Go to Setup and click on Sites.
- Select an existing site or create a new one.
- Go to Public Access Settings then Apex Class Access.
- Grant access to
DocsumoWebhookHandler. - Click Save.
Configure Custom Metadata in Salesforce
- Go to Setup and then to Custom Metadata Types.
- Find Docsumo Config and create a new record (if not already present).
- Fill in the following details:
- Label:
docsumo - API Key: _Copy from Docsumo API settings_. More details in Step 3
- Auth Token: Generate your own and insert it here (used for webhook authentication).
- Base URL:
https://app.docsumo.com
- Label:
- Click Save.
Step 3: Configure Webhooks in Docsumo
-
Go to Docsumo Webhook & API settings.

-
Click Edit and enter the following details:
-
Webhook URL:
-
Find your Salesforce Site URL in Setup → Sites.
-
For example, the Salesforce Site URL will be something like this.
https://<your-site-url>/services/apexrest/webhook-handler/
-
-
Headers:
- Add a key
x-custom-authwith the value as the Auth Token (saved in Salesforce Custom Metadata).
- Add a key
-
-
Click Save.
Step 4: Run the Application in Salesforce
Option 1: Use the Salesforce search option
- Search for "Document AI" in the Salesforce search bar.
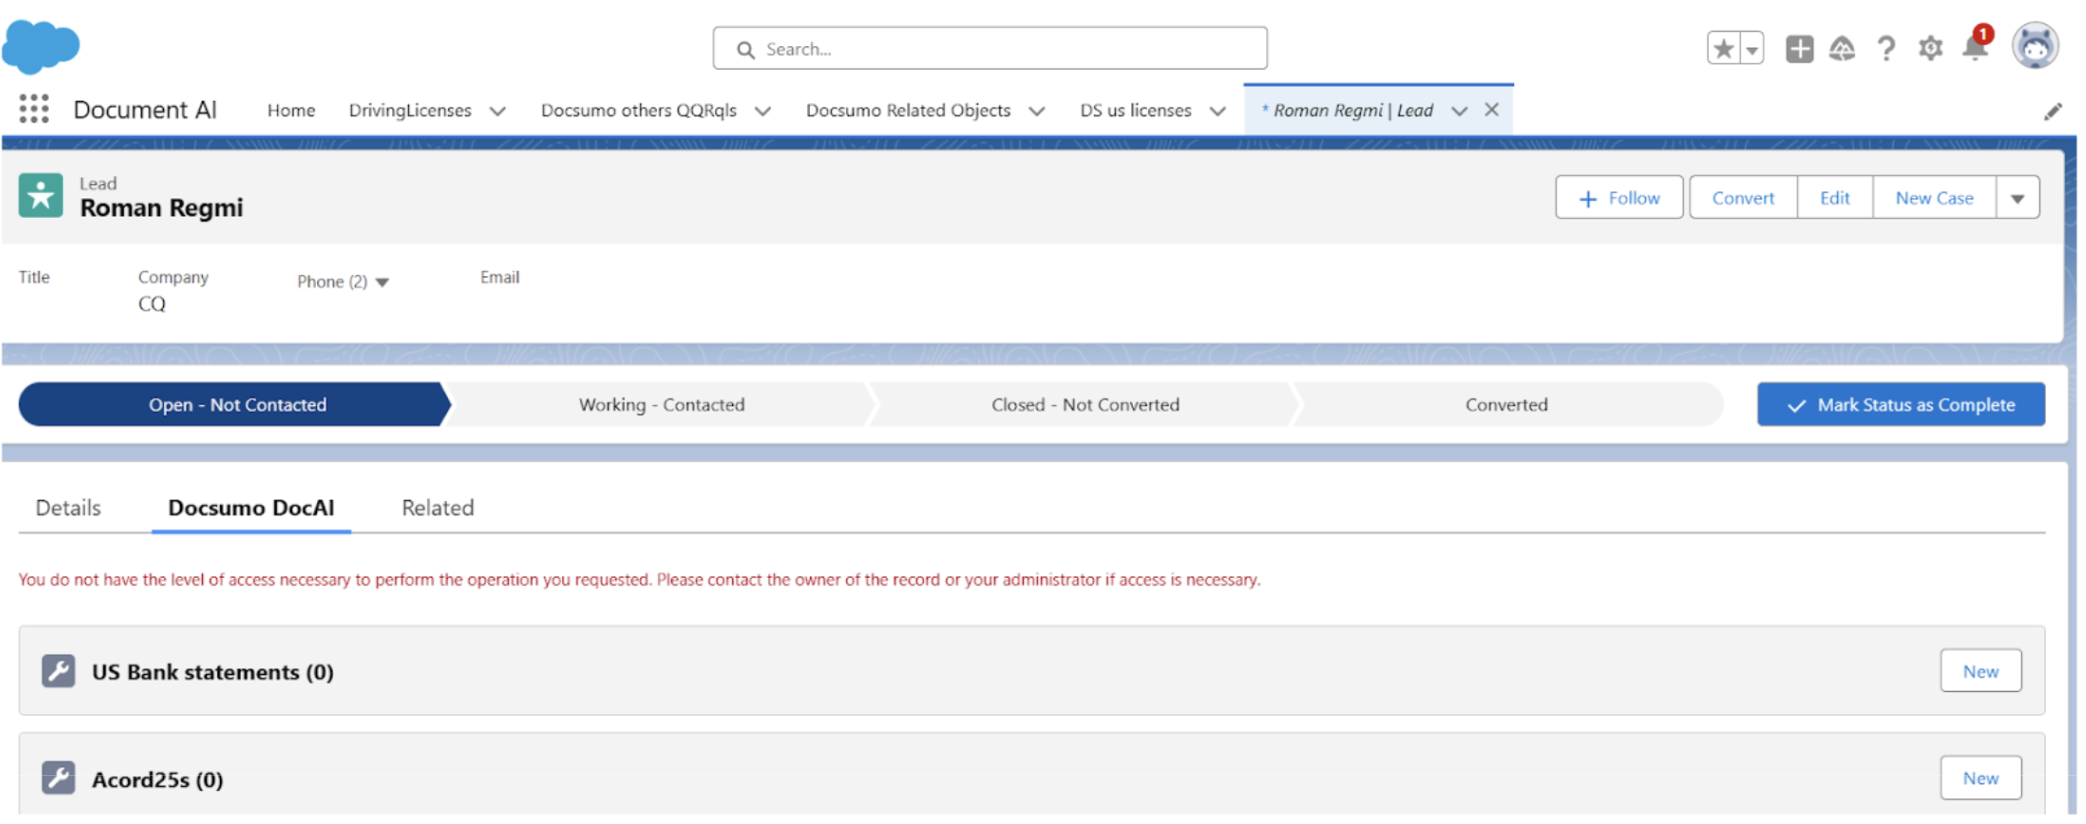
- Navigate to Leads Page and then to Document AI Leads Tab.
- You should see Docsumo Doc AI as an option.
Option 2: Customize in Leads Record Page
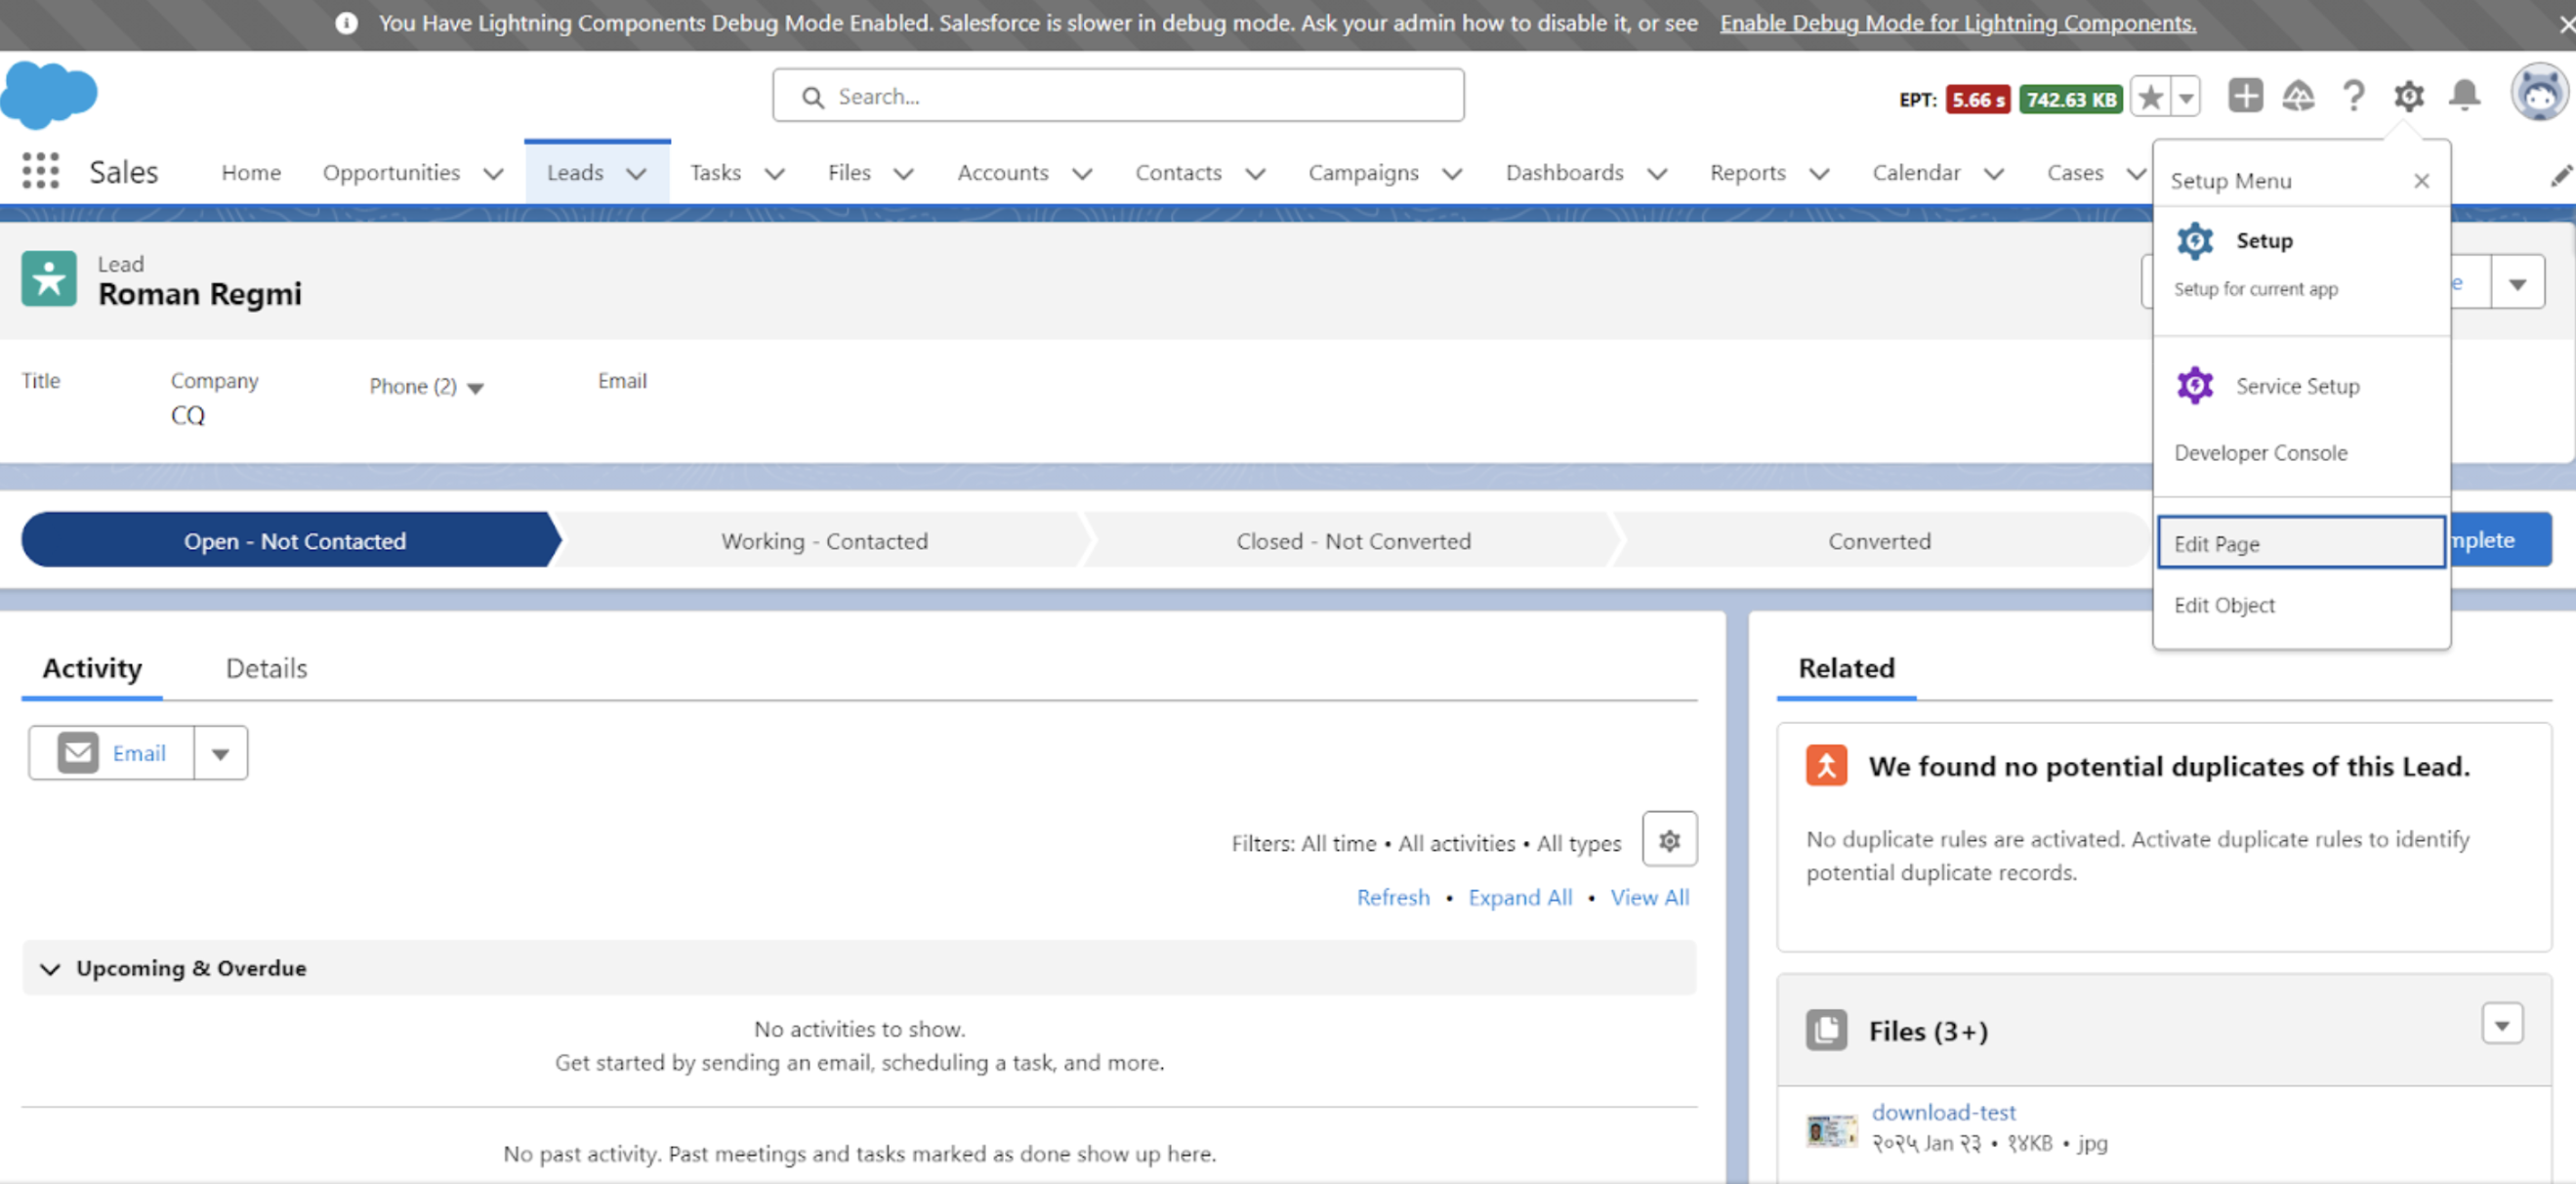
-
Open any Leads record.
-
Click on Settings then on Edit Page.
-
Click the component where you want to add the Docsumo flow.
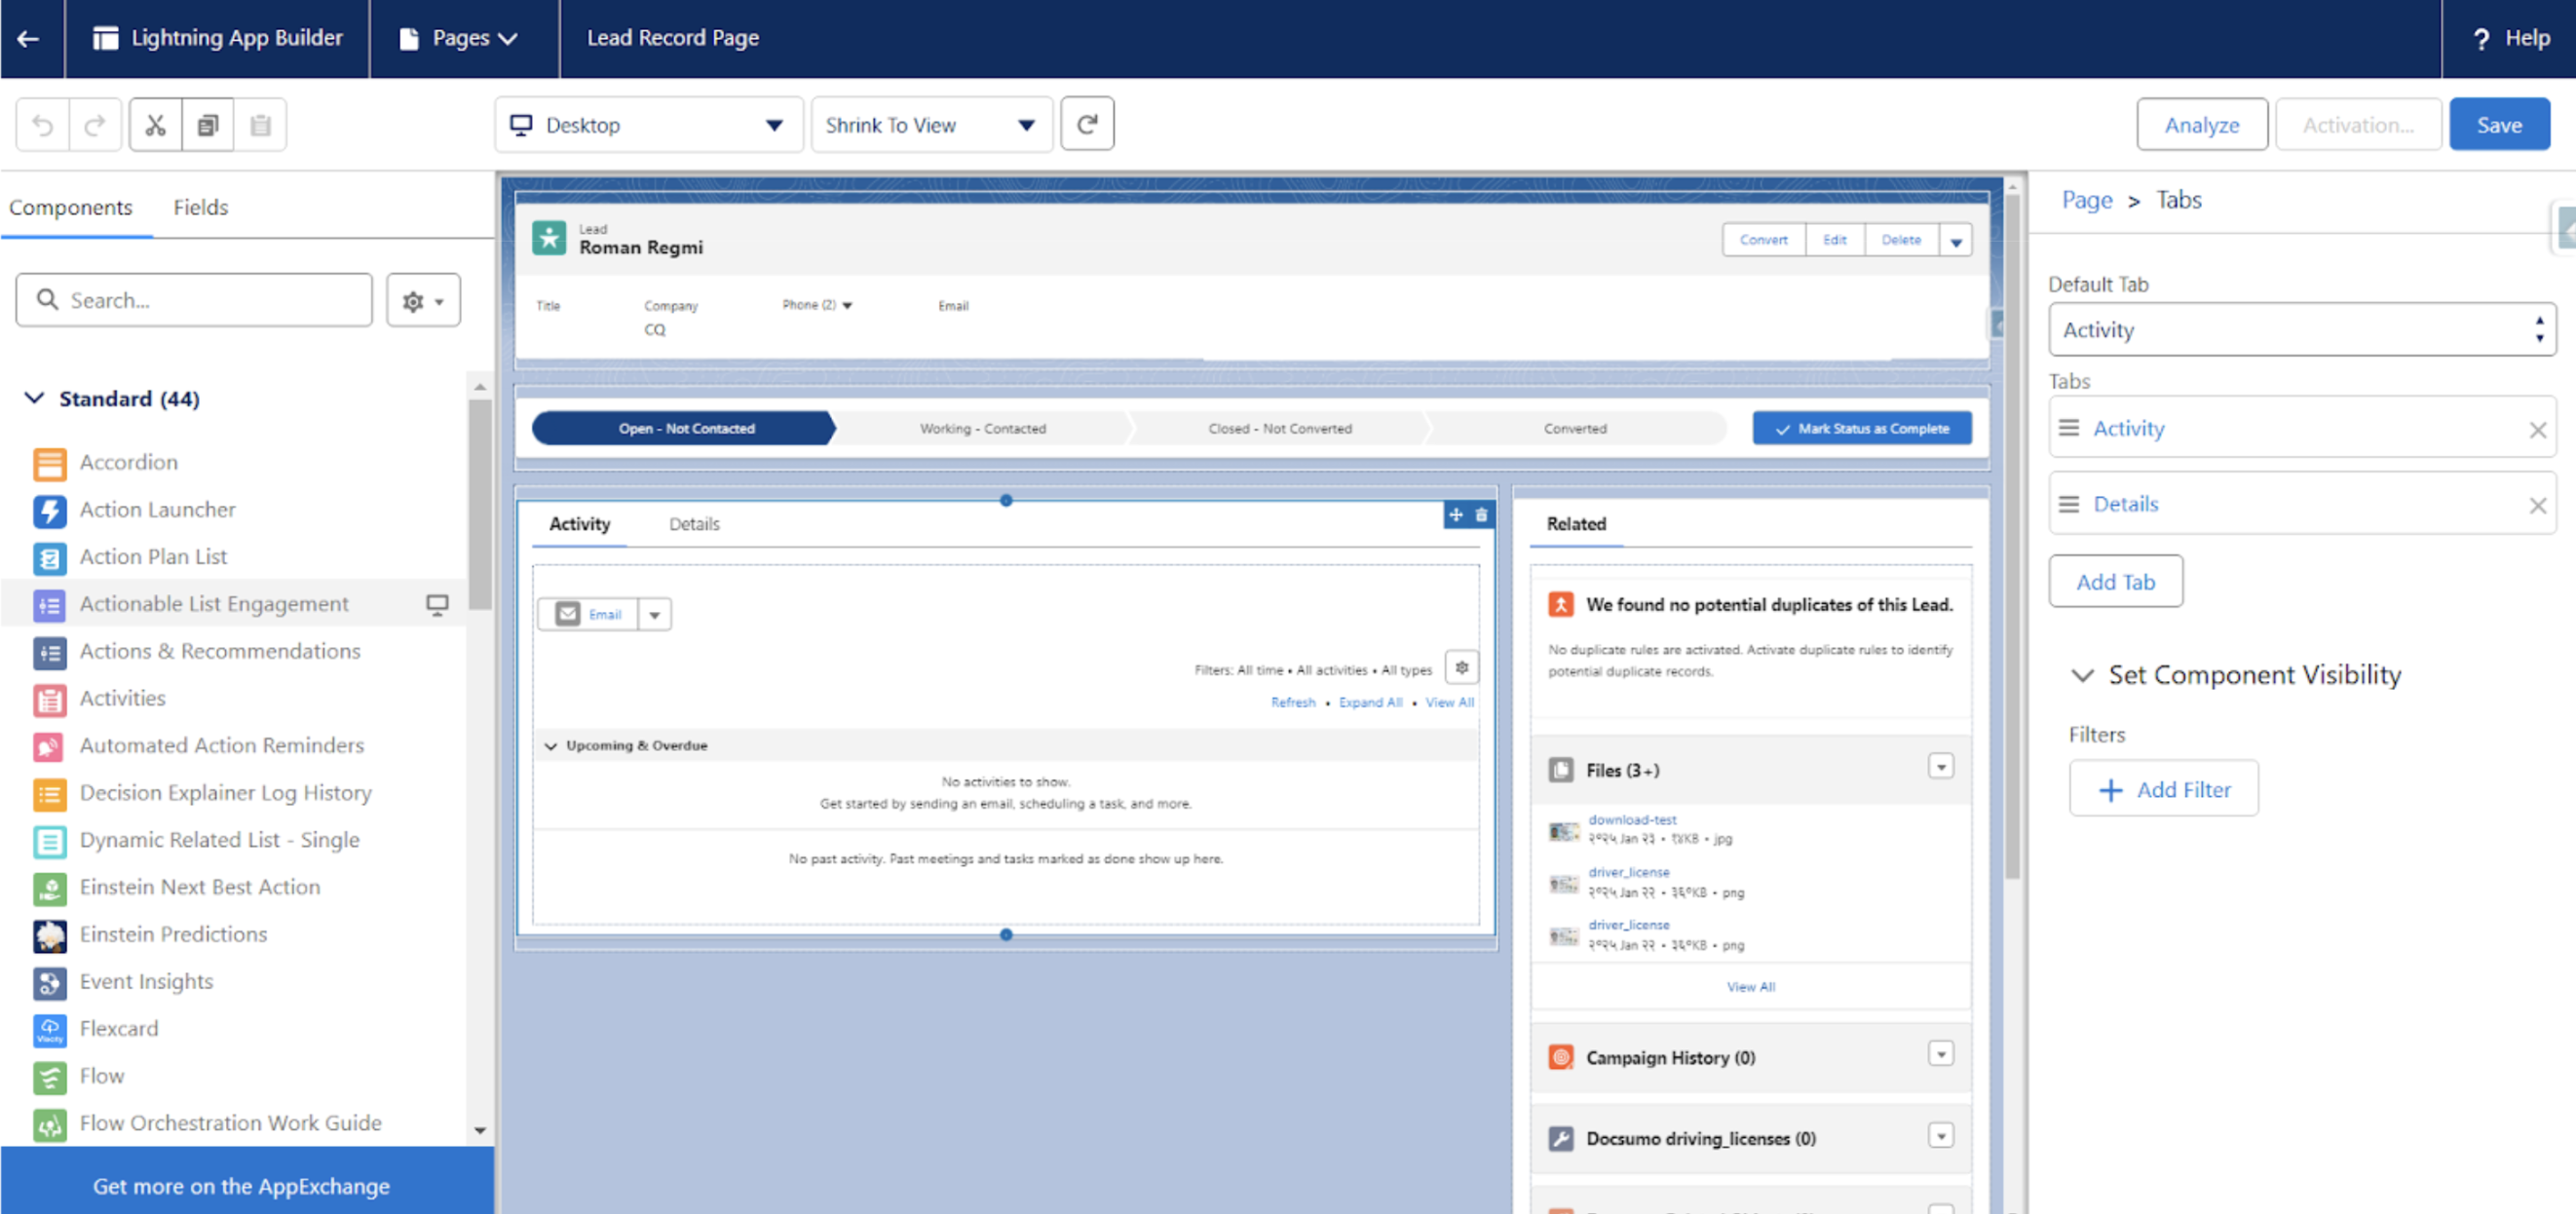
-
Click Add Tab, Select Custom and Name it as
Document AI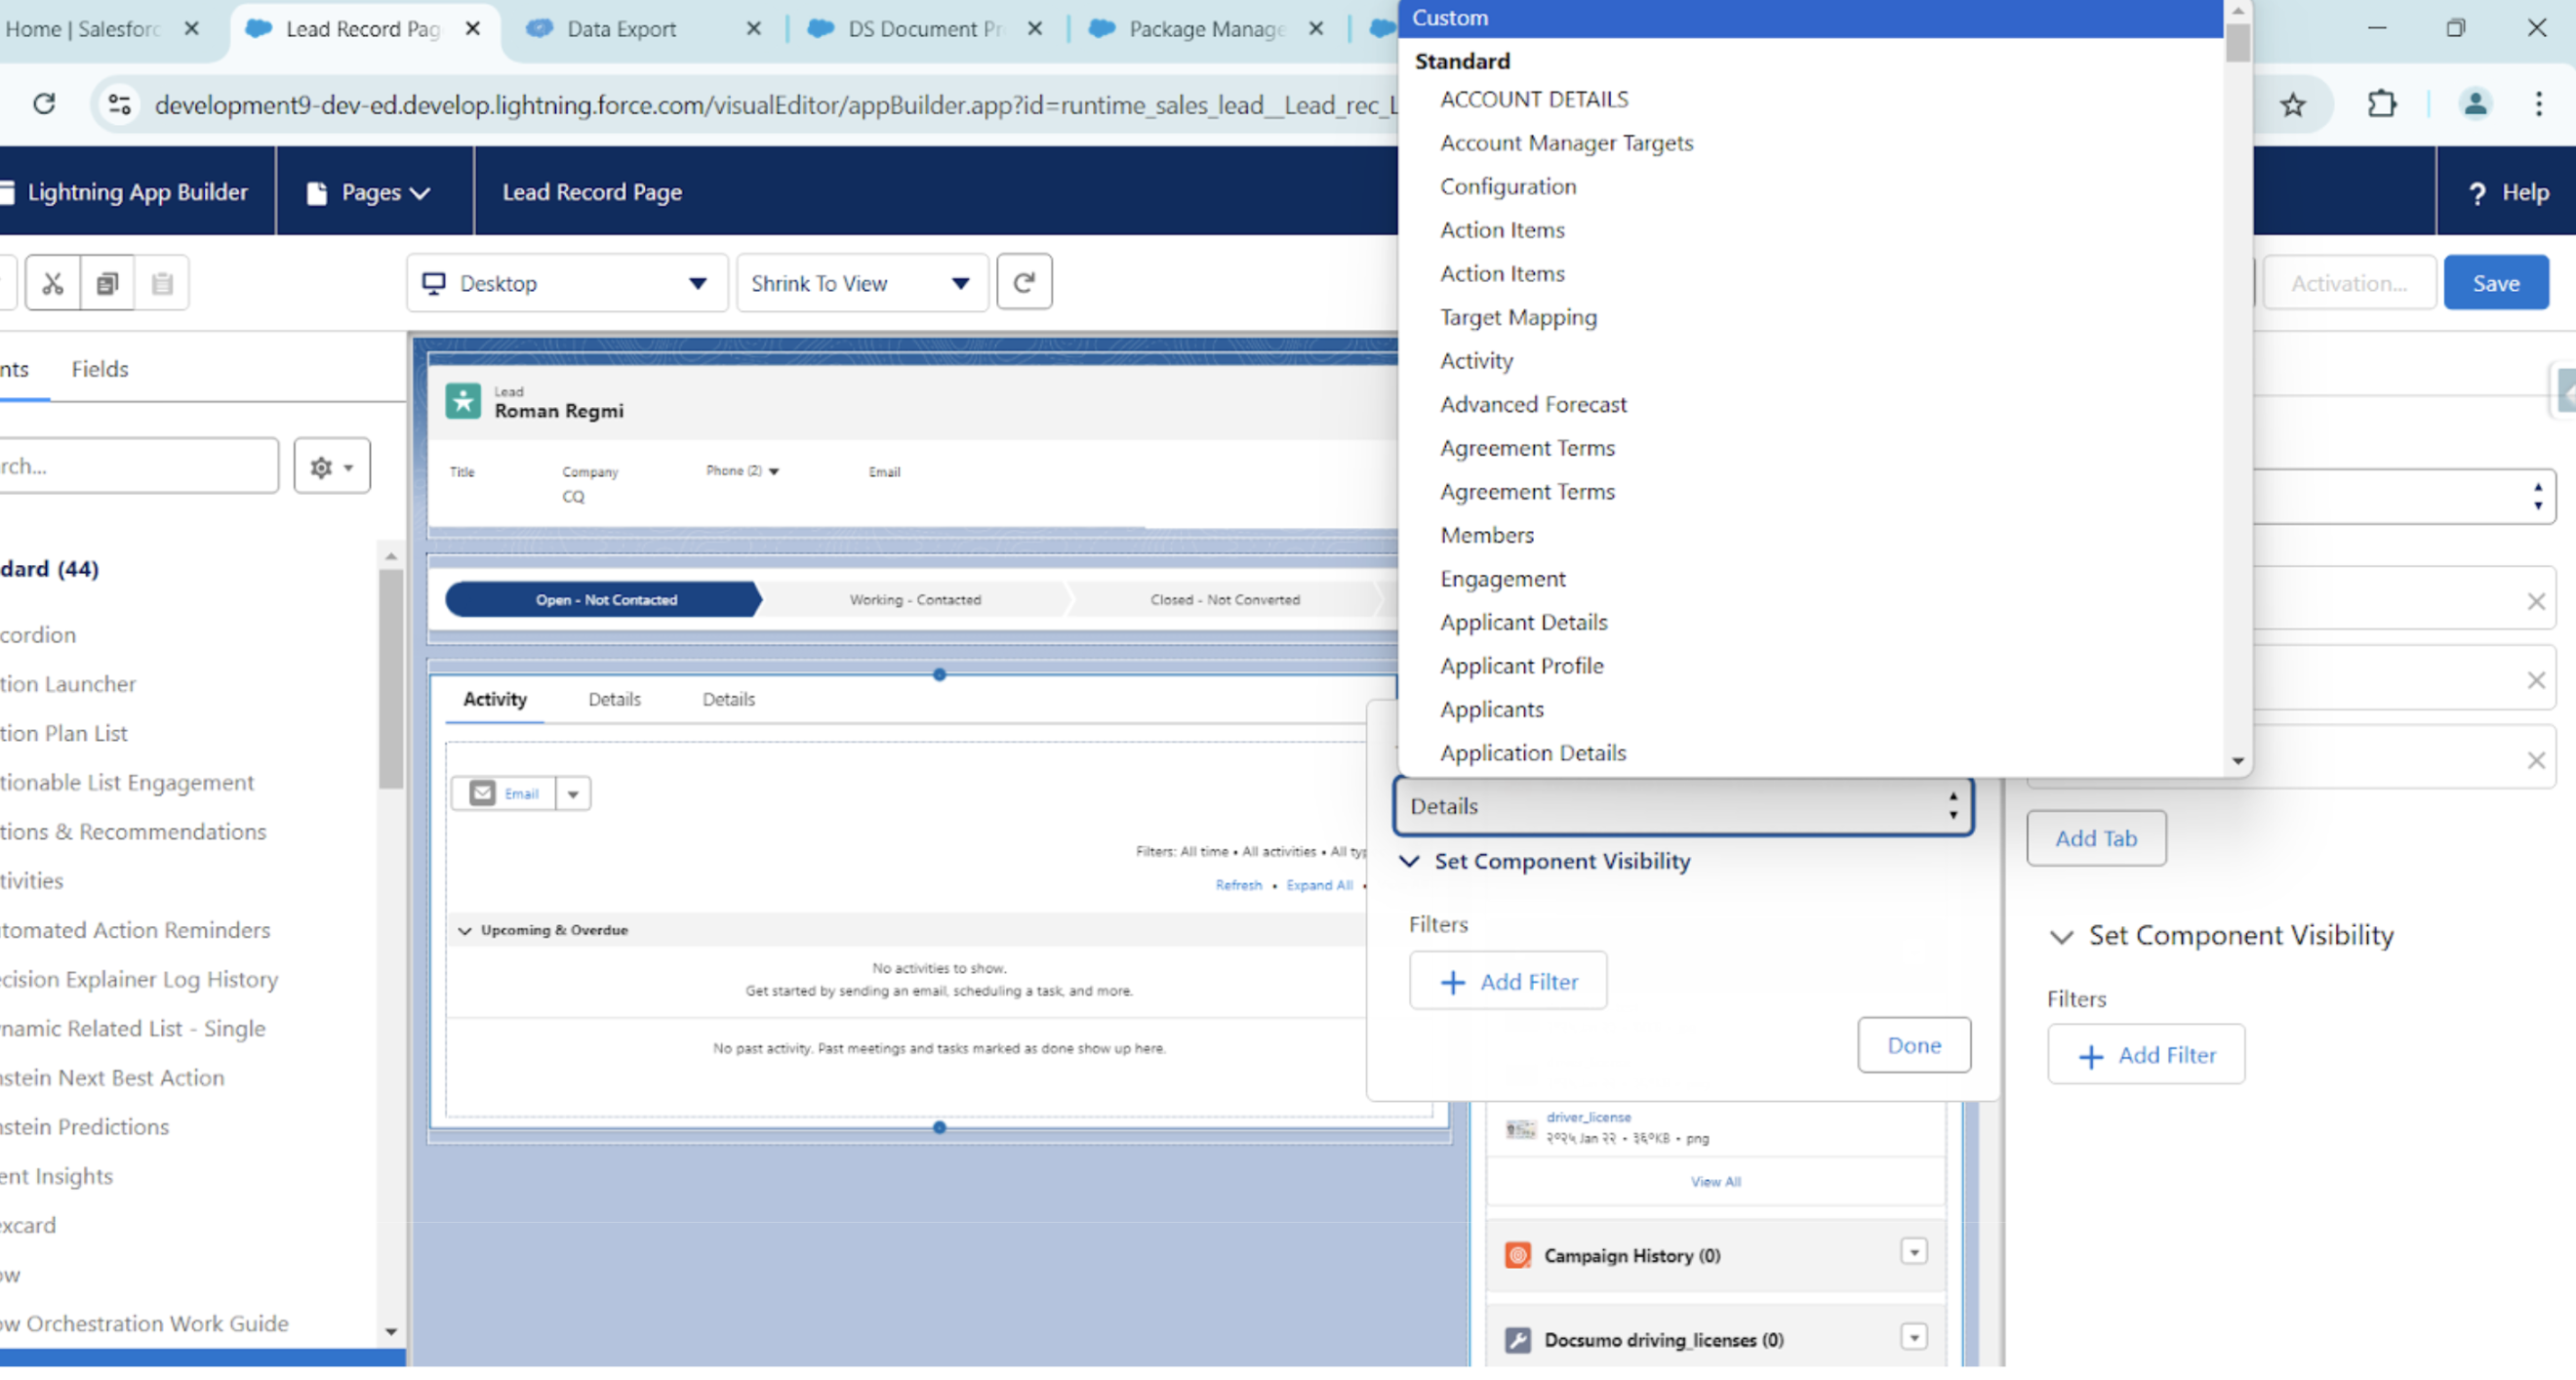
-
Select the Document AI Tab and Search for Flow in the left panel.
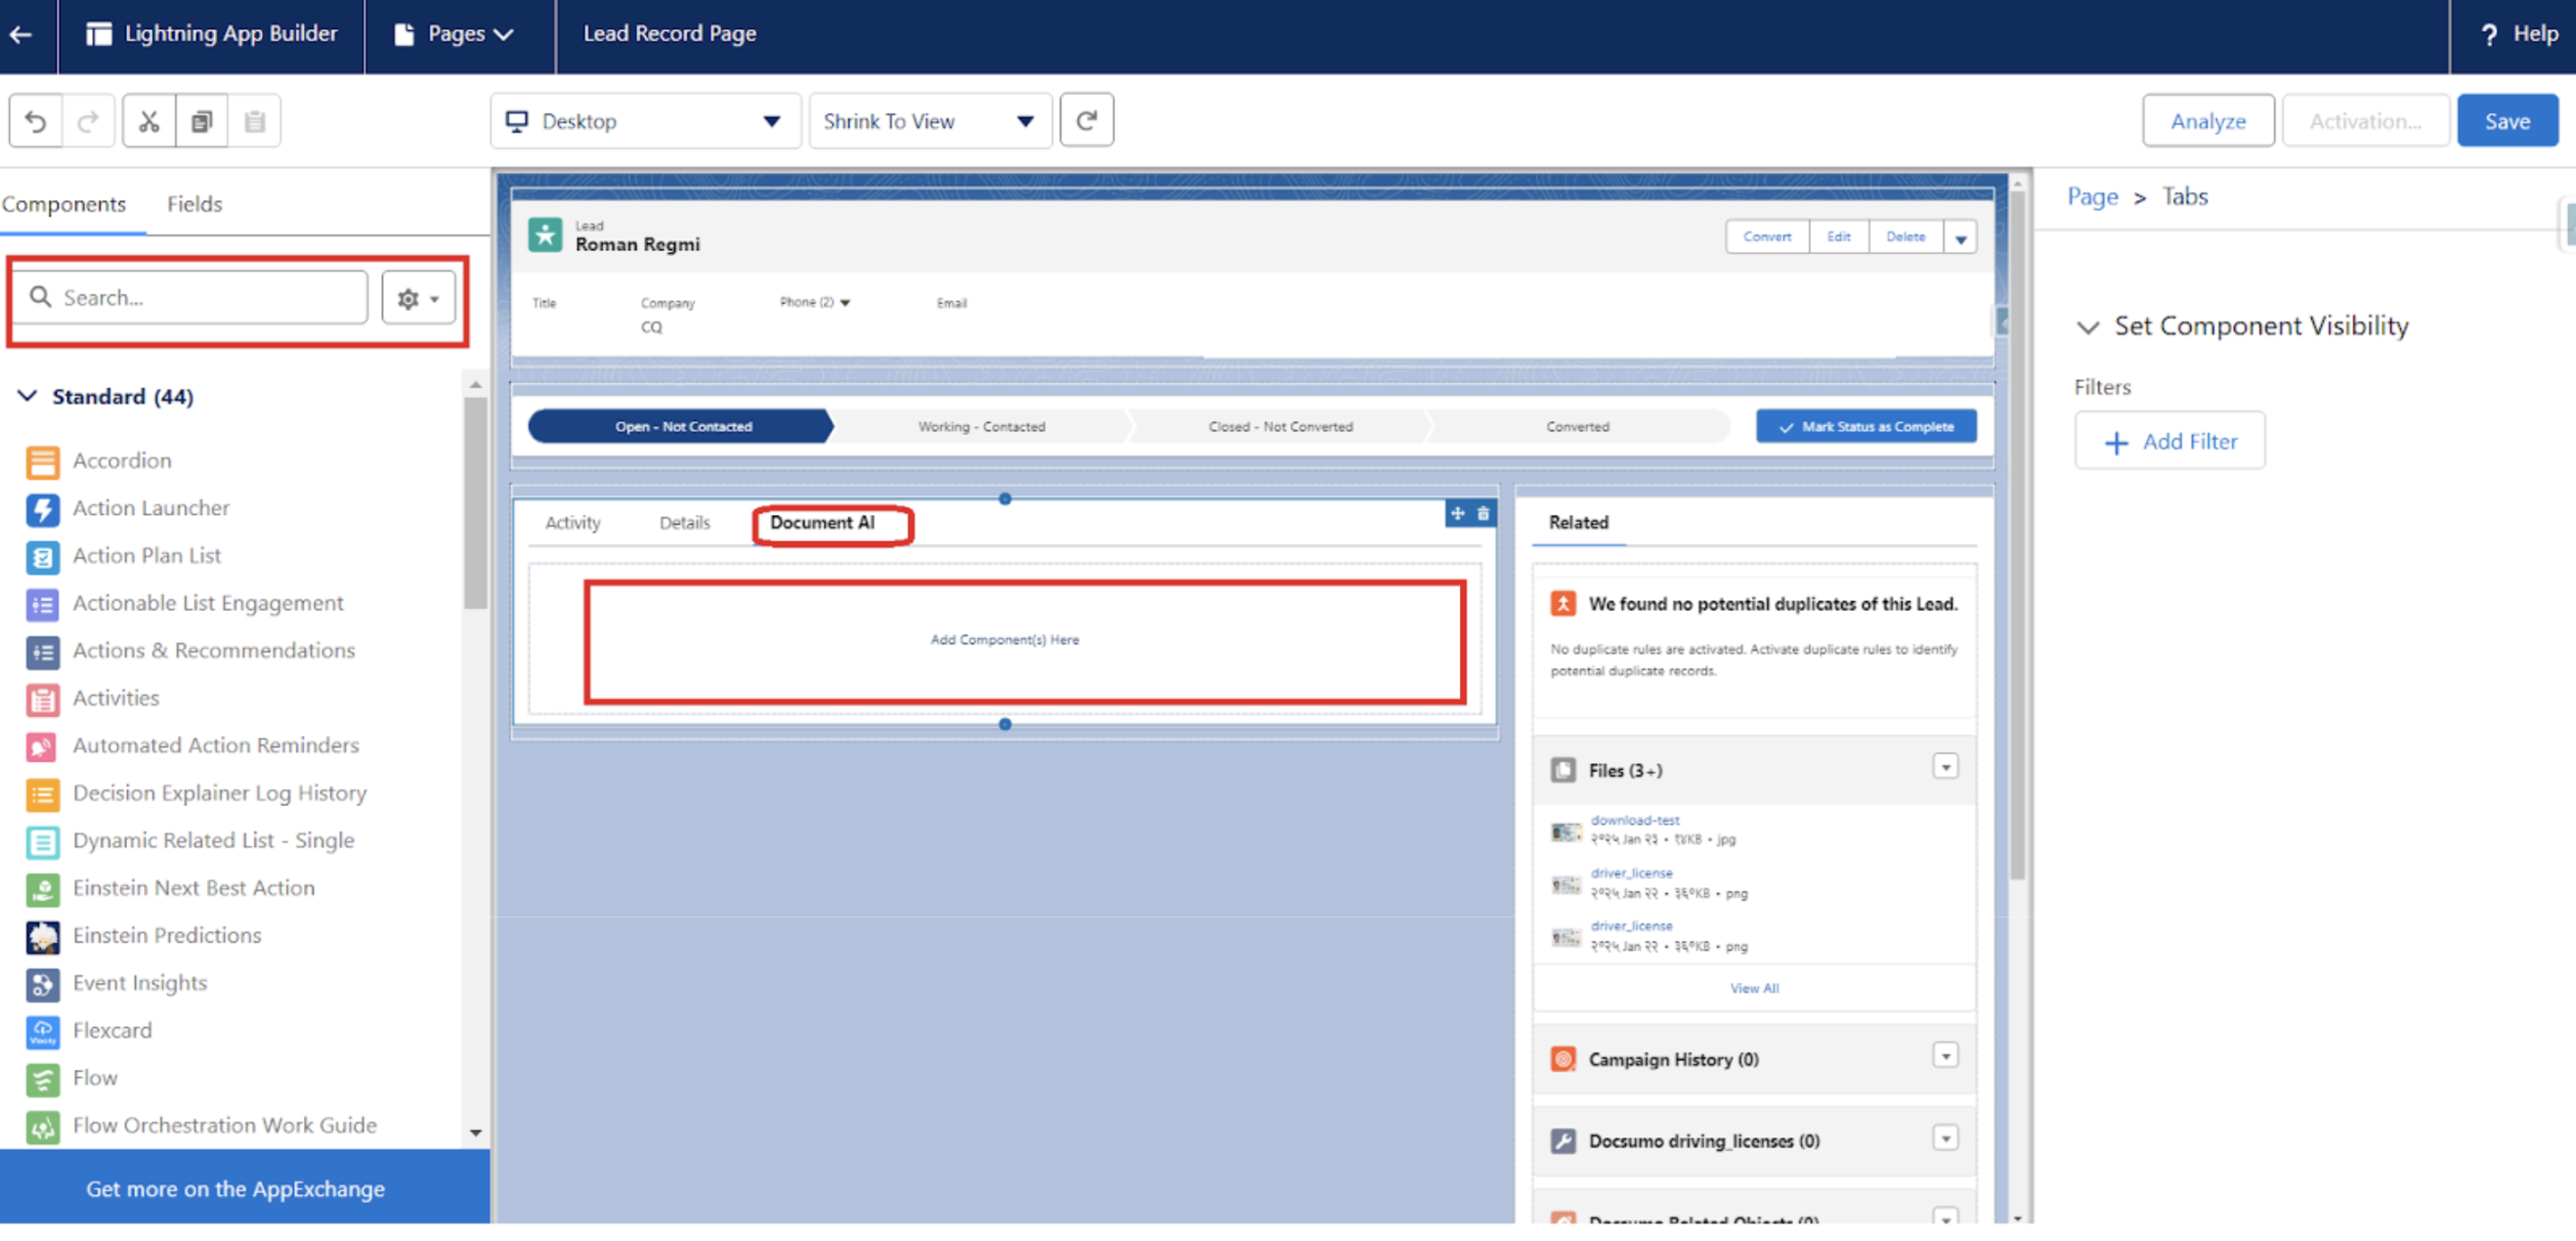
-
Drag & drop the Flow Component into the Document AI section.

-
Select DS Document Process Flow from the right panel. (Ensure the flow is active.)
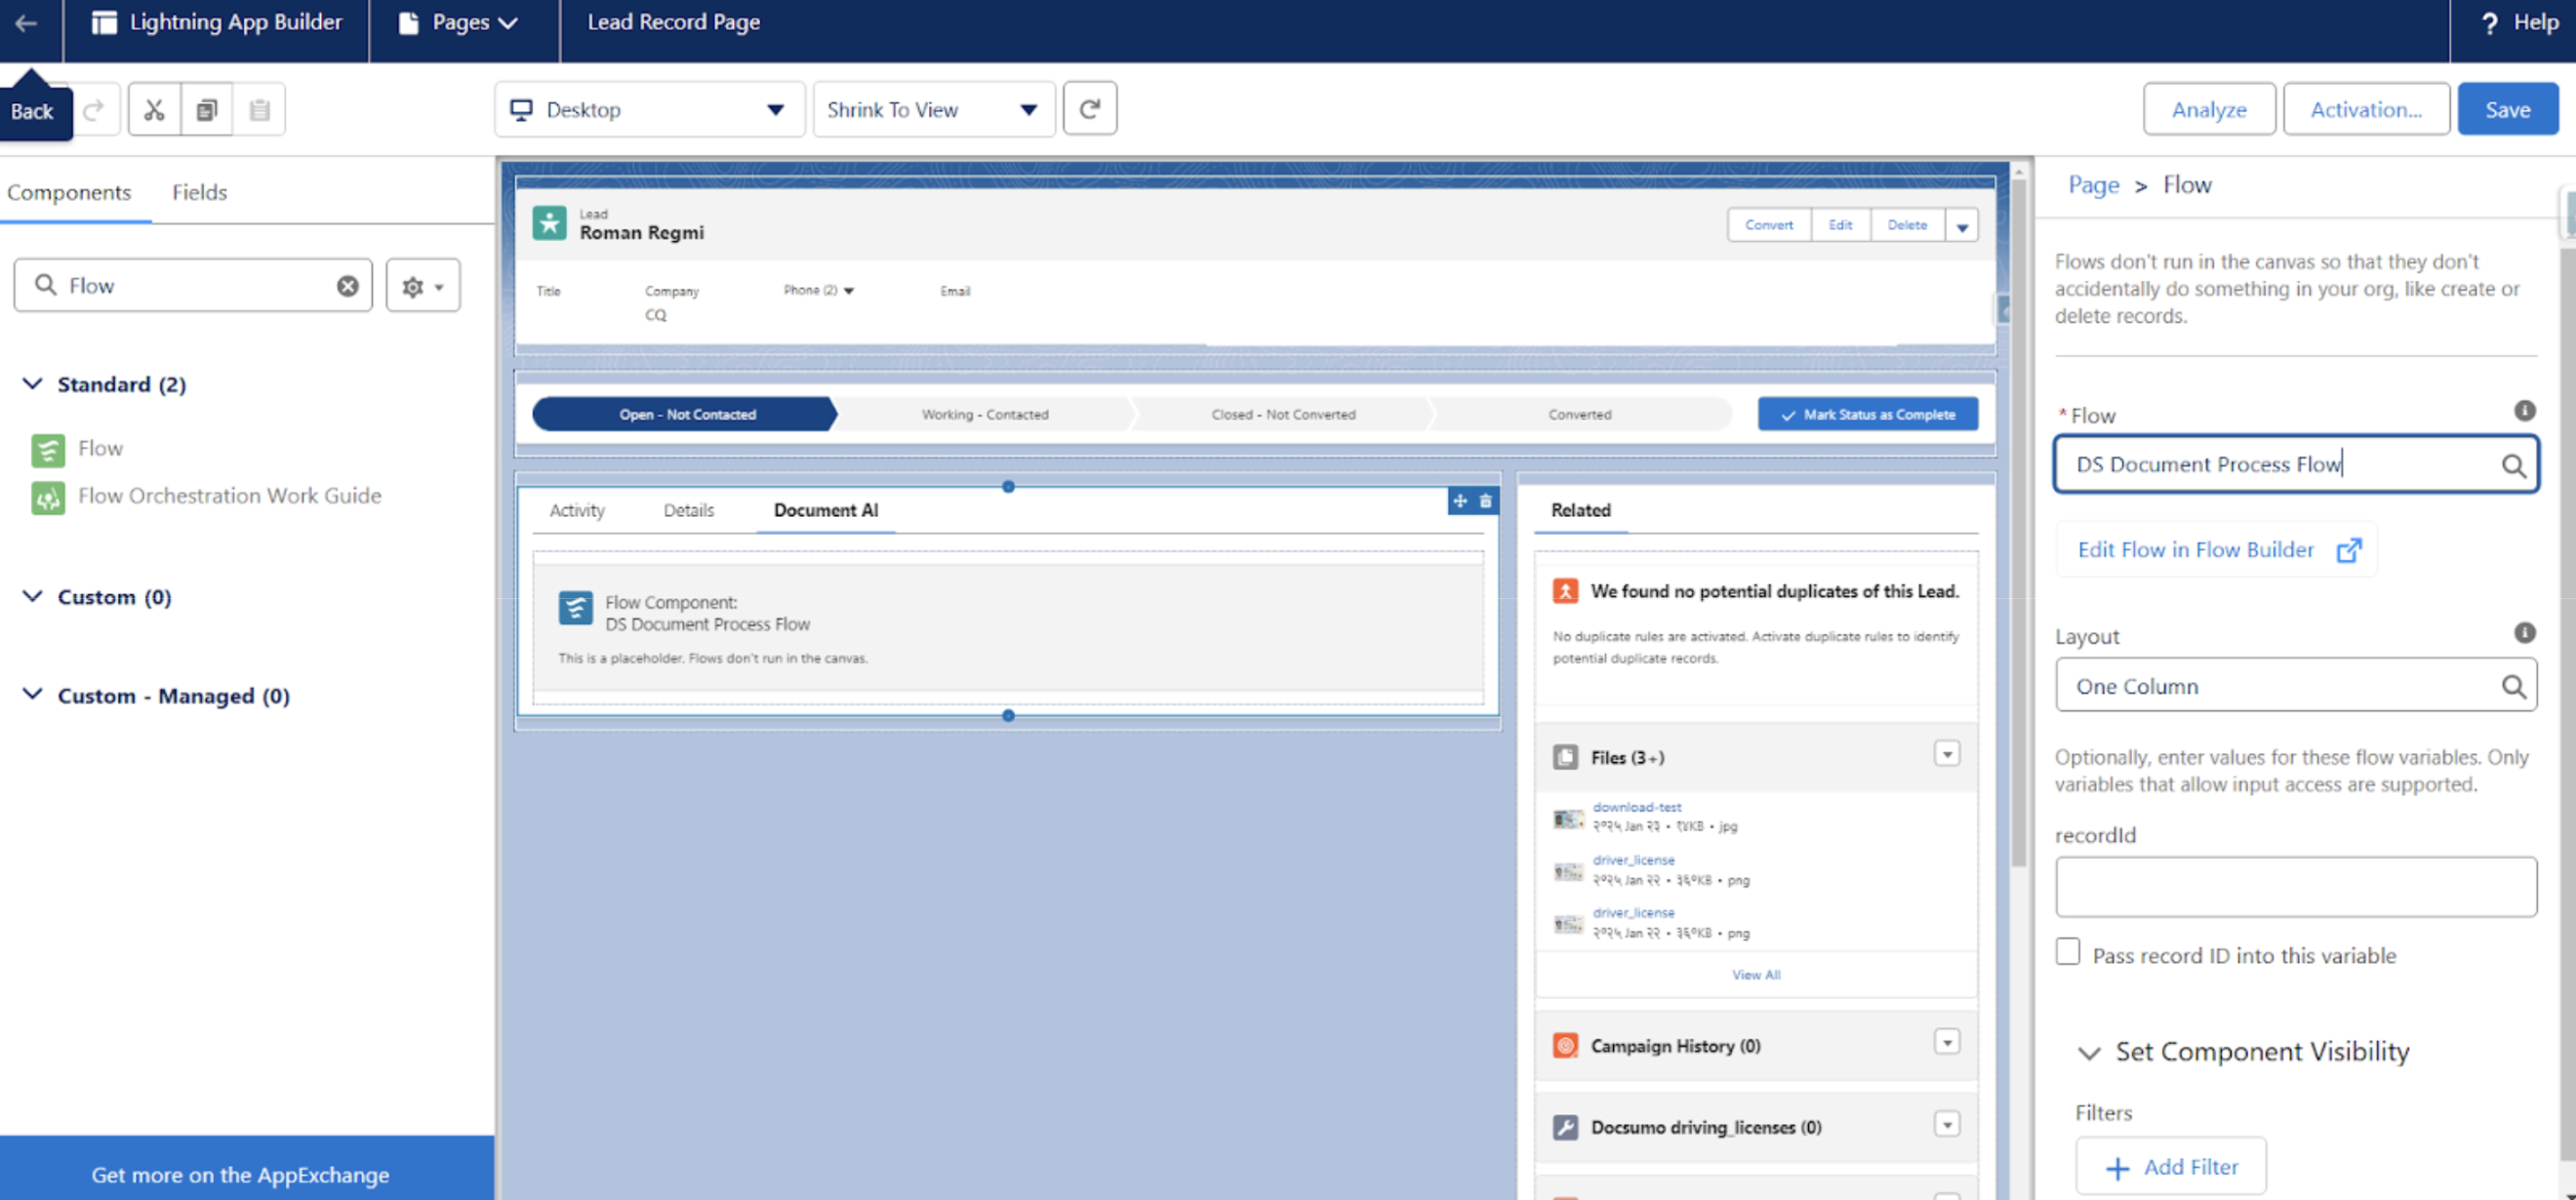
-
Click Save & Activate.
Troubleshooting & Common Issues
Issue 1: Document AI Tabs Not Visible
Cause: Incorrect homepage assignment.
Solution: Ensure you are accessing the Document AI application context in Salesforce.
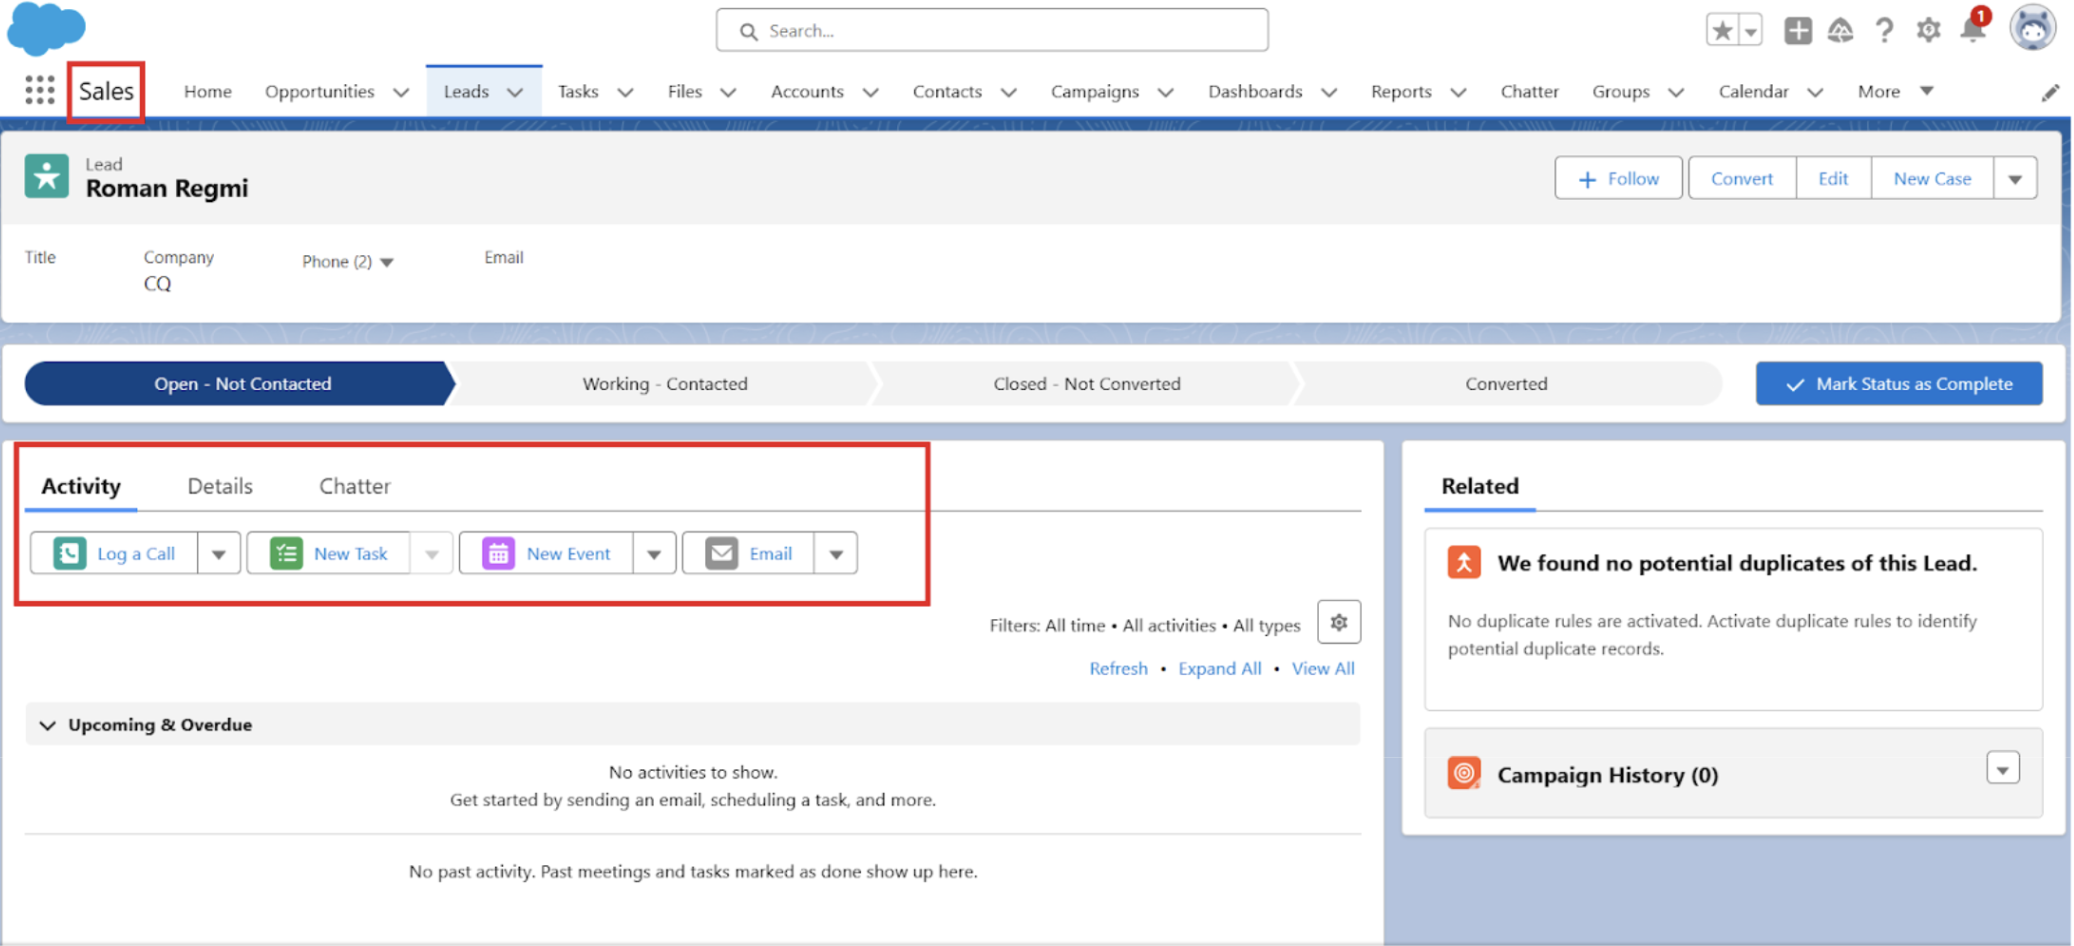
For the same record, the Leads record page only showed the flow and related lists when opened from the context of the Document AI application.
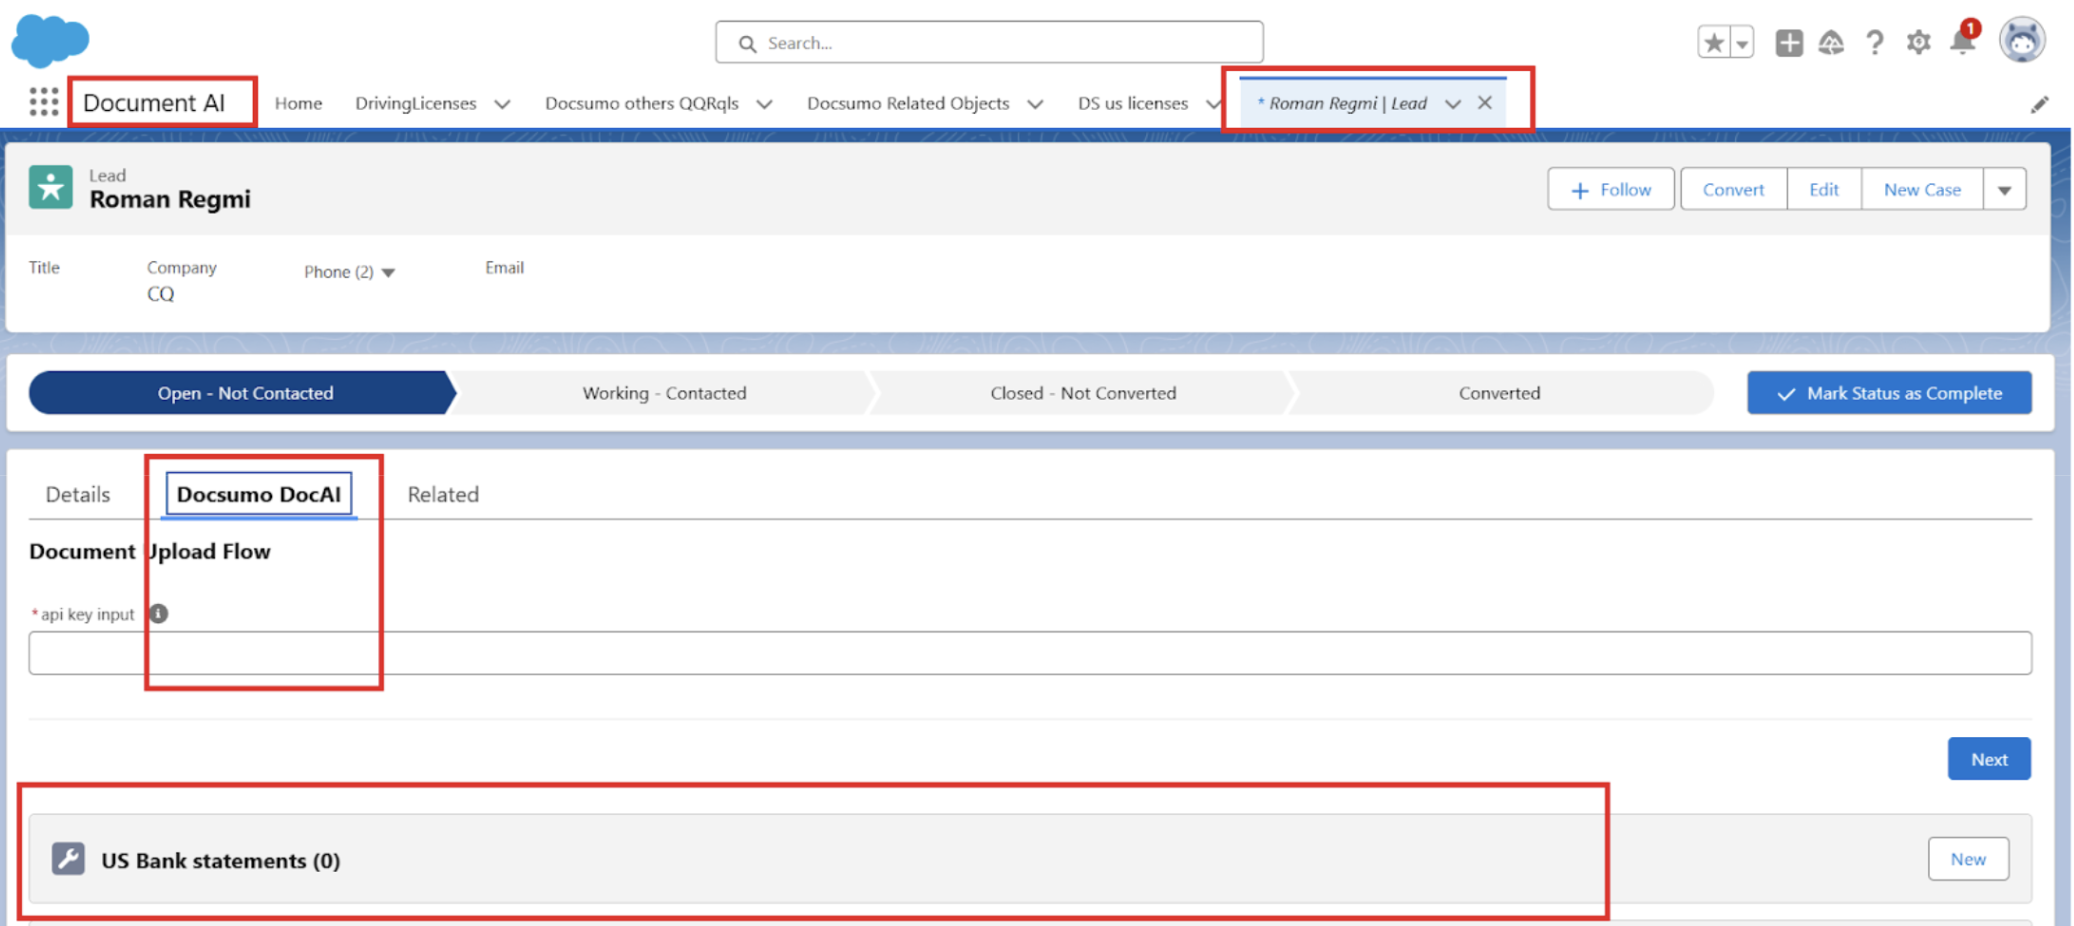
When opened from the context of any other application, a different record page is shown.
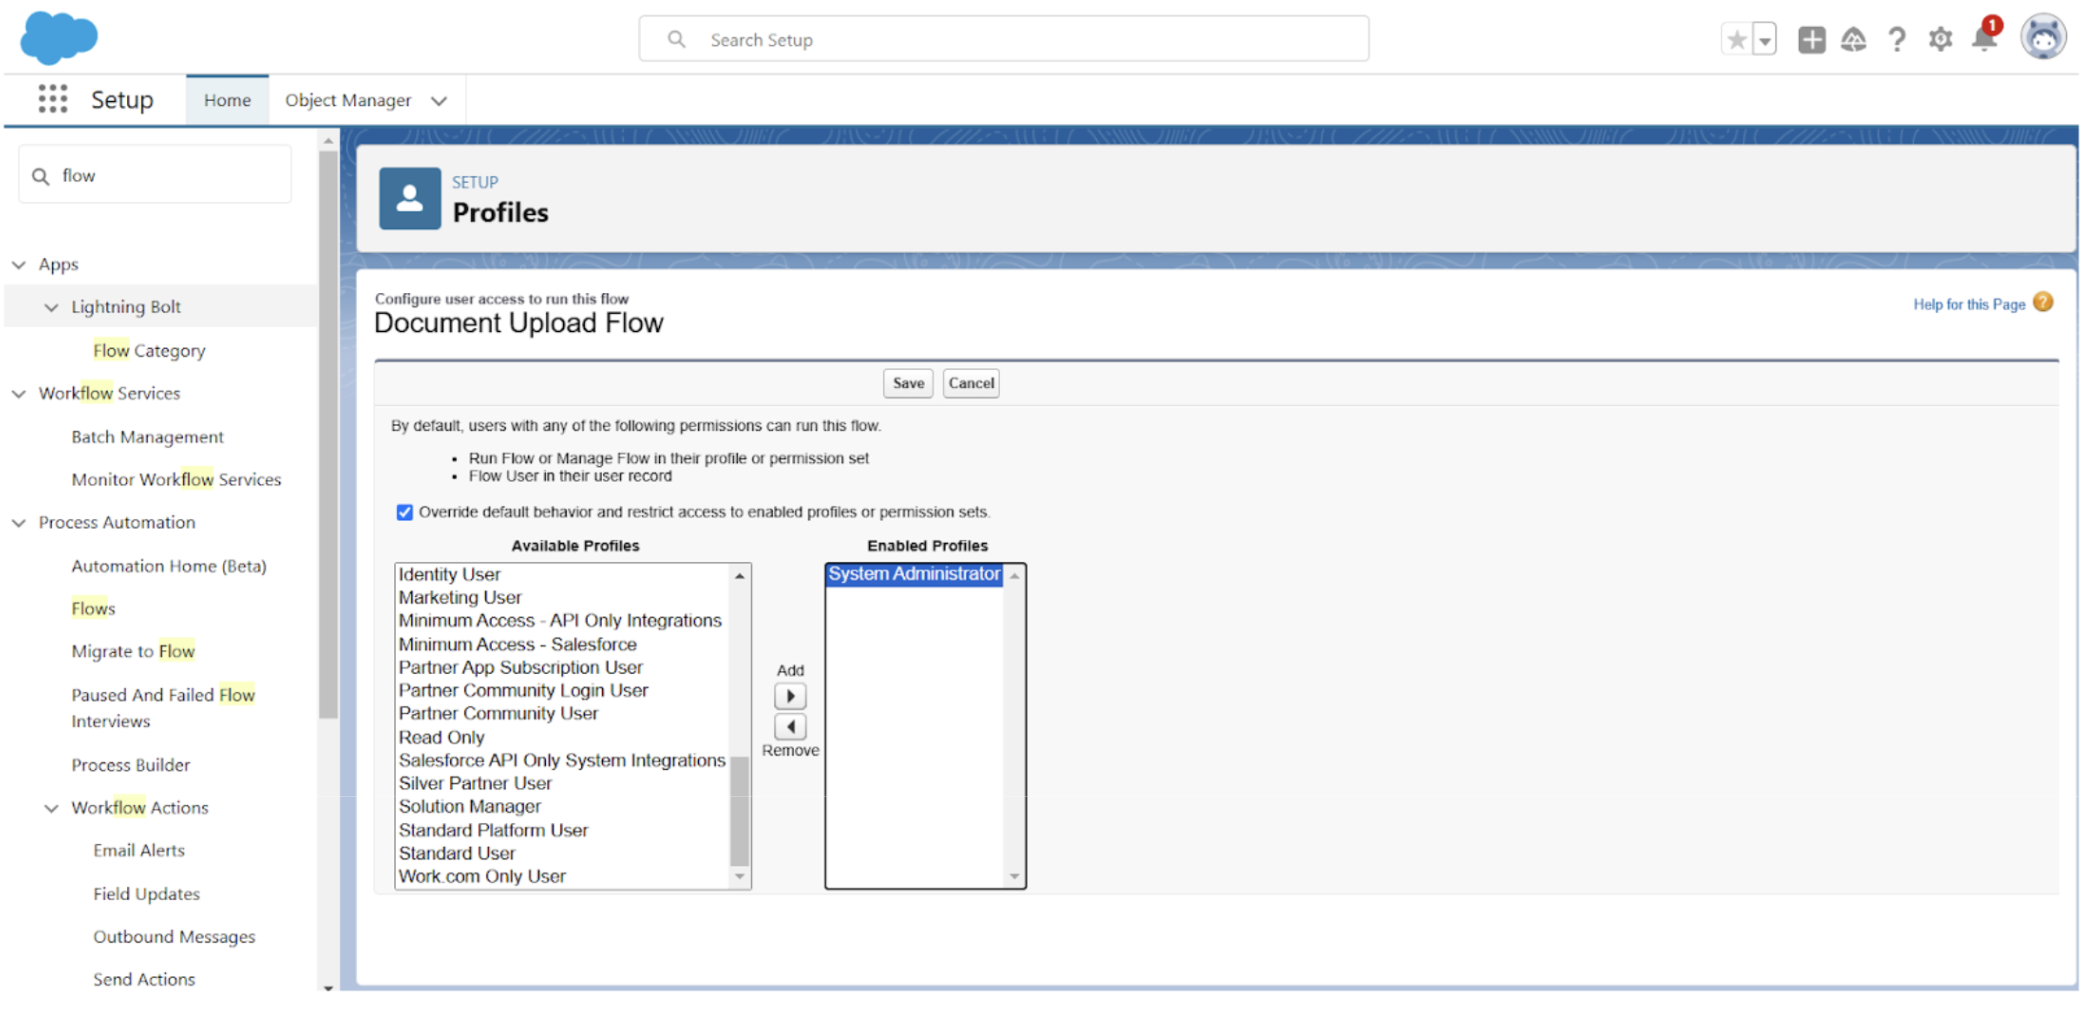
Issue 2: Document Upload Flow Not Running
Cause: Flow is inactive or lacks access permissions.
Solution:
-
Go to Setup → Flows.
-
Search for Document Upload Flow.
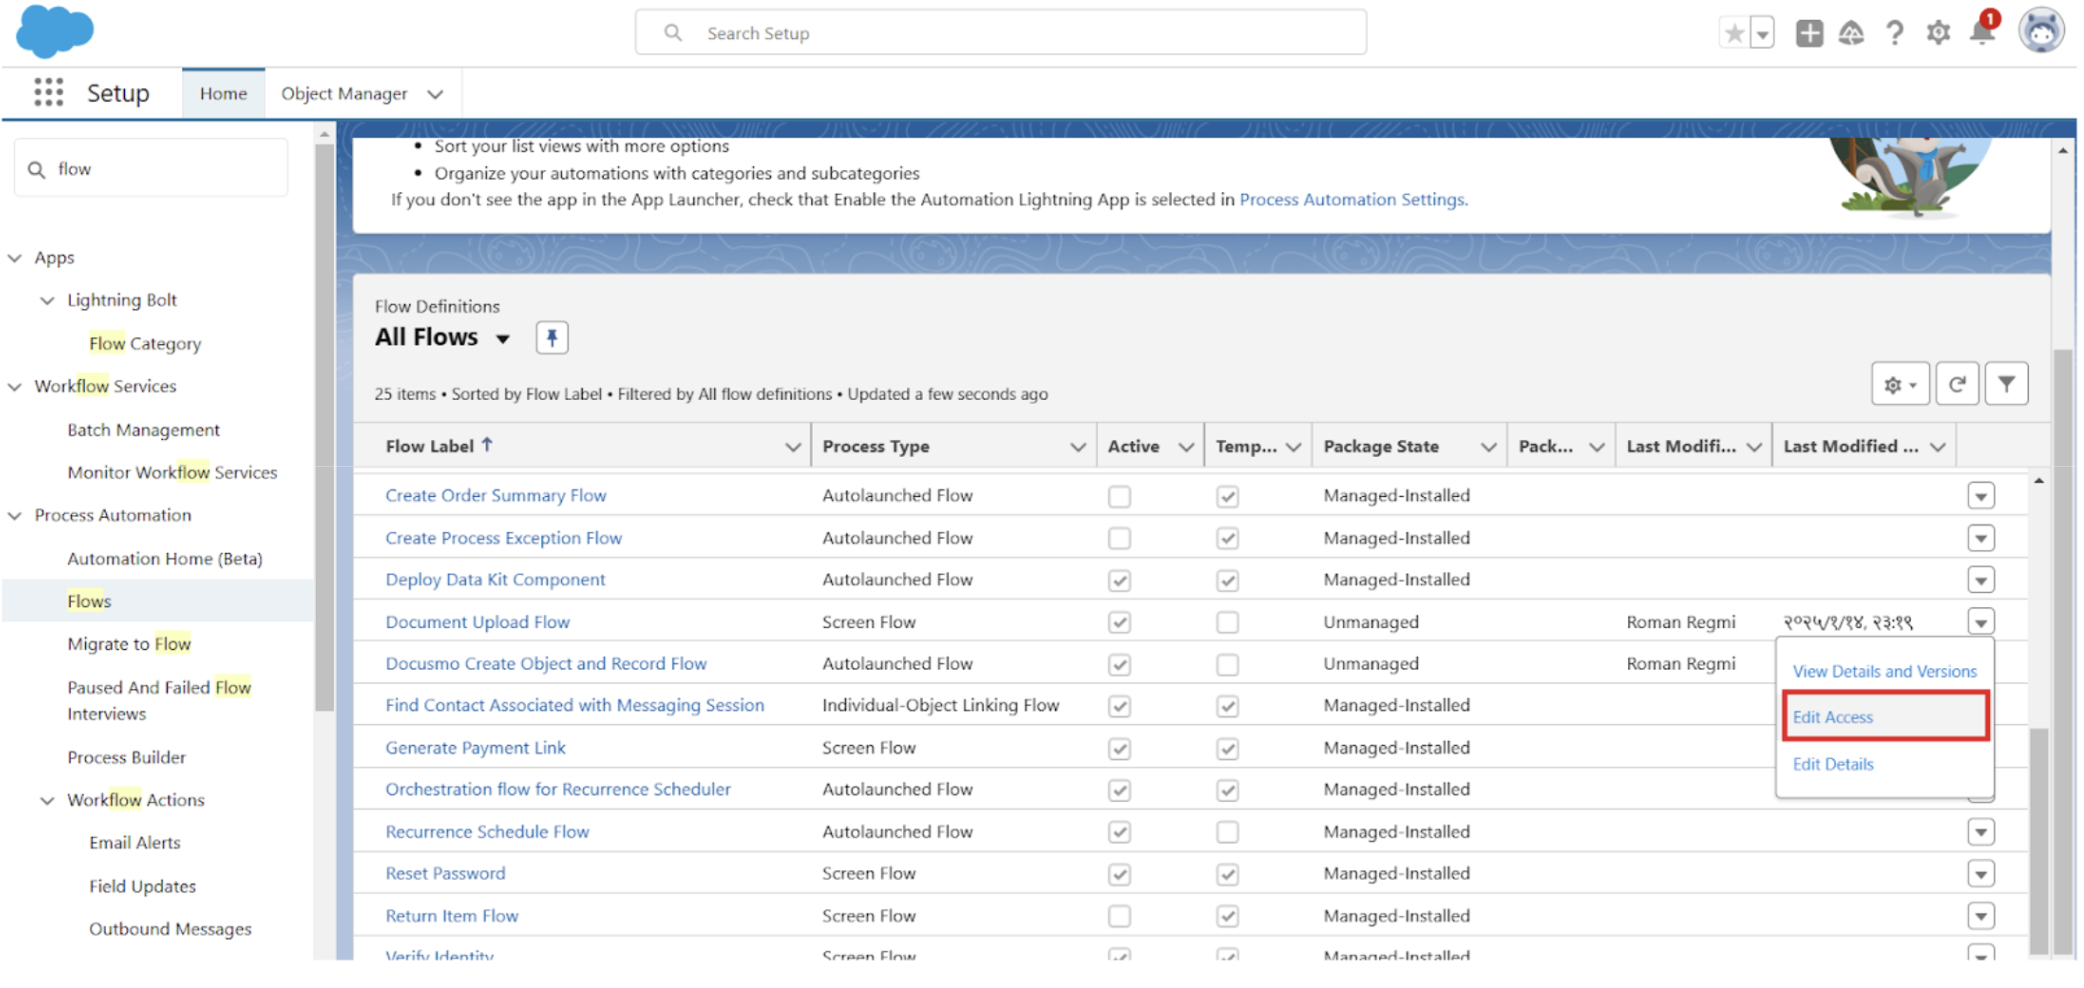
-
Click ⚙️ Dropdown → Edit Access.
-
Grant access to required profiles.
Issue 3: Webhooks Not Working
Cause: Incorrect webhook URL or missing authentication.
Solution:
- Verify that the Webhook URL is correctly entered in Docsumo.
- Ensure the Auth Token matches the one in Salesforce Custom Metadata.
Should you have any questions or encounter any issues during the process, feel free to reach out to us at [email protected], and we'll be more than happy to help you.
Updated 9 months ago