Workflow Builder
Overview
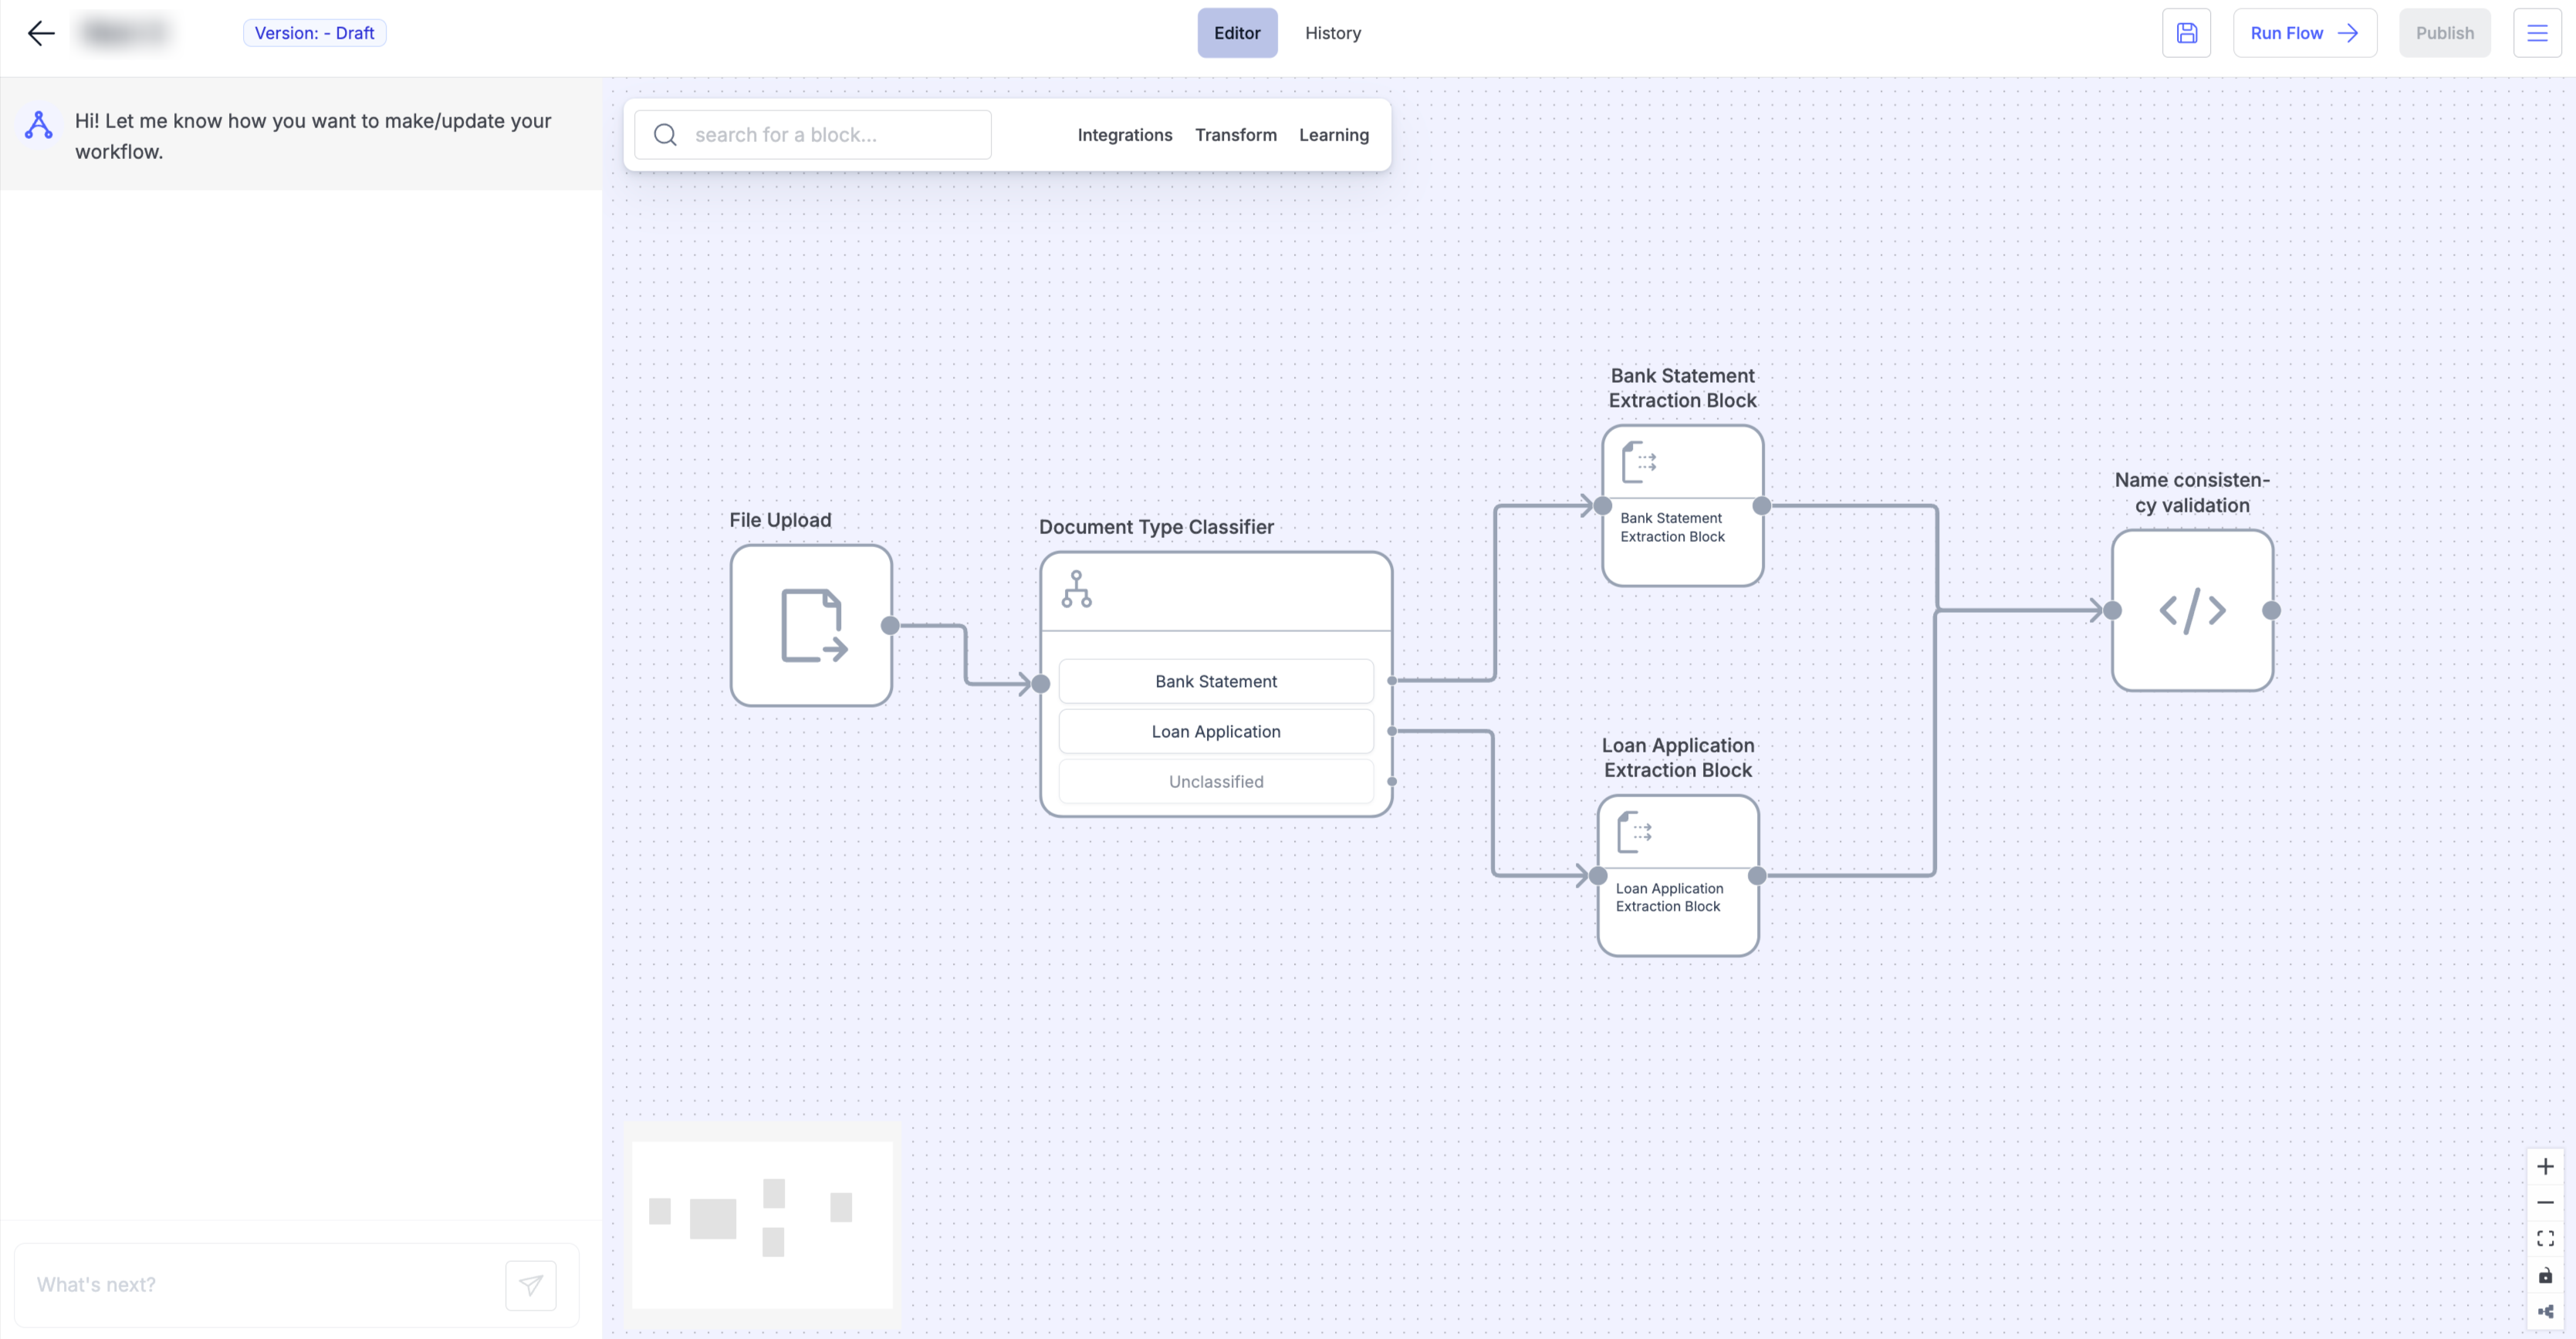
The Workflow Builder is the central workspace where you design, test, and manage your automation flows. It combines a prompt-based interface with a visual block builder for flexibility and ease of use.
| Section | Description | Key Actions |
|---|---|---|
| Left Sidebar Chat | Prompt-based input area where you can describe or update your workflow in natural language. | - Write a prompt to create a new workflow - Modify existing workflows via text commands |
| Center Canvas | Visual workspace for designing workflows using a drag-and-drop interface. | - Add, connect, and arrange blocks - Define the flow of data between steps |
| Top Navigation Bar | Provides quick access to essential controls and tabs. | - Switch between Editor and History - Save, Run Flow, or Publish workflows |
| Block Library Tabs | A categorized list of available blocks to build workflows. | - Integrations: File upload, Email, API ingestion - Transform: Data extraction, Python code, AI categorization - Learn: View examples or help articles |
| Run Flow Button | Executes the workflow for testing purposes. | - Test workflow logic - View results in History tab |
| Publish Button | Deploys the workflow to production for live usage. | - Make workflow accessible via API or automation triggers |
| Workflow Menu (⋯) | Access workflow management utilities. | - Copy Workflow ID - Duplicate, Download, or Upload workflows |
| History Tab | Displays run history for debugging and monitoring. | - View run logs, status, and timestamps |
| Version Control | Shows current workflow version and allows rollbacks. | - Manage versions |
✅ Tip: Use the left sidebar for quick generation and the canvas for fine-tuning — combining both gives you speed and control.
Adding Workflow Blocks
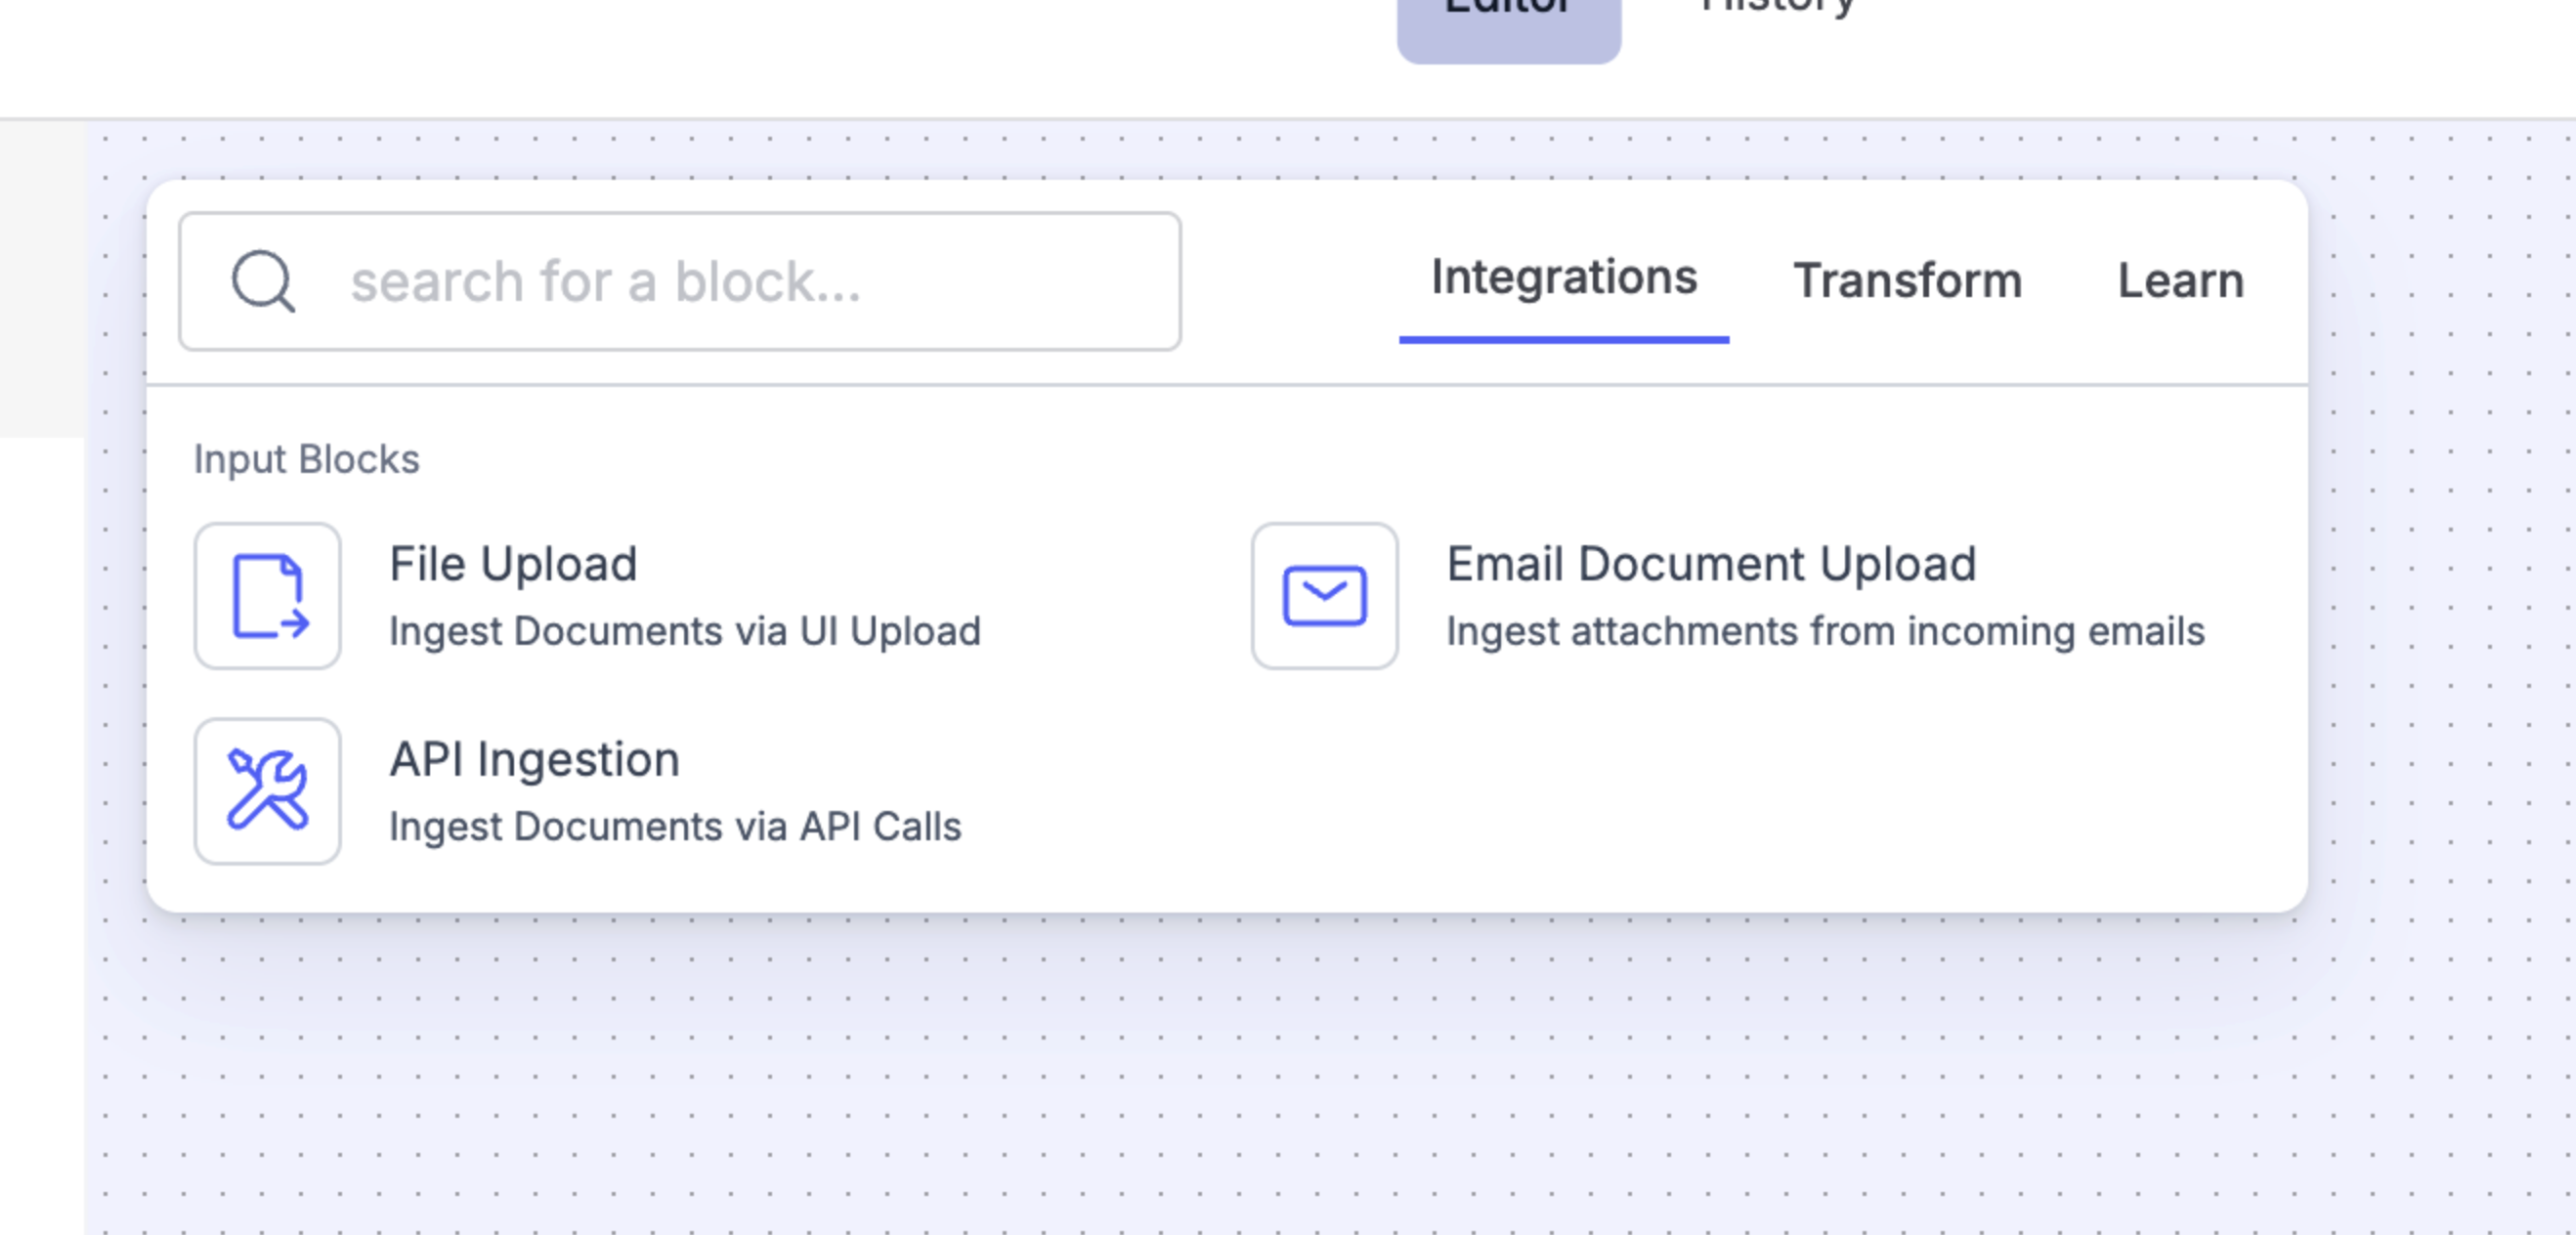
Open the Block Library tab on the canvas to add building blocks.
Each block represents a specific task in your workflow. Common block categories include:
Workflow Blocks
| Category | Block Name | Description | Example Use Case |
|---|---|---|---|
| Integrations → Input Blocks | File Upload | Ingest documents via Docsumo upload. | Users manually upload PDFs or images for extraction. |
| Email Document Upload | Ingest attachments from incoming emails. | Automatically process invoices or receipts received over email. | |
| API Ingestion | Ingest documents via API calls. | Integrate with third-party tools or back-end systems to push documents automatically. | |
| Transform → Extraction Blocks | Data Extraction | Extract structured data from documents based on a defined model. | Extract fields like “Invoice Number” and “Amount” from invoices. |
| Transform → Pre-Processing Blocks | Merge JSON | Combine multiple incoming data streams into a single JSON object. | Merge outputs from multiple extraction models before further processing. |
| Python Code | Generate custom logic based on input data context. | Write code to clean, normalize, or enrich data before passing to the next block. | |
| Transform → Post-Processing Blocks | Python Code | Run code-based logic after extraction to transform data further. | Format extracted values, add computed fields, or validate results. |
| Categorize with AI | Automatically classify data columns into preset categories using AI. | Tag document types or categorize transaction records. | |
| Transform → Classification Blocks | Document Type Classifier | Automatically classify incoming documents into specific types. | Detect if a document is an Invoice, PO, or Receipt. |
| Transform → Human in the Loop | Human in the Loop | Pause the workflow and allow a human to review or decide. | Require manual approval for low-confidence extractions. |
| Transform → Conditional Blocks | Router | Add IF–ELSE / conditional logic to branch the workflow. | Send invoices above ₹50,000 for approval; others directly to export. |
✅ Tip: You can mix and match blocks from different categories to design complex, automated document workflows — from ingestion to validation to export.
Connecting Blocks
You can connect blocks by dragging an arrow from one block’s output to another block’s input.
Each connection defines data flow — i.e., how results from one step feed into the next.
✅ Tip: Always start your flow with an input block (e.g., file upload or API trigger) and end with an output block (e.g., export to API or database).
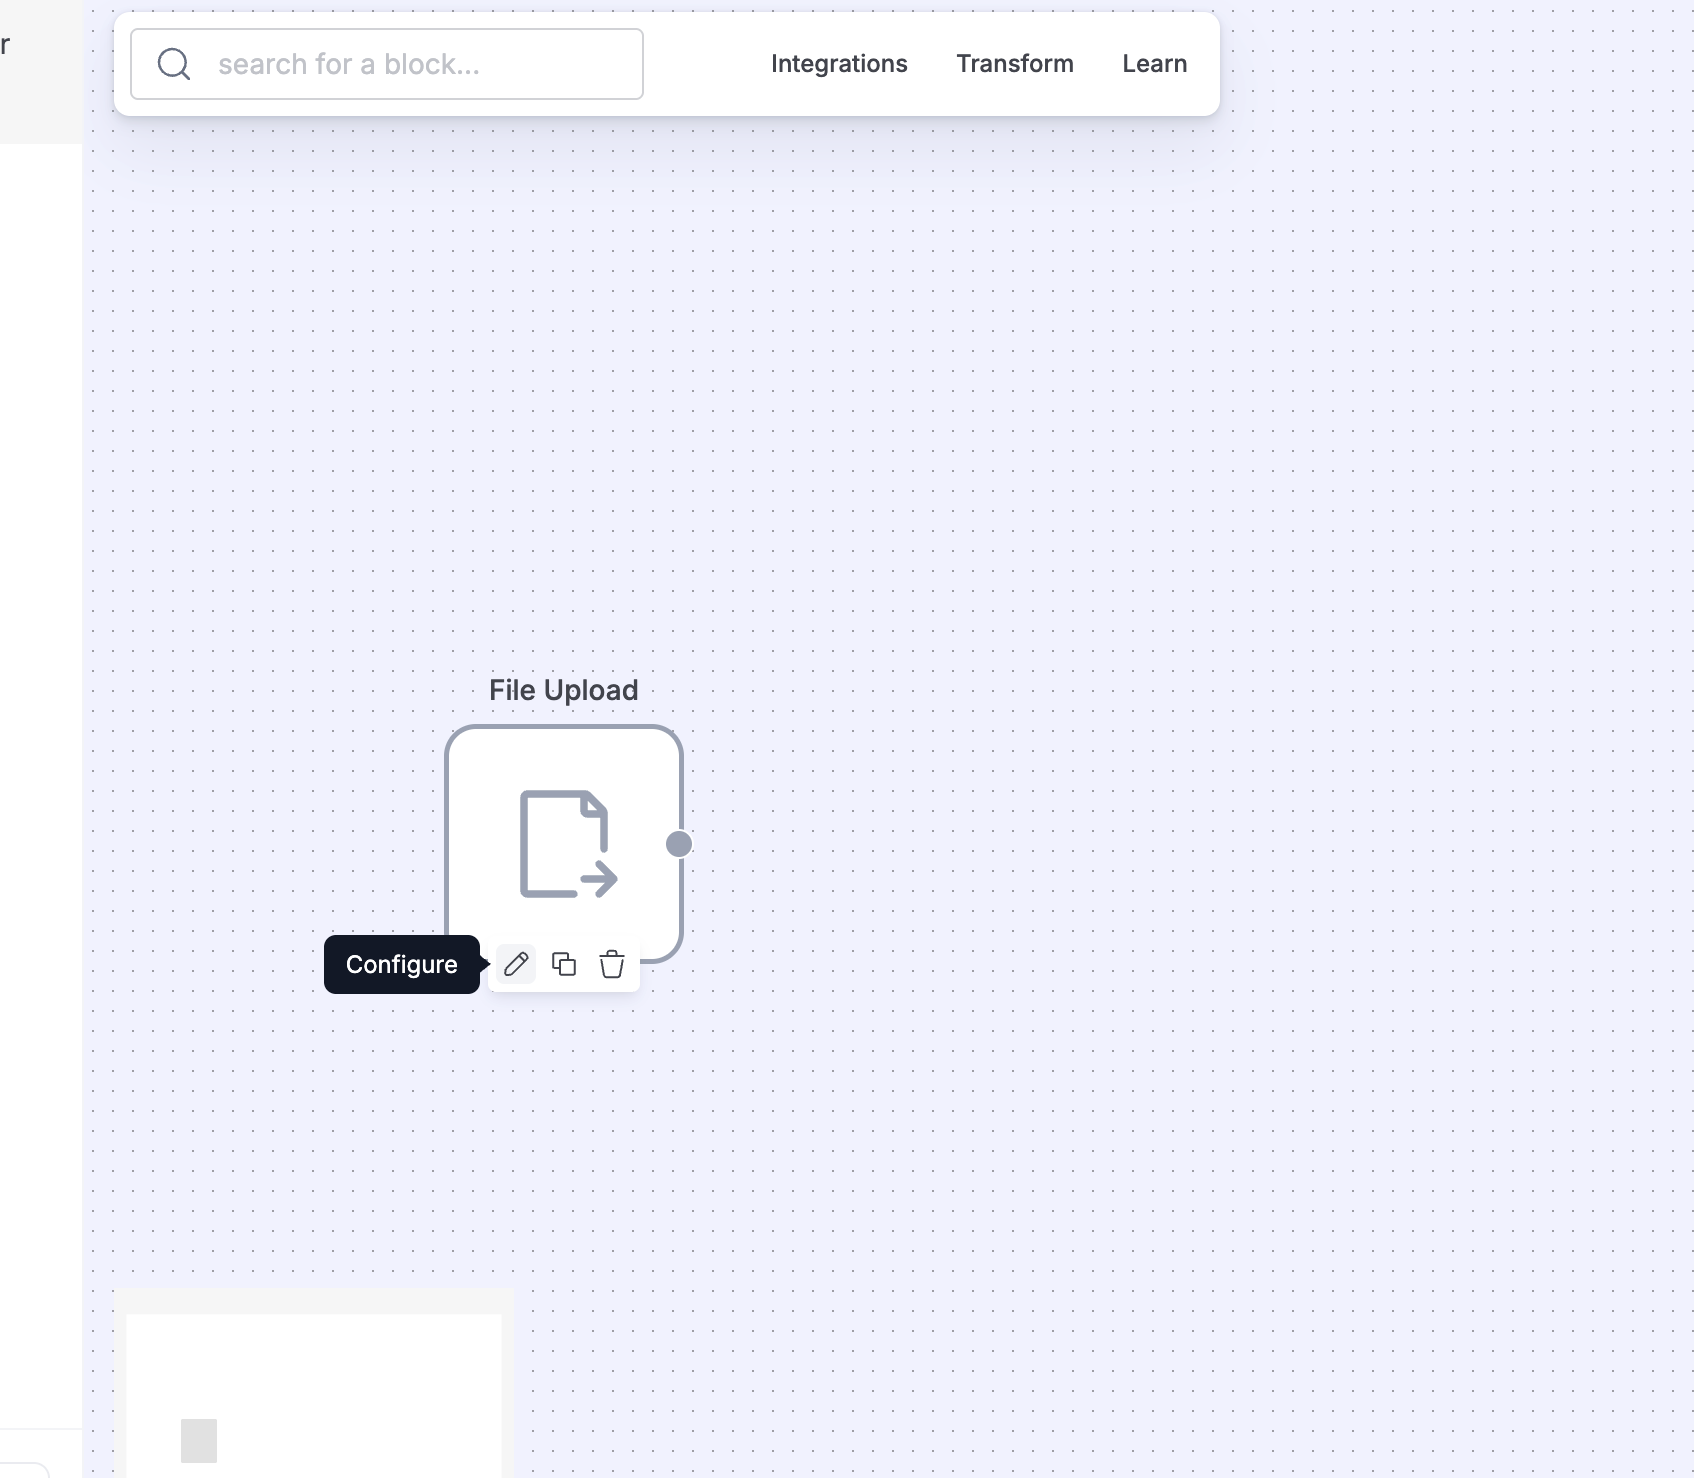
Configuring a Block
Click the edit option on any block in the canvas to open its configuration panel on the right side.
You can:
- Define the input format (e.g., JSON, extracted fields, table rows)
- Write custom Python code or prompt-based logic
- Choose AI models for classification or categorization
- Add validation rules and fallback conditions
Every block has input/output mapping — ensure field names and formats align between connected blocks.
Saving & Testing Your Workflow
- Once your workflow is ready, click Run Flow to test it.
- Review the output for accuracy and flow correctness.
- Once verified, click Publish to activate it for production.
Your published workflow can now be triggered automatically via API, integrations, or human input.

Best Practices
- Start simple — begin with 2–3 core blocks and expand gradually.
- Use versioning to test major changes without affecting production.
- Keep naming consistent for all blocks and fields for easy debugging.
- Use “Human in the Loop” for exceptions or uncertain AI predictions.
Updated 8 months ago
What’s Next
Continue to Block Types & Their Use Cases to explore each block in detail — including configuration options and examples.