Case Type View
Case Type View
Once you’ve created a Case Type, you can access all uploaded cases from the Cases tab under that Case Type.
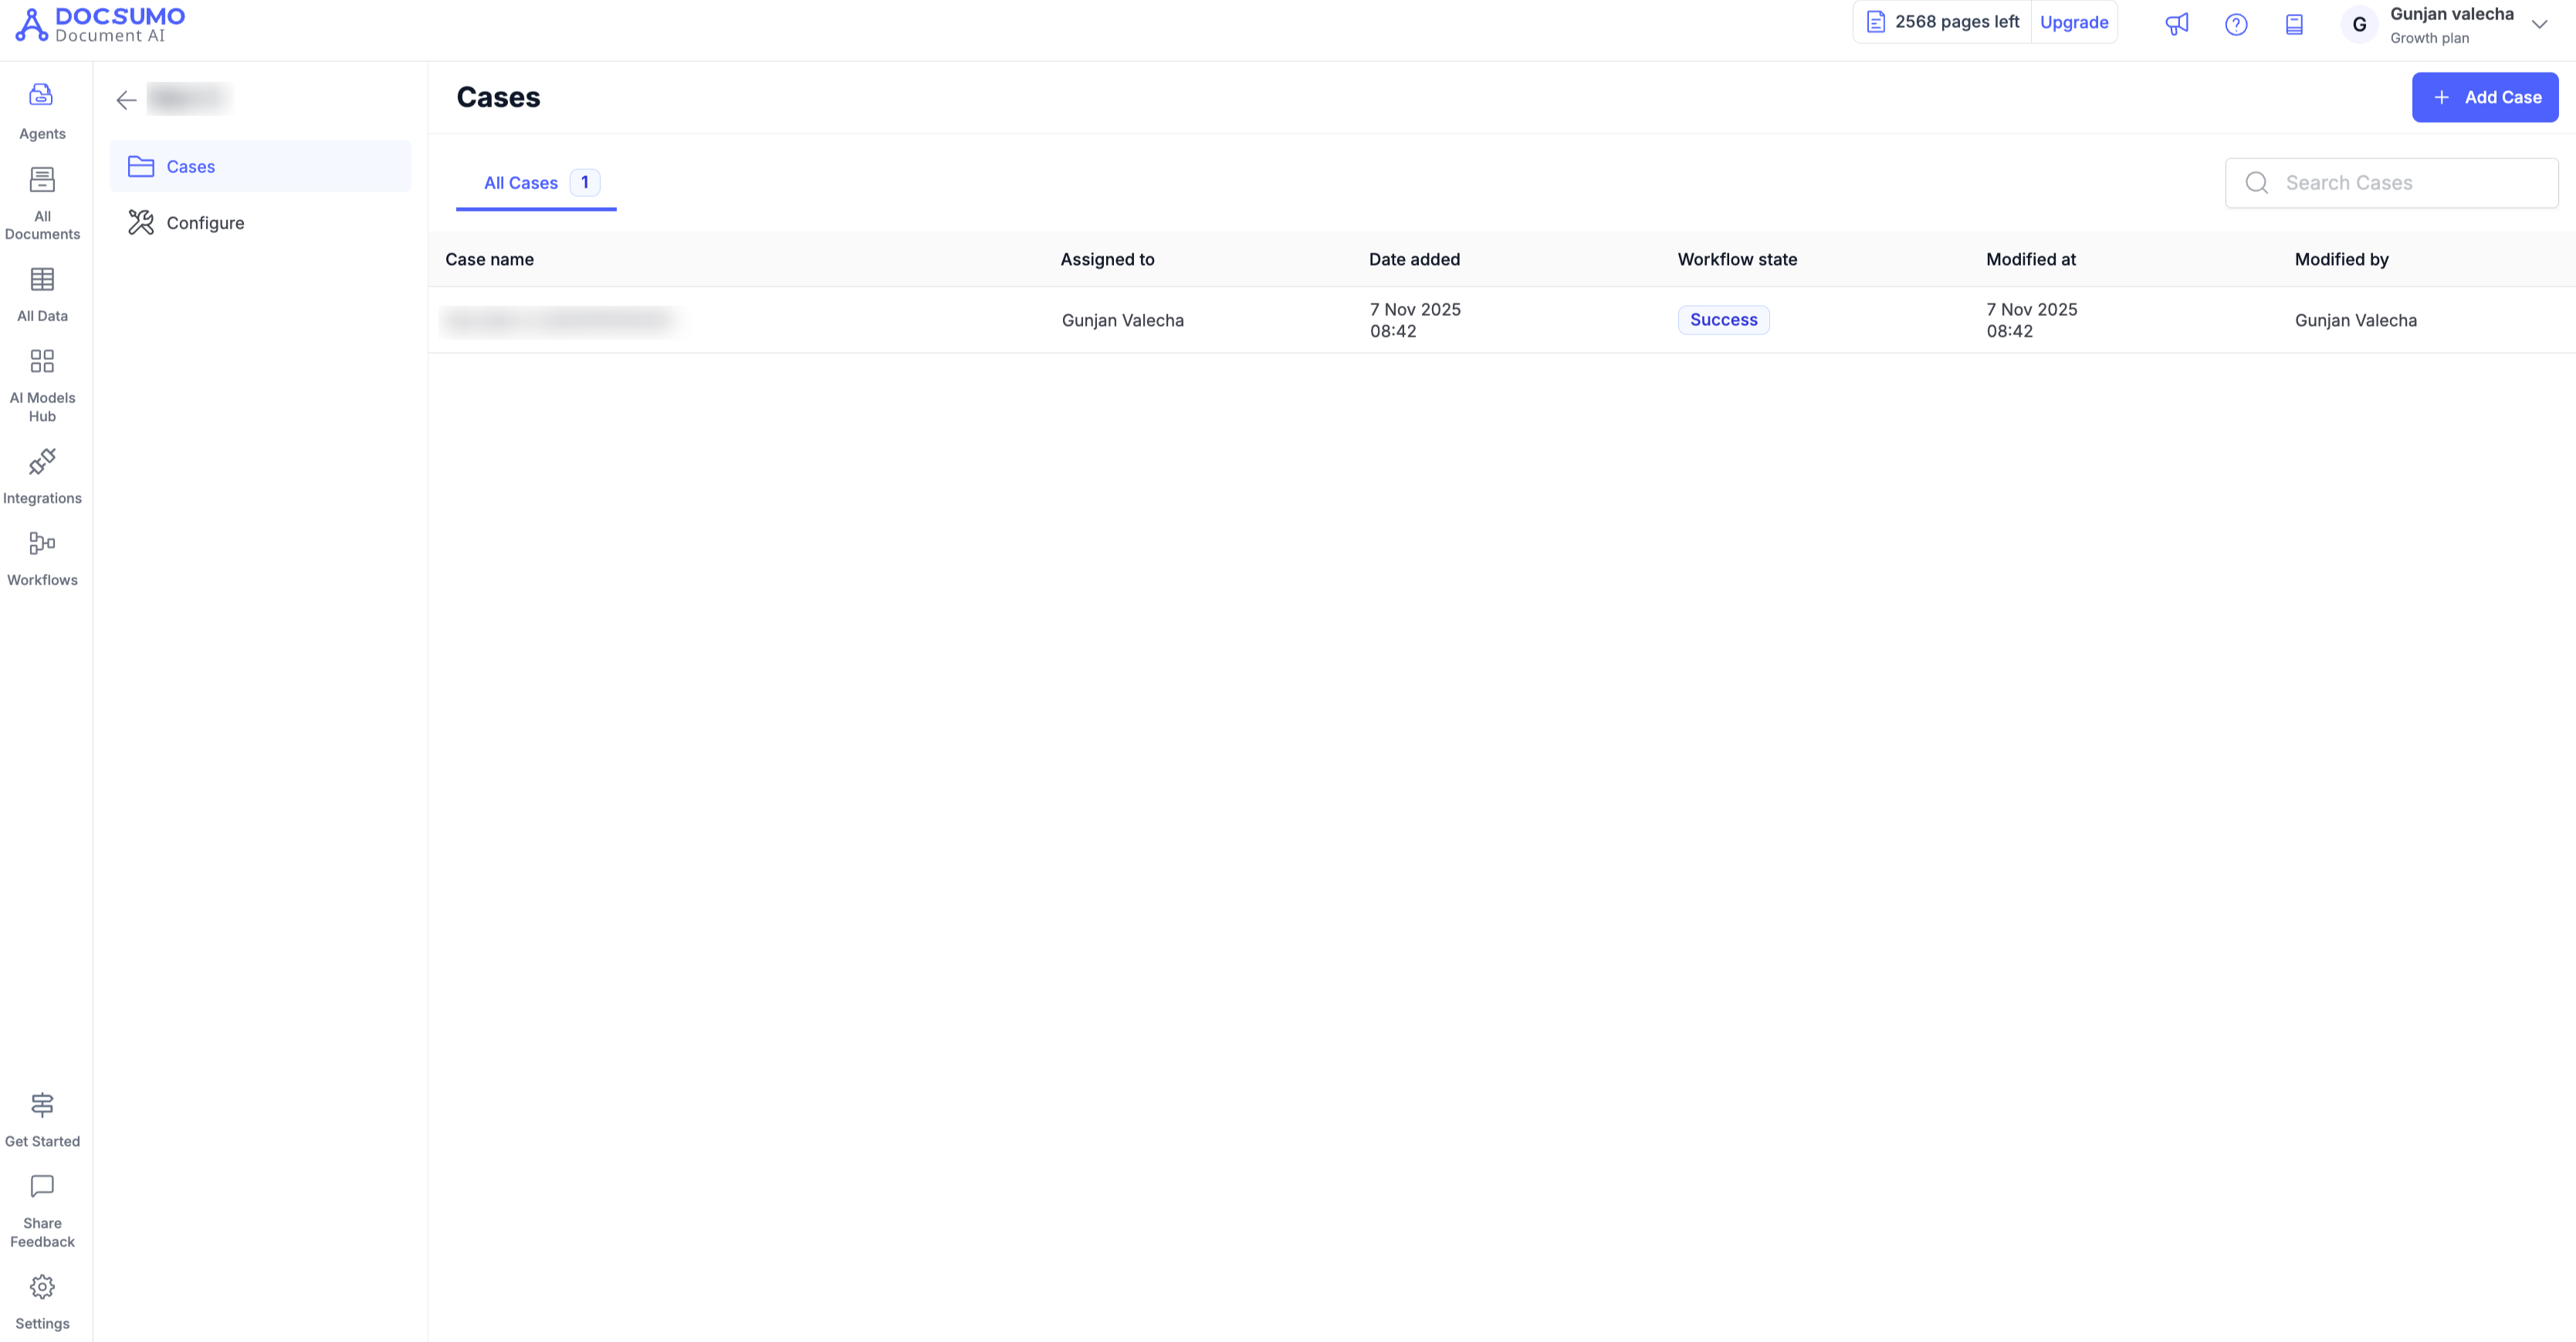
The Case Type View displays a list of all cases created for that workflow.
Each row represents one case (e.g., a loan application), showing key details like:
- Case Name – Unique name automatically generated when the case is created.
- Assigned To – Team member responsible for reviewing the case.
- Date Added – When the case was created.
- Workflow State – Current progress of the case (e.g., Success, In Progress, Failed).
- Modified By – Last person who updated the case.
You can:
- Search for cases using the search bar.
- Add new cases by clicking Add Case.
- Open a case to review its details and documents.
This view helps you manage multiple cases at once and monitor their workflow status.
Searching cases
Use the search bar above the case list to find a specific case. Two search formats are supported:
- Search by case name — Type any part of the case name. For example, Acme Loan matches Acme Loan Application, Acme Loan #42, etc. The match is case-insensitive.
- Search by exact Case ID — Prefix your query with case_id: to look up a case by its unique ID. For example, case_id:c_abc123 returns only that case.
▎ Tip: Case ID search requires an exact match — partial IDs won't return results. Use case name search when you only remember part of the case.
Case Overview Page
Clicking on any case opens the Case Overview Page, which provides a detailed view of all documents and processing results for that specific case.
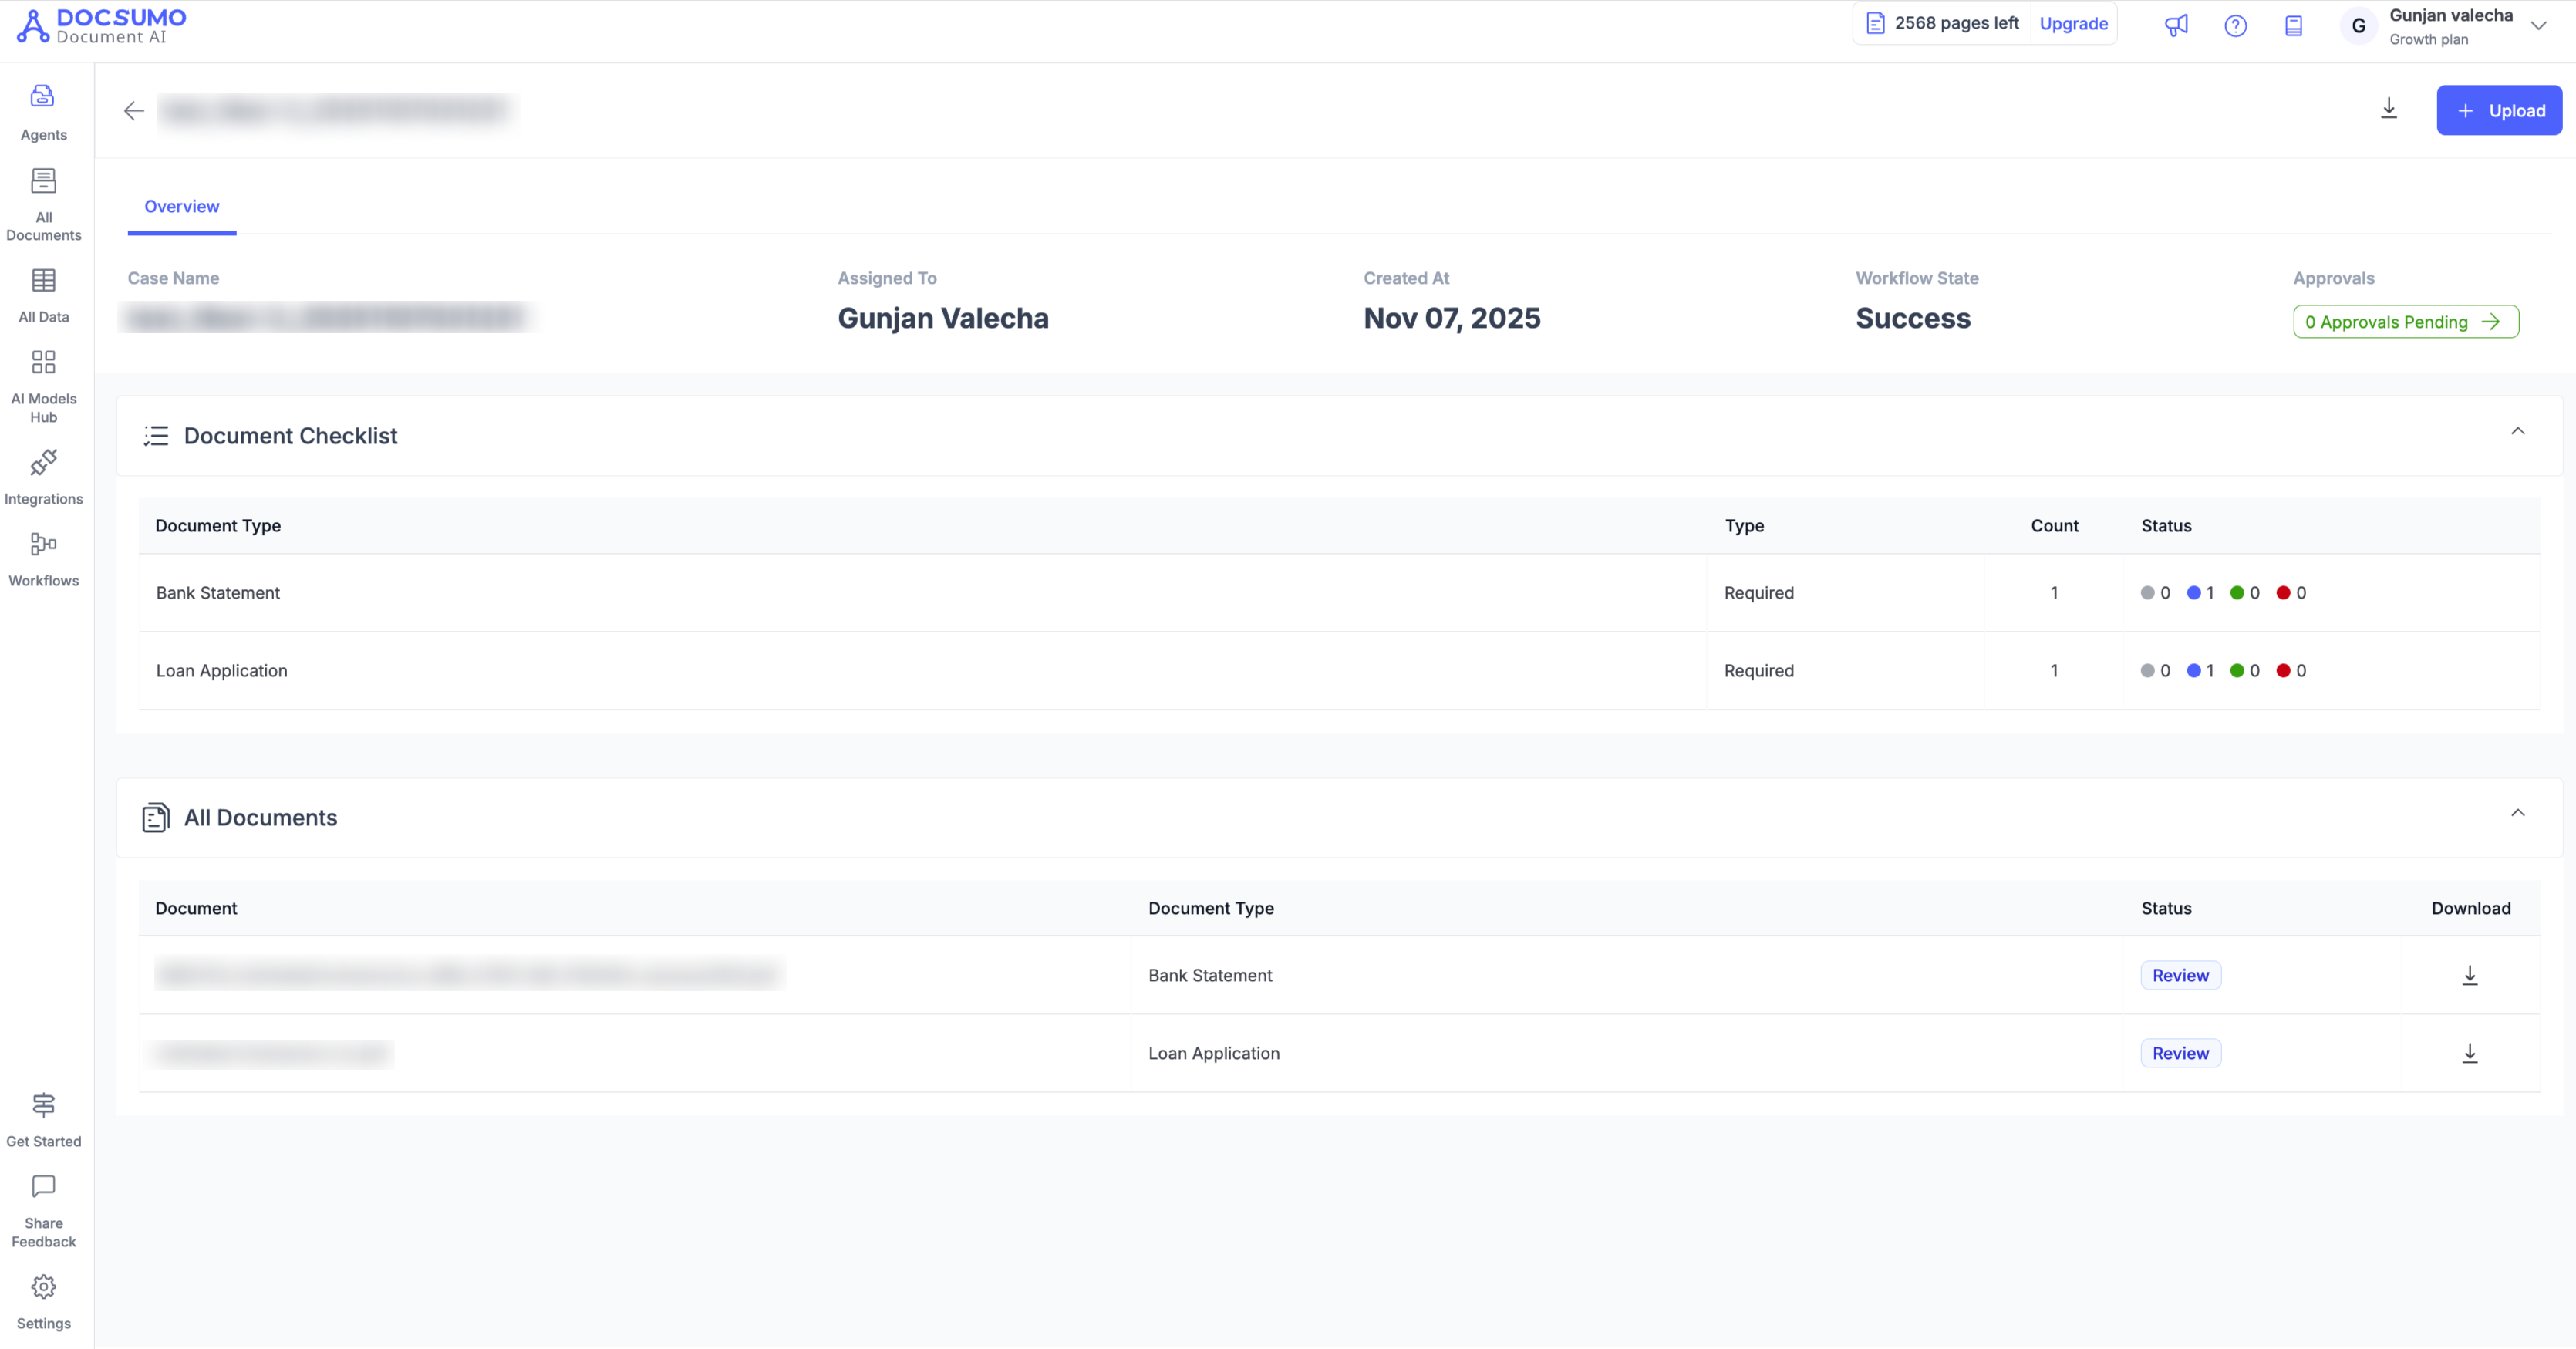
Overview Section
At the top of the page, you’ll see:
- Case Name – The name or ID of the case.
- Assigned To – The user handling the case.
- Created At – When the case was created.
- Workflow State – Indicates if the workflow completed successfully.
- Approvals – Shows pending or completed approvals, if applicable.
Document Checklist
The Document Checklist lists all required and uploaded document types within the case, such as:
- Bank Statement
- Loan Application
- ID Proof, etc.
For each document type, you’ll see:
- Type – Whether the document is required or optional.
- Count – Number of files uploaded for that document type.
- Status – Visual indicators showing which documents have been uploaded, reviewed, or need attention.
All Documents
This section displays a list of all files uploaded to the case with details such as:
- Document Name
- Document Type
- Status (e.g., Review, Completed, Error)
- Download Option to view or save the file.
You can also upload additional files using the Upload button on the top right.
Tip:
Use the Configure tab (next to Cases) to modify your Case Type setup — for example, to update required document types, validation rules, or workflow automations.
Updated about 2 months ago