Form Request: Public Form
The Public Request Form page is the external page a recipient opens when you share a request-form link. It gives the recipient a guided, branded place to upload files, answer questions, complete tables, sign, and submit their response back to the case.
What Is the Public Request Form Page?
The Public Request Form page is the recipient-facing version of a request form.
It is opened from the public link generated for a case request form. This allows the recipient to respond without needing to work inside the case itself.
The page is useful when you need someone outside Docsumo to:
- upload requested documents
- answer follow-up questions
- fill out structured data
- provide a signature
- complete a form template
How Recipients Access the Form
Recipients usually access the form from a shared request-form link.
That link can be sent through:
- the
Open in Mailaction - the copied public link
- a manual email or message from your team
If the link is invalid, expired, or already used, the page shows an error or completed state instead of the form.
What the Recipient Sees
This gives the form a more polished and customer-friendly experience than asking the recipient to reply over email.
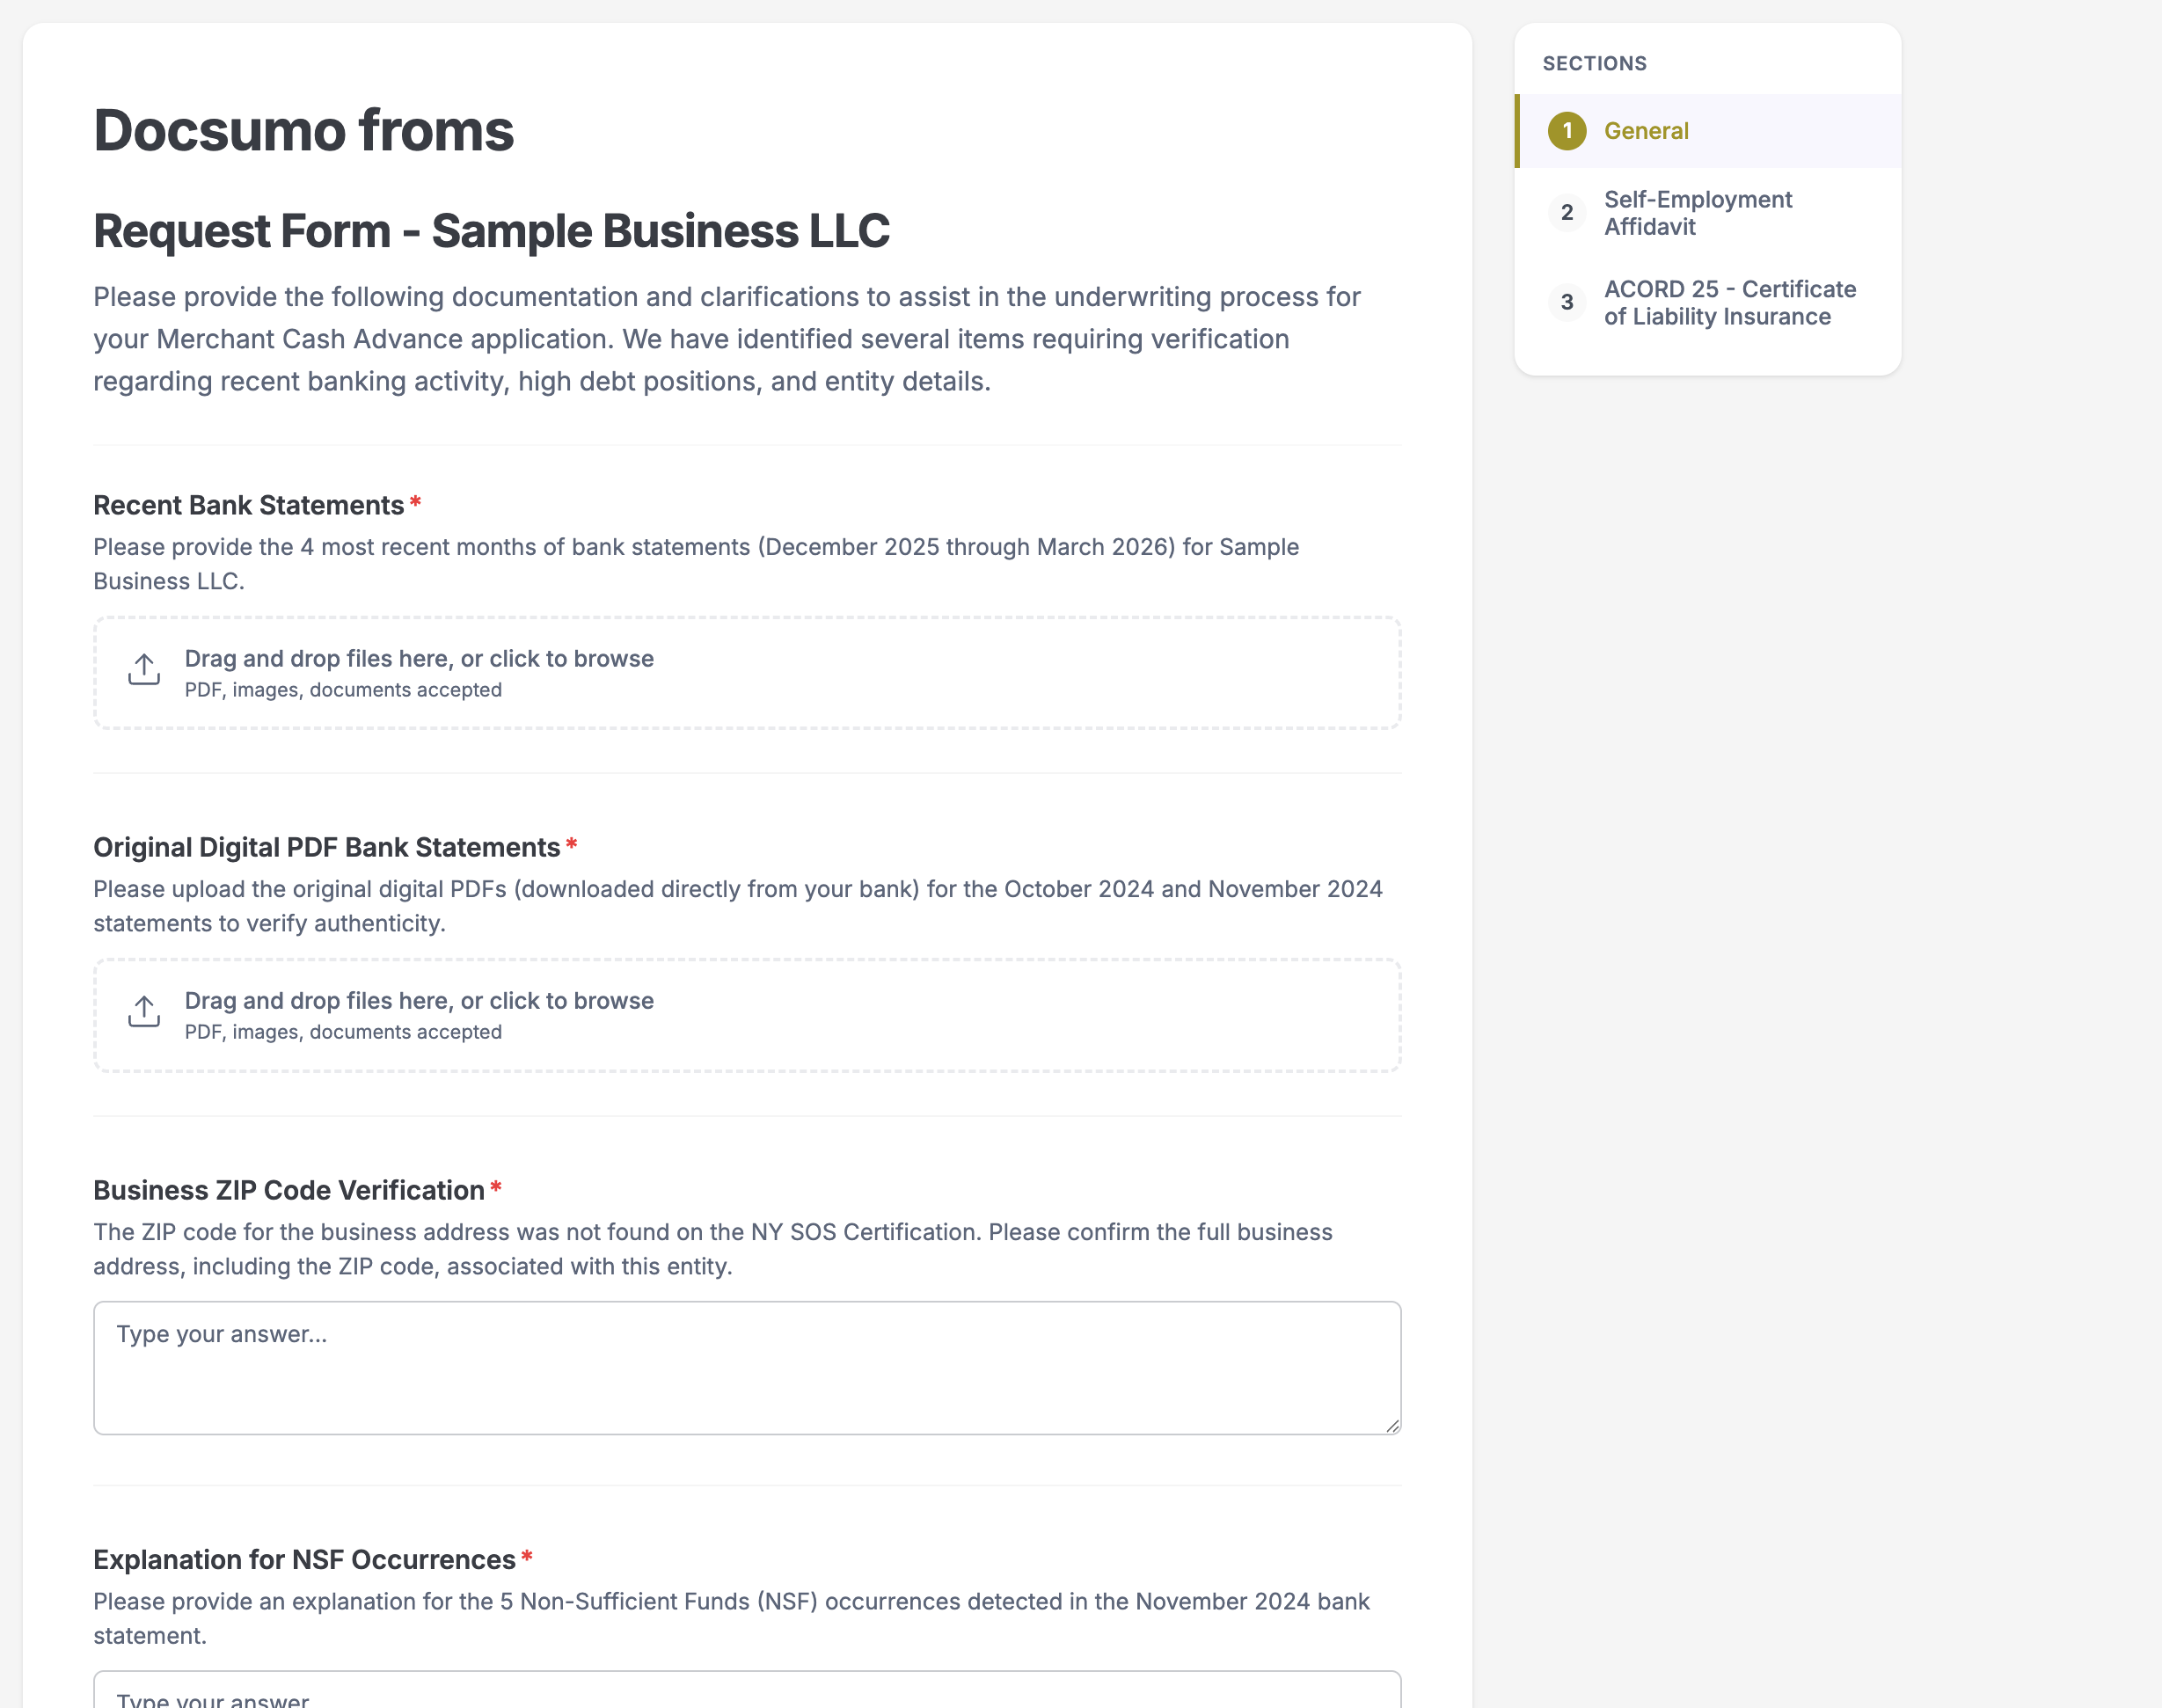
How the Page Is Organized
The page is organized into sections so recipients can complete the form step by step.
If the form contains only standard fields, the recipient sees a single form page.
If the form includes form templates, the page can be split into sections such as:
General- one separate tab or section for each form template
On larger forms, recipients can move through the form using:
- section navigation
PreviousNext
On mobile, this appears as a horizontal tab bar. On larger screens, it can appear as a sidebar navigation list.
Supported Input Types
The Public Request Form page can contain different field types depending on how the request was created.
Questions
Question fields are free-text answers.
Use these when you want the recipient to explain something in their own words, such as:
- why a value changed
- where a document came from
- clarification on missing information
The recipient types the answer directly into the form.
File Uploads
File upload fields allow the recipient to add one or more files.
This is useful for collecting:
- bank statements
- ID proof
- invoices
- supporting documents
- any missing attachments
The upload experience supports:
- clicking to browse
- drag and drop
- multiple files
- upload progress
- removing a file before submission
Tables
Table fields allow the recipient to enter structured row-based information.
This is useful when you need repeated data such as:
- transactions
- itemized entries
- line items
- history records
Recipients can:
- add rows
- remove rows they added
- type into cells
- choose from dropdown fields when configured
- enter longer notes in textarea cells when configured
Some rows or columns may be prefilled and locked, which means the recipient can see them but cannot edit those locked values.
Signatures
Signature fields let the recipient provide a signature directly in the form.
They can usually do this in two ways:
Type: type their name and choose a signature styleDraw: sign using a mouse or touch input
This is useful when the request needs acknowledgement or confirmation before the reviewer continues.
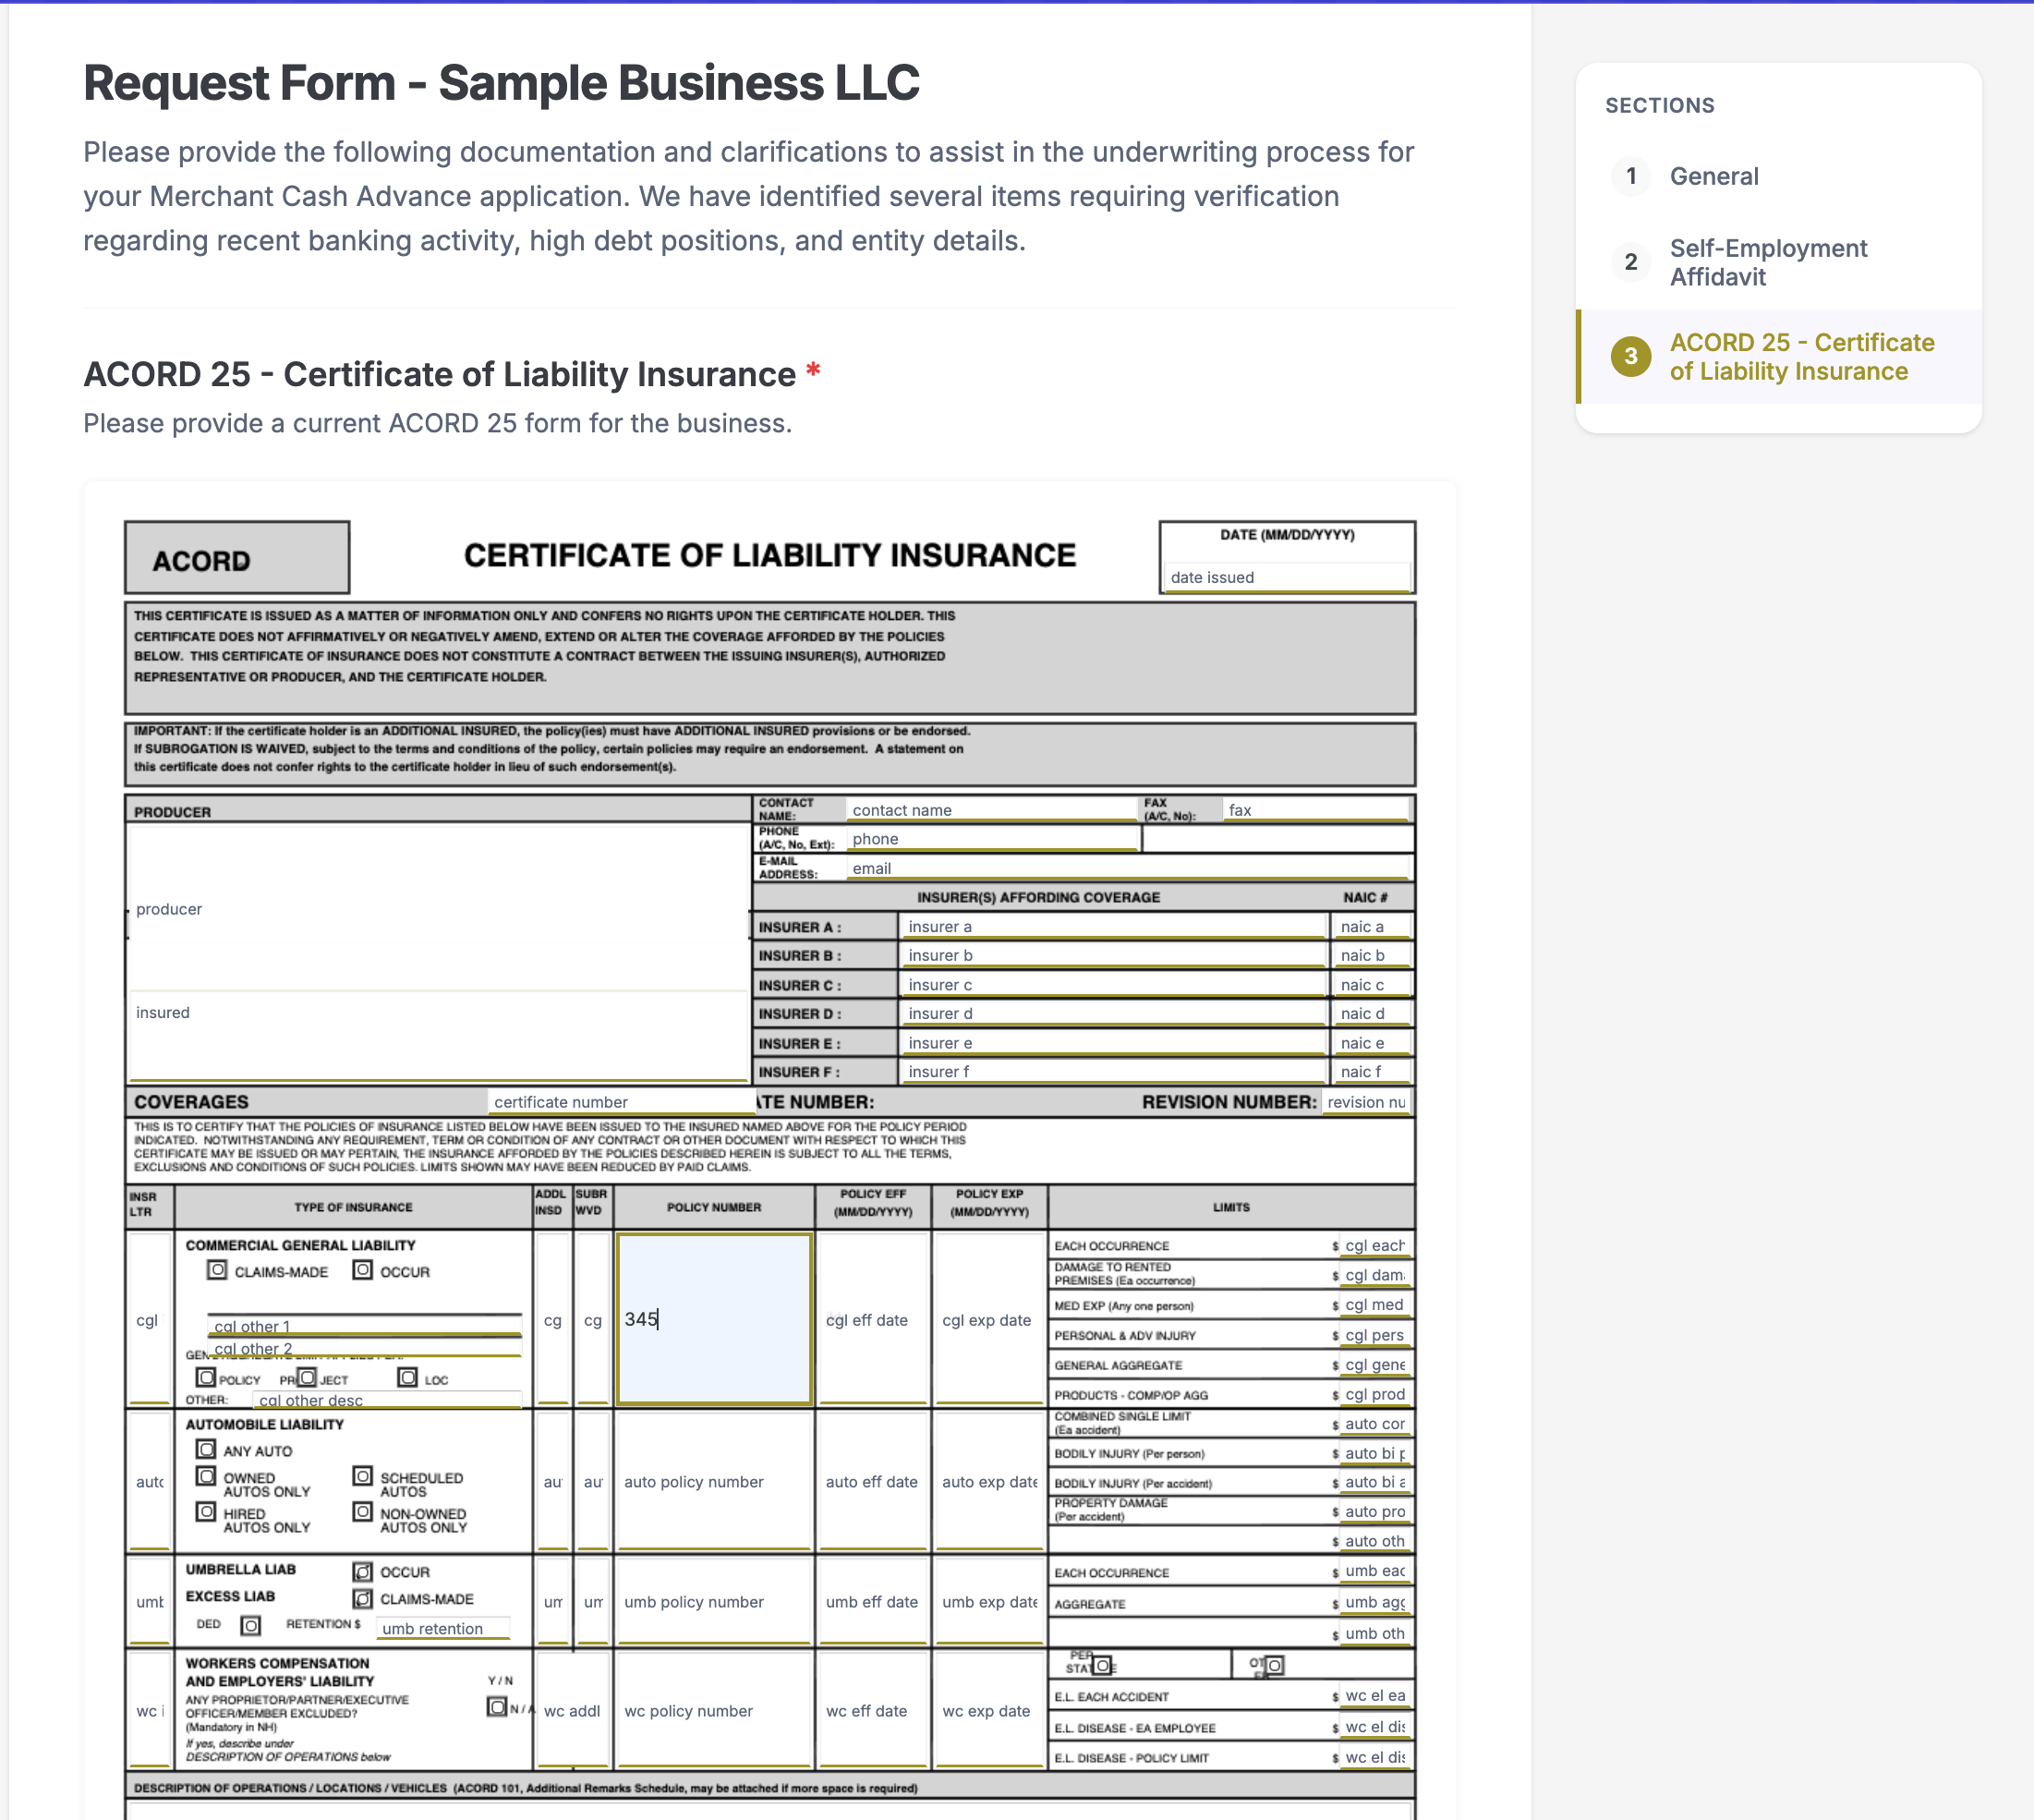
Form Templates
Form-template fields are used when the recipient needs to complete a more structured template as part of the request.
Depending on configuration, this can be:
- a dynamic fillable template
- a PDF-based template
These are often placed in their own section so the recipient can focus on one template at a time.
Required Fields and Validation
The form can contain required and optional items.
If the recipient tries to submit without completing required items, the page shows validation errors and points them back to what still needs attention.
Validation can apply to:
- unanswered required questions
- missing required uploads
- empty required tables
- missing signatures
- incomplete required form templates
This helps ensure the submission is complete before it is sent back to the case.
How Submission Works
When the recipient finishes the form, they click Submit Response.
Before the response is accepted, the page checks whether all required sections are complete.
If everything is valid, the response is submitted and the recipient sees a success page confirming that:
- the response was submitted
- the reviewer has been notified
- the window can be closed
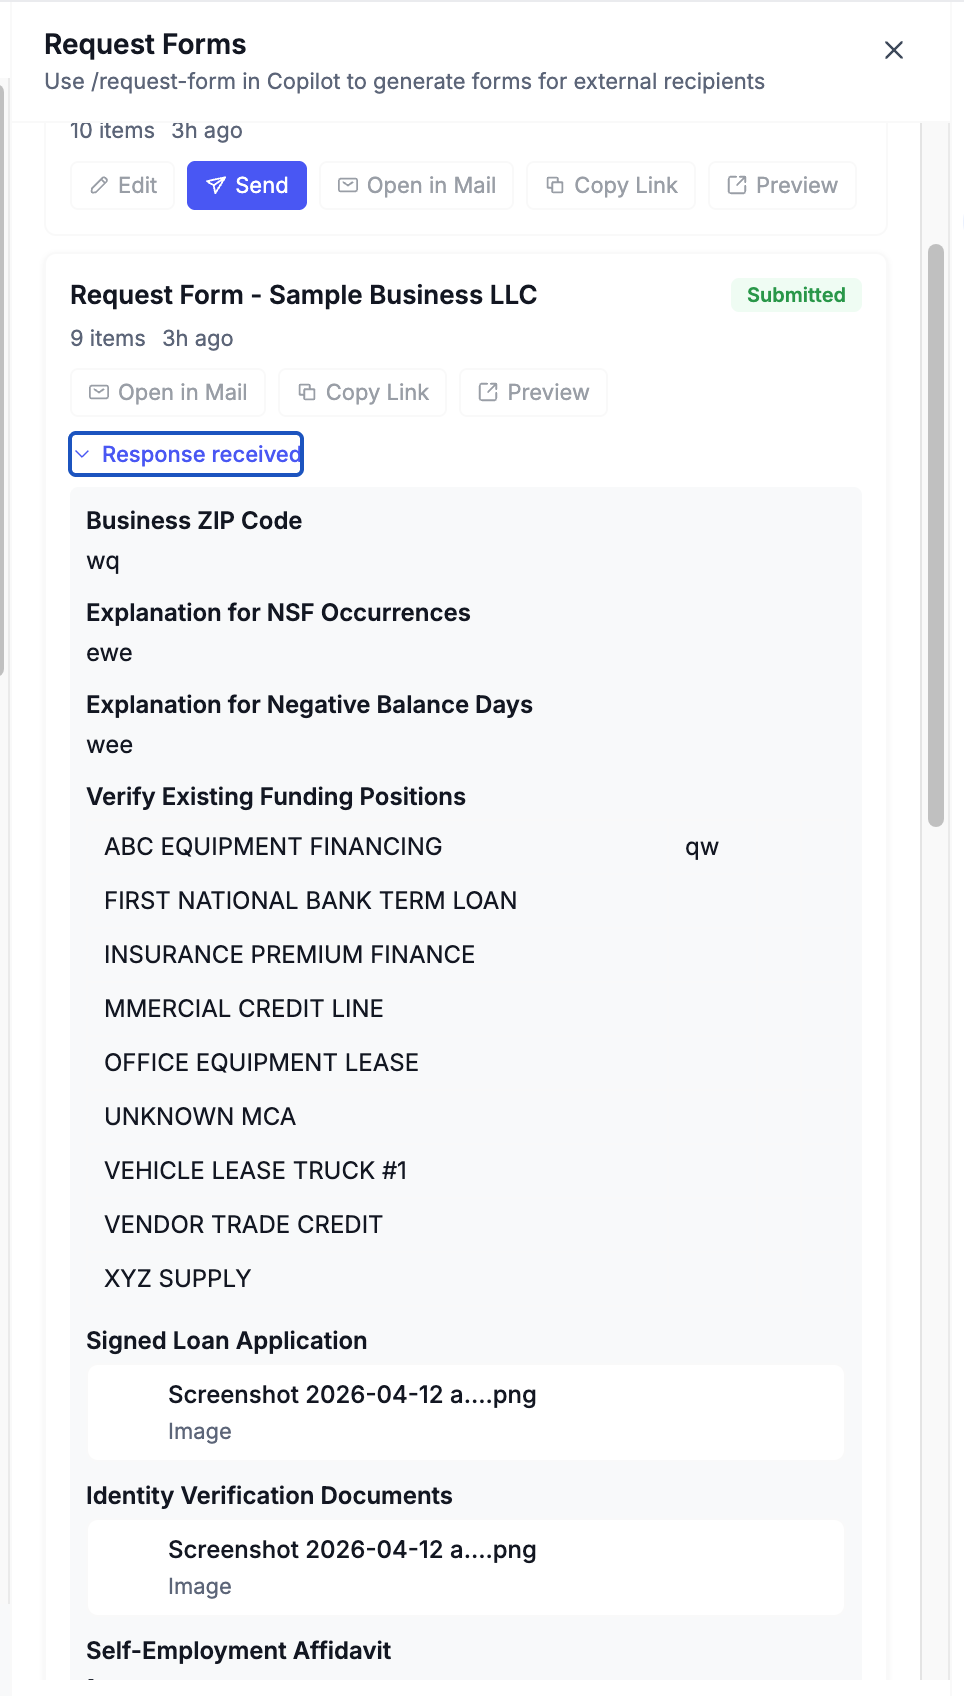
What Happens After Submission
Once the form is submitted:
- the response is attached to the request form
- the reviewer can see the result in the case
- uploaded files become available for review
- the form is no longer in the pending state
This makes the public page part of a complete closed-loop workflow between the reviewer and the external recipient.
When to Use a Public Request Form Instead of Email
Use a Public Request Form instead of a normal email reply when:
- the recipient needs to upload files
- you need structured answers
- you want a consistent response format
- a signature is required
- you want the response to stay tied to the case automatically
If you only need a plain written response, email may be enough. If you need a guided and trackable response experience, use a Public Request Form.
A Common End-to-End Workflow
Here is how the full process usually works:
- A reviewer creates a request form from the case.
- The reviewer shares the public link with the recipient.
- The recipient opens the Public Request Form page.
- The recipient completes all required sections.
- The recipient submits the response.
- The reviewer returns to
Request Formsin the case to review the submission.
Tips for Form Owners
- Preview the public form before sending it.
- Keep instructions clear so the recipient knows what to upload or answer.
- Use tables only when structured repeated data is actually needed.
- Use signatures only when acknowledgement or approval matters.
- Use templates when the response needs a standard format.
Updated 3 months ago