
Entity / Tables
Entity / Tables lets you store structured reference data directly inside Docsumo and use it across your document workflows. You can build tables manually or import them from a spreadsheet, keep them updated as documents are processed, and link records to cases so you always know which data belongs to which case.
This guide covers creating tables and entities, managing columns and records, searching and filtering data, and viewing linked cases. To learn how workflows read from and write to your tables, see Table Blocks.
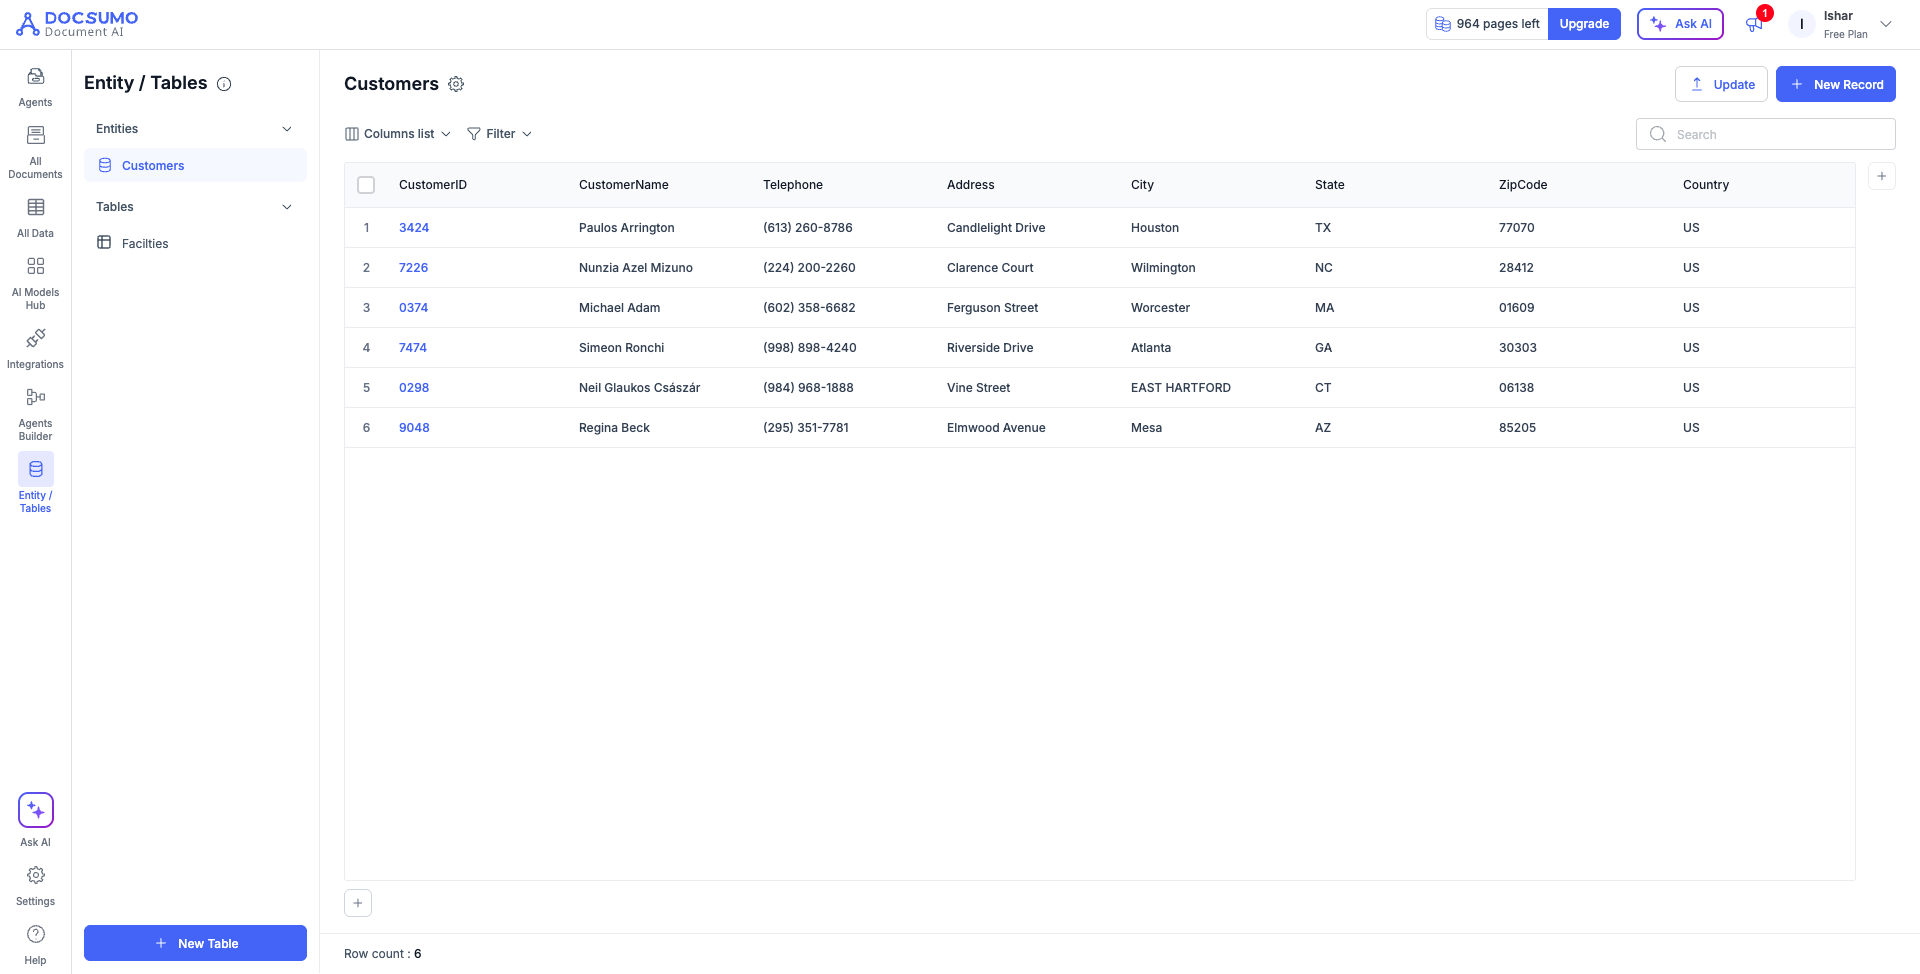
How this differs from other tables in DocsumoEntity / Tables is reference data you own and maintain, stored in its own workspace and shared across every workflow.
Database Tables holds CSV data used to populate dropdown values and validate fields on a document type. See Settings, then Database Tables.
Data Table (Documents In, Table Out) shows the data already extracted from documents of one document type. It is a view of extraction output, not a table you author.
Tables vs Entities
When you create a table, you choose one of two types:
- Table: A simple lookup table. Use this for reference data such as GL codes, currency lists, or approved vendor categories that workflows match against.
- Entity: A table of records that can be linked to cases and to other entities. Every Entity requires a Primary Key column that uniquely identifies each record. Use this for business objects such as vendors, customers, or borrowers that you want to track across multiple cases.
Which one should I pick?If you only need data for lookups and validation, choose Table. If you want each record to have an identity of its own, appear on the Case Overview page, and accumulate linked cases over time, choose Entity.
Accessing Entity / Tables
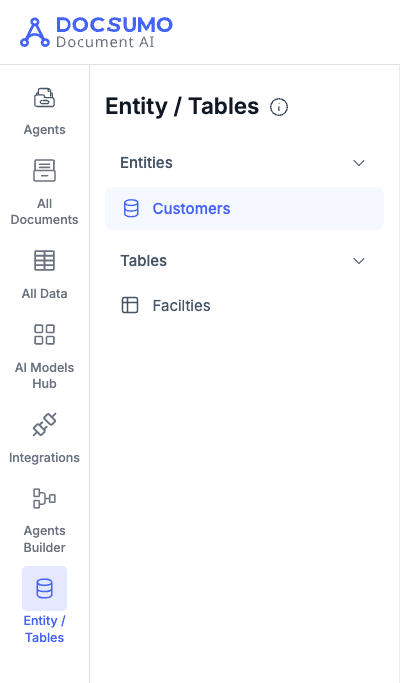
Click Entity / Tables in the left navigation. The page shows two collapsible groups in its sidebar, Entities and Tables, listing everything created in your organization. Select any item to open its data grid.
Creating a Table or Entity
Step 1: Click New Table
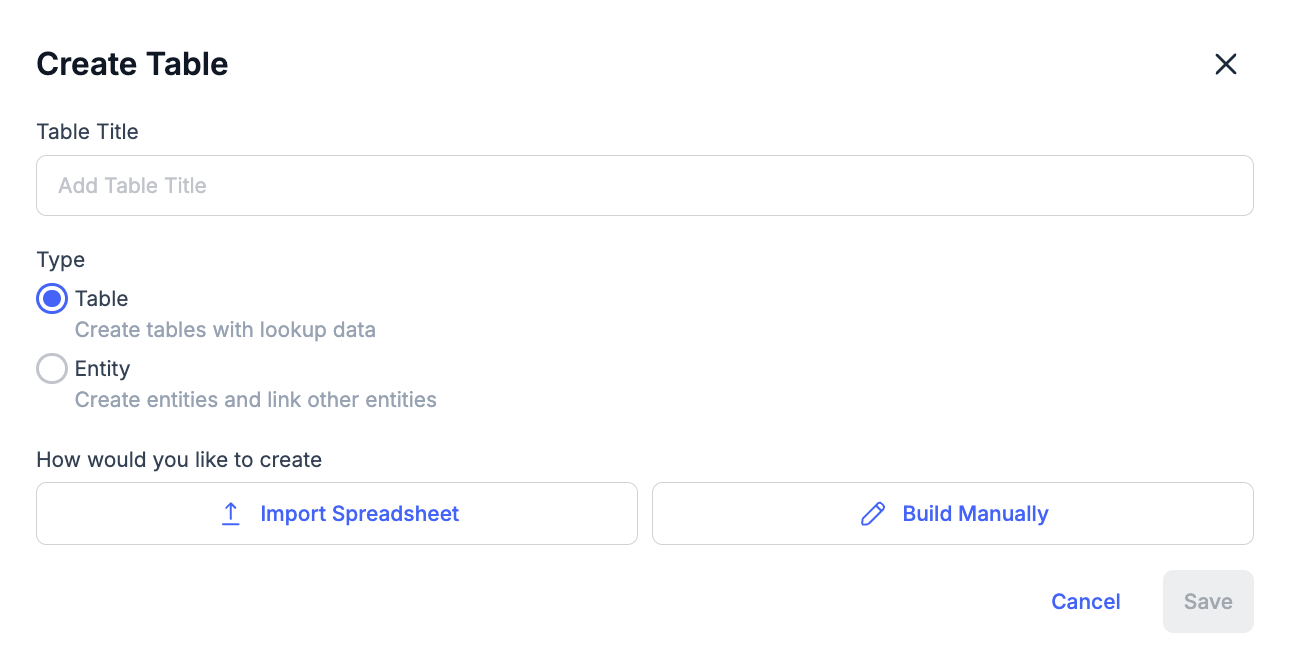
Click the New Table button at the top of the sidebar. The Create Table modal opens.
Step 2: Add a title and pick a type
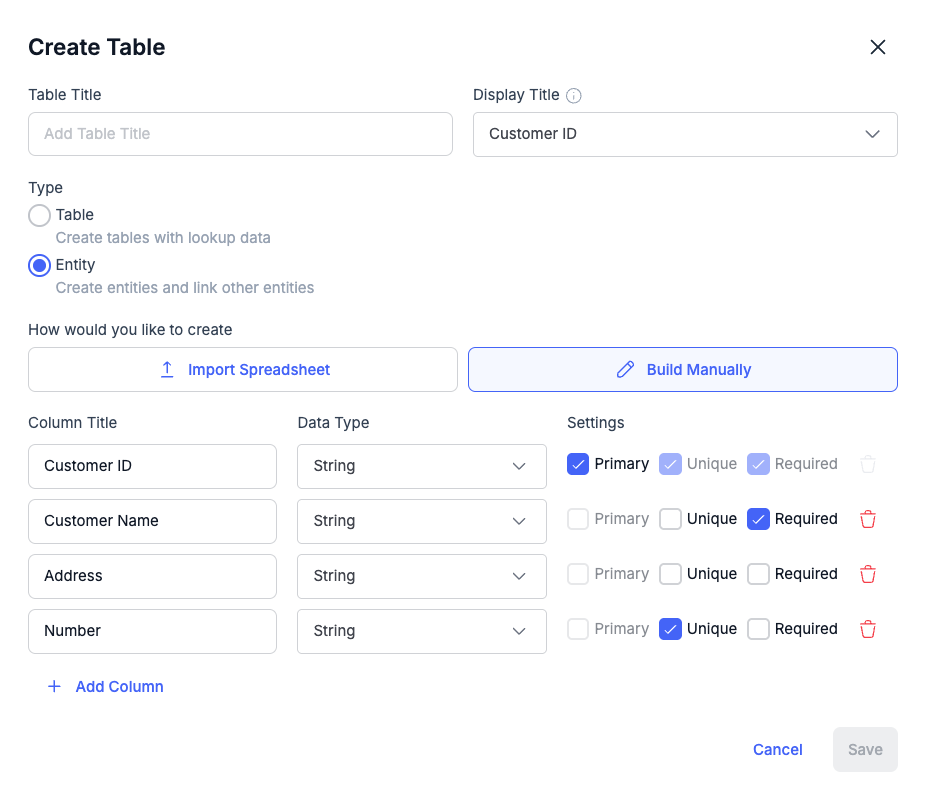
- Table Title: Give the table a descriptive name.
- Type: Choose Table (Create tables with lookup data) or Entity (Create entities and link other entities).
Step 3: Choose how to create it
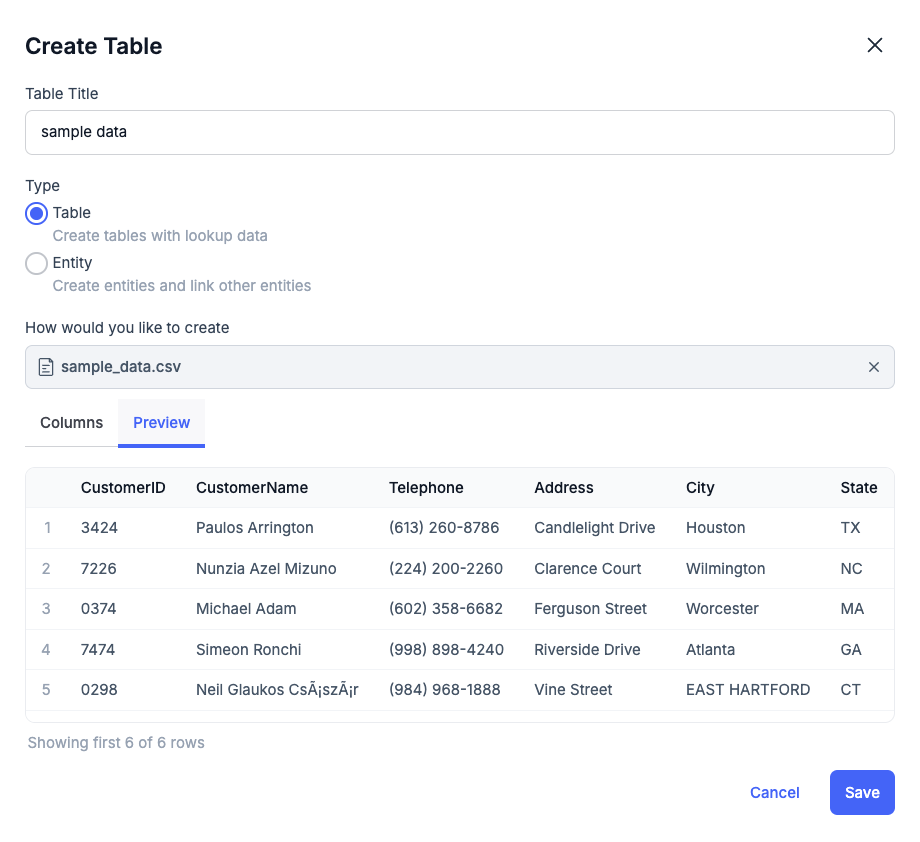
- Import Spreadsheet: Upload a .csv, .xls, or .xlsx file. Docsumo reads the first row as column headers, guesses each column's data type, and pre-fills the table title from the file name if you have not typed one. Two tabs appear after import:
- Columns: Adjust column names, types, and constraints before saving.
- Preview: Peek at the first rows of your file to confirm the data landed correctly.
- Build Manually: Start from a blank column and define each column yourself.
Step 4: Set the Display Title (Entities only)
For an Entity, pick a Display Title column. This decides what is shown when a record is linked to a case, for example the vendor's name instead of an internal ID. By default it follows the Primary Key column.
Step 5: Save
Click Save. For an Entity, one column must be marked as the Primary Key before you can save. The new table opens immediately in the grid view.
Columns
Column types
| Type | Description |
|---|---|
| String | Free text |
| Number | Numeric values |
| Date | Date values |
| Yes/No | Boolean values |
| Dropdown | A single value picked from a list of choices you define |
| Linked Record | A reference to a record in another table |
Column constraints
Each column can also carry constraints, set with the checkboxes under Settings:
- Primary: Marks the column as the table's primary key, which uniquely identifies each record. One per table, and required for Entities.
- Unique: No two records can share the same value in this column.
- Required: The column cannot be left empty.
Showing, hiding, and reordering columns
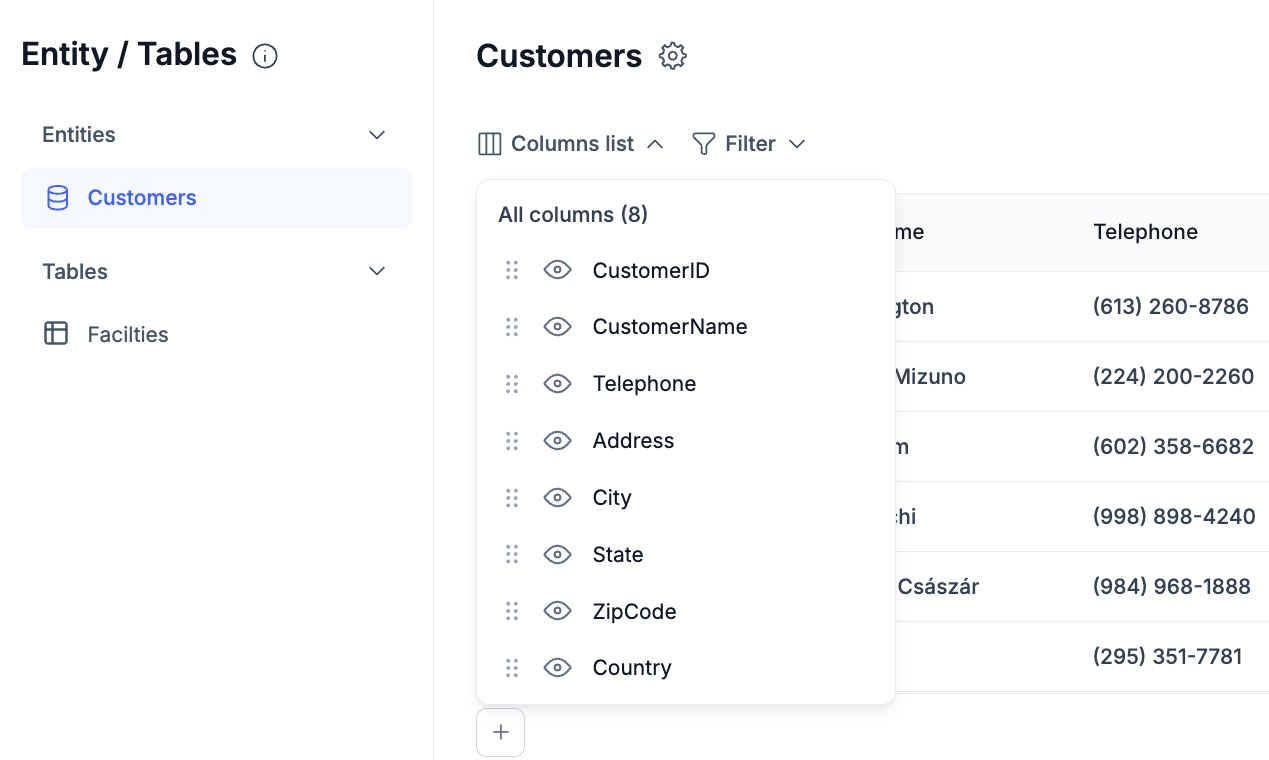
Use the Columns list button above the grid to open the columns popover. From there you can:
- Show or hide individual columns. The button shows a count of hidden columns, for example "Columns list (2 hidden)".
- Drag columns to reorder them.
Both changes are saved for your whole organization, so the table looks the same for every teammate.
Managing records
Adding records
- Click New Record at the top right of the table to add a single record through a form.
- Click Update to append many rows at once from a spreadsheet. The file's headers must match the table's column names. Docsumo validates every row first: if any row violates a constraint, nothing is imported, so a partial import can never corrupt your data.

Editing records
Click any cell to edit it in place. Changes are saved as you go. Cells respect their column type, so a Dropdown cell offers its choices, a Date cell offers a date picker, and a Linked Record cell lets you pick a record from the linked table.
Deleting records
Select one or more rows using the checkboxes, then delete them together. A confirmation dialog shows how many records will be removed.
Row limitEach table can hold up to 5000 rows.
Search, filters, and sorting
- Search: Use the search box above the grid to search across the table's data.
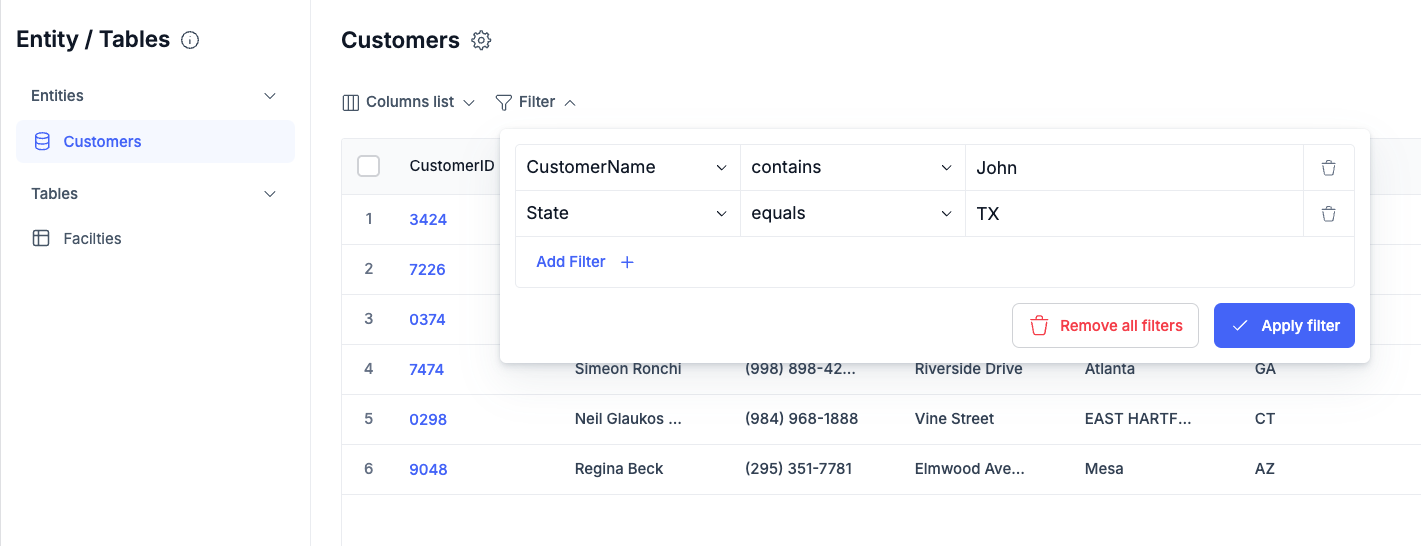
- Filter: Open the filter panel to build conditions per column, such as text matches, number ranges (Min / Max), date ranges (From / To), and value picks for Dropdown columns. Conditions can be combined with AND / OR logic.
- Sort: Click a column header to sort the table by that column.
Record view
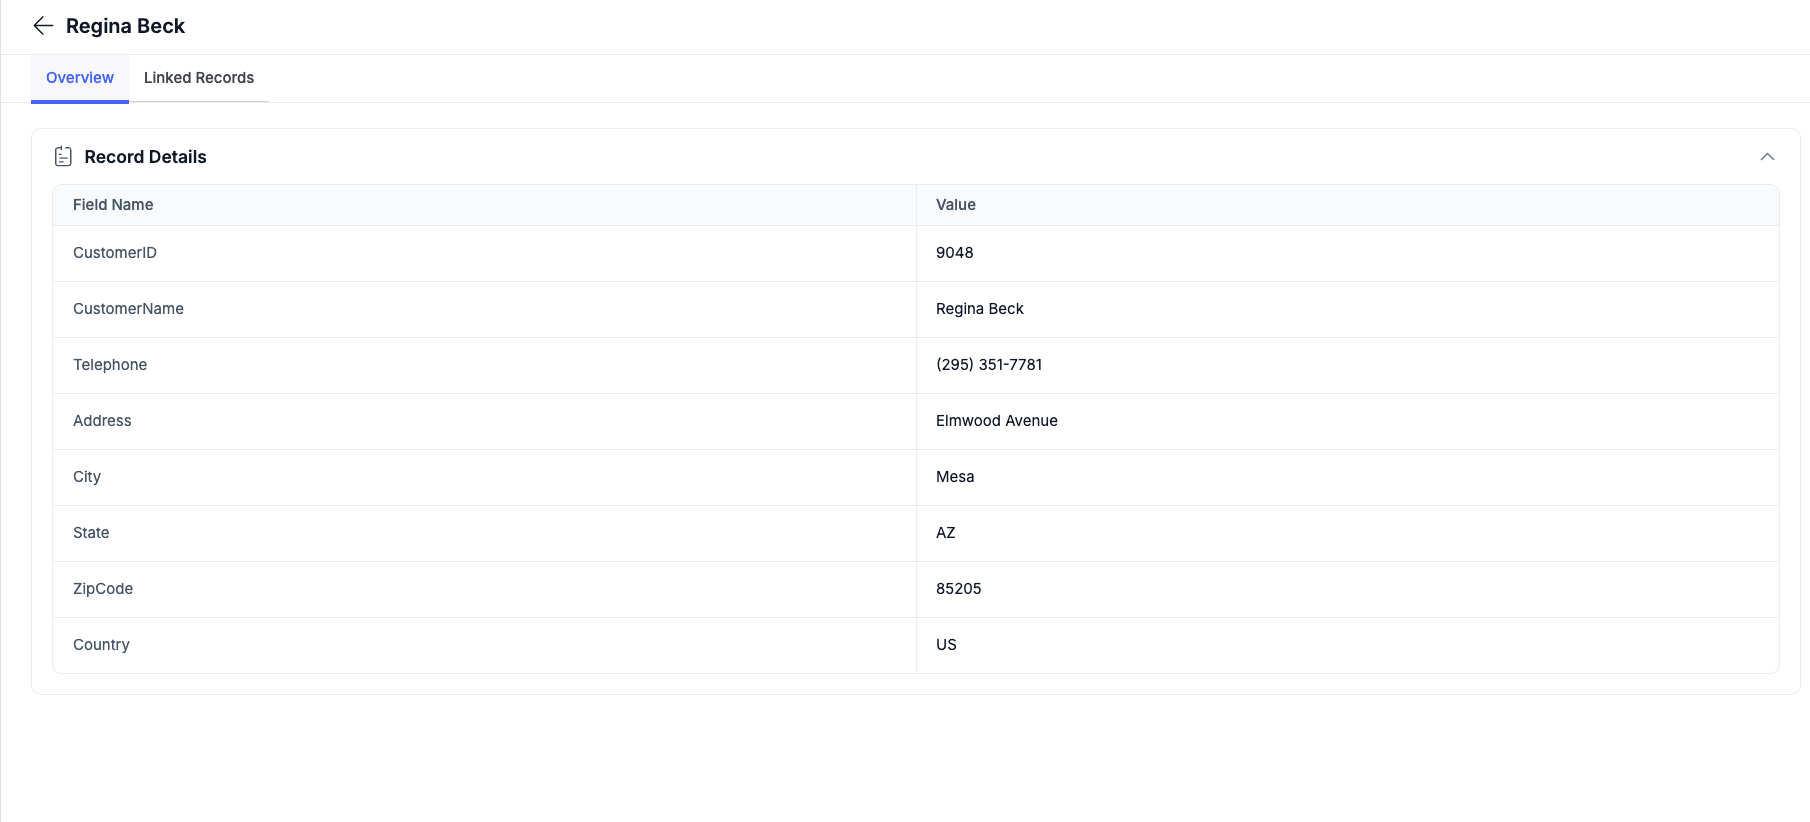
Click a record to open its detail view. It has two tabs:
- Overview: A Record Details table listing every field of the record and its value, editable inline.
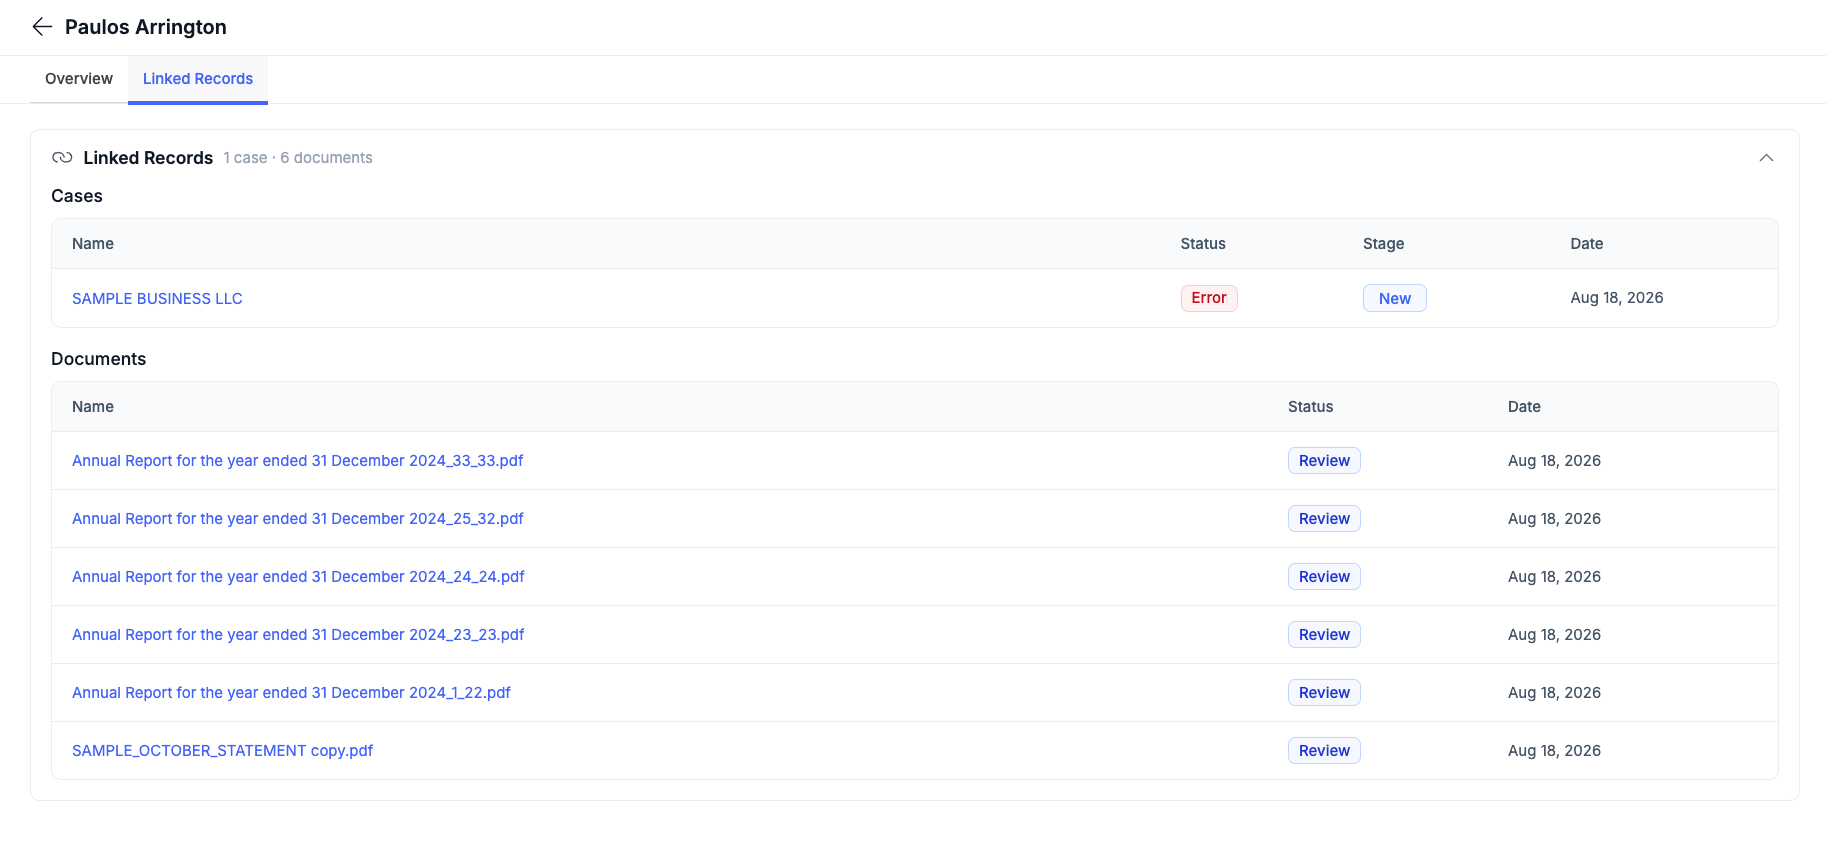
- Linked Records: The cases this record is linked to, along with each case's documents and their statuses.
Entities on the Case Overview page
When a workflow links an entity to a case (see Table Blocks), the case's Overview page shows a Linked Records card listing the linked entities. Click a linked record to open a side panel with the record's details and its other linked cases, without leaving the case.
Next stepLearn how workflows look up records and write to tables automatically in Table Blocks.
Updated 2 months ago